

How to create your AWS account and first project
Create your first AWS account, set up a project for what you want to build, and learn how to keep track of what you spend.
Series: Build your website on AWS (4 articles)
- 1How to create your AWS account and first project This article

When you build an app on your computer, it usually only works there, and nobody else can use it. A cloud provider like AWS hosts your app on their servers instead, so it stays up after you close your laptop and anyone with the link can open it.
To get there, you need an AWS account. In this guide we'll create one and set up a project for what you want to build. Your first AWS account starts on the Free Plan, so we'll go through how it works and add a monthly budget that emails you if you're about to spend more than you planned.
Create your account
You can sign up with an email address or with an account you already have on Google, GitHub, Apple, or Amazon. Pick one that belongs to you rather than to your job or your school, so the account and everything you build in it stays with you.

If you sign up with email, AWS sends a code to that address. Enter the code and choose a password. If you sign up with an existing login, you sign in there and come straight back to AWS.
AWS might also ask for a payment method. If this is your first AWS account, you start on the Free Plan and won't pay for anything unless you decide to upgrade.
When signup finishes, the AWS Console opens. AWS creates the first project for you and gives it a name, which you can see in the upper right corner of the console.
Check your Free Plan
Open the menu with your project name in the upper right corner and choose Projects.

AWS Settings opens in a new tab. On the left you'll see Projects, Team, Billing, and Support, and you start on Projects. At the top of the page, Overview shows two numbers: Days remaining in free plan and Credits remaining. They're also in the menu you just opened, under Free plan status.

These numbers are for your whole account, so they cover every project you create. Whatever you use in any project comes out of the same credits, and you don't pay anything while you're on the Free Plan.
The Free Plan ends after 6 months, or sooner if you use up your credits. AWS then pauses your projects for 90 days, so you have time to upgrade to the paid plan and keep going.
If you upgrade, you keep the credits you haven't used. The Credits page in AWS Settings shows when they expire.

Create a project
AWS created your first project at signup, but it's a good idea to give each thing you build its own project. On the same Projects page, choose Create project, enter a name you'll recognize, like Portfolio, and choose Create.

Each project brings together three things:
- An AWS account. Everything you create for the project lives here: databases, functions, storage. Resources in one project can't reach resources in another unless you set that up.
- The people who work on it. You can invite others to build with you. They get full access to the project's AWS services, but they can't delete the project or change its billing.
- Its costs. Each project has its own costs and cost controls, so you can see what each one is costing you.
Each project's resources are created in one AWS Region, which AWS picks for you based on the country in your contact details. You don't have to choose anything here.
Set a budget
To set the budget on your new project, choose AWS Console next to Portfolio in the projects list. Console Home opens, this time with Portfolio in the upper right corner.
Scroll down to Explore AWS. It has a few short activities, and one of them sets up a budget. Choose Set up a cost budget using AWS Budgets, then Start activity, and Billing and Cost Management opens.


Choose Use a template (simplified), then Monthly cost budget. Give the budget a name, enter how much you're okay spending in a month, and add the email where you want the alerts. Then choose Create budget.
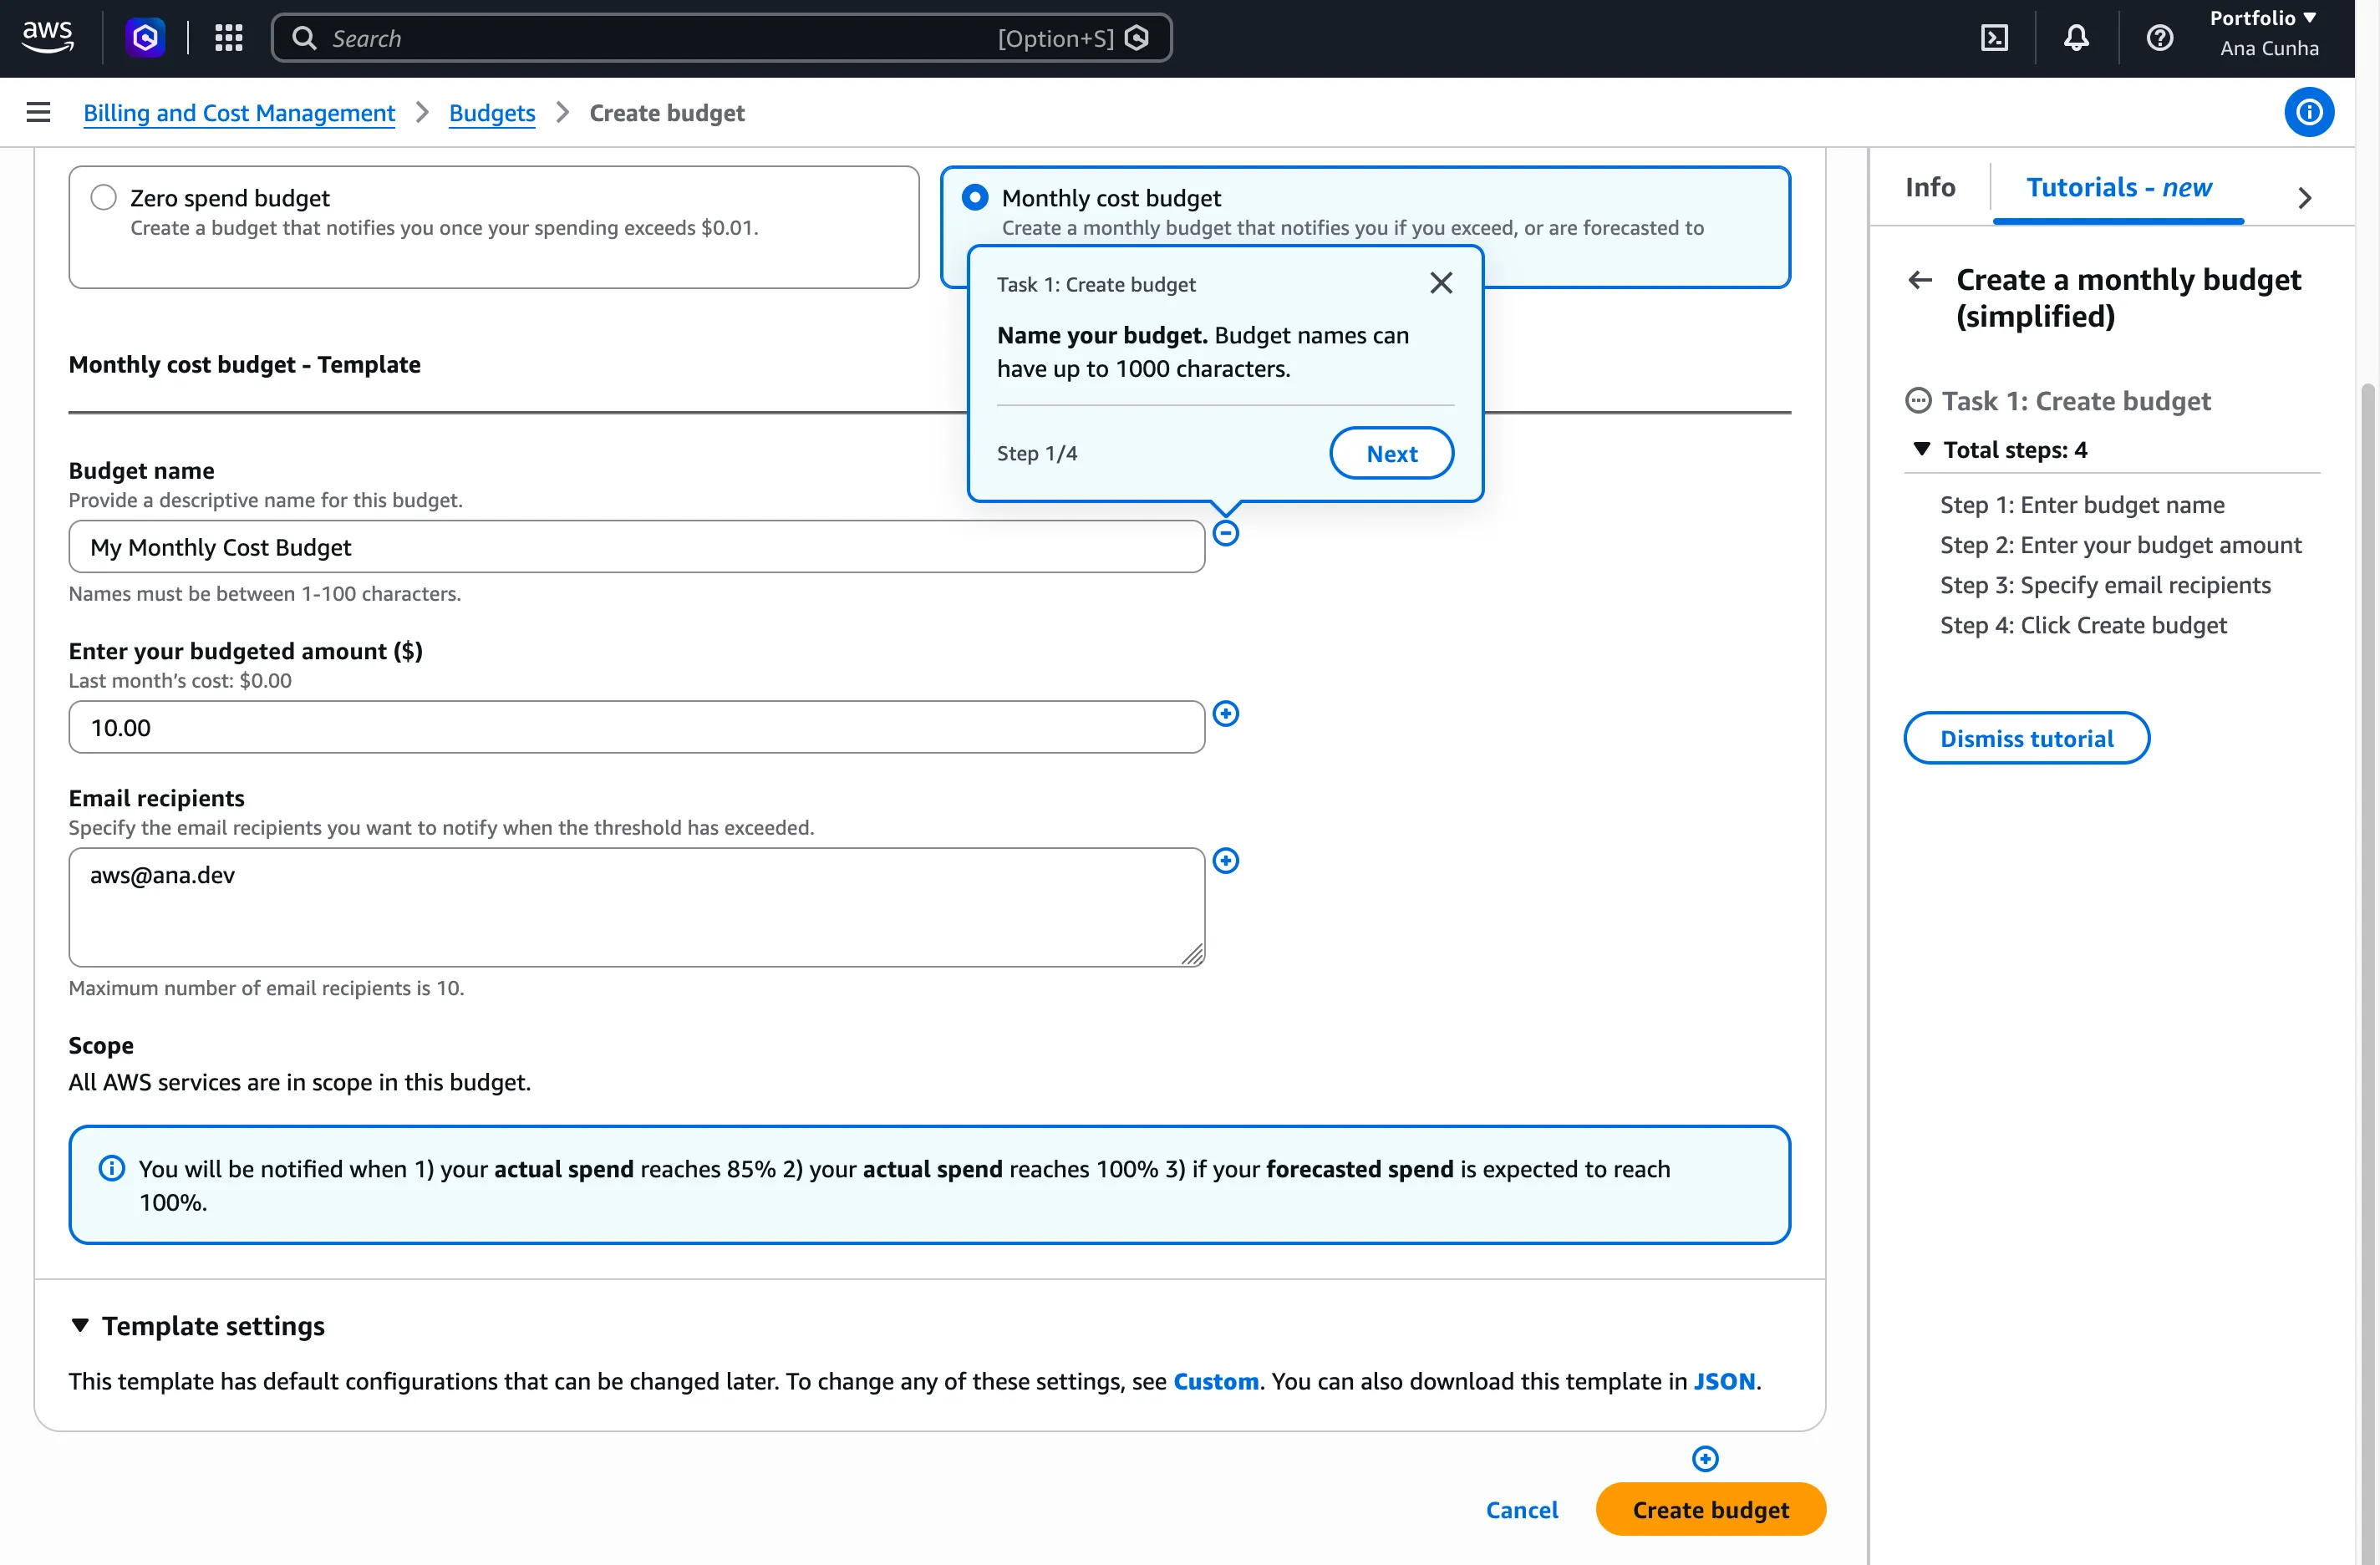
The budget counts what you use before your credits cover it. So if you set it to $10, you'll get an email when you've used about $10 of your credits, not after they run out.
Verify your email, or you won't get any alerts. After you create the budget, scroll down to Email verification on the budget's page and choose Send verification next to your email. Then open the email from AWS and choose the link while you're signed in to Portfolio. The status changes from Inactive to Active.
This budget only covers Portfolio, since each project has its own AWS account. If you create more projects later, give each one its own budget.
A budget only sends emails. It doesn't stop anything running in your project, so when an alert comes in, open the project and check what's using it.
If you upgrade to the paid plan at some point, you can also set a spend limit on each project. Unlike a budget, it doesn't just email you. When the project reaches its limit, AWS pauses it so it doesn't keep costing you more.
Creating the budget also adds USD $20 to your credits. It can take a few minutes to show up in Credits remaining.
What's next
You now have an AWS account, a project for what you want to build, and a budget that emails you if your spending goes past what you planned.
From here, you can start creating things in your project from the console. If you use an AI coding agent, you can also connect it to your AWS account, so it checks the current AWS docs and builds in your project for you. At the top of Console Home, choose Copy agent prompt and paste it into your agent's chat.
Series: Build your website on AWS (4 articles)
- 1How to create your AWS account and first project This article
Enjoyed reading this content? Let the author know!
Your likes, comments, shares, and saves help creators reach more builders.

Loading recommendations
Loading article