
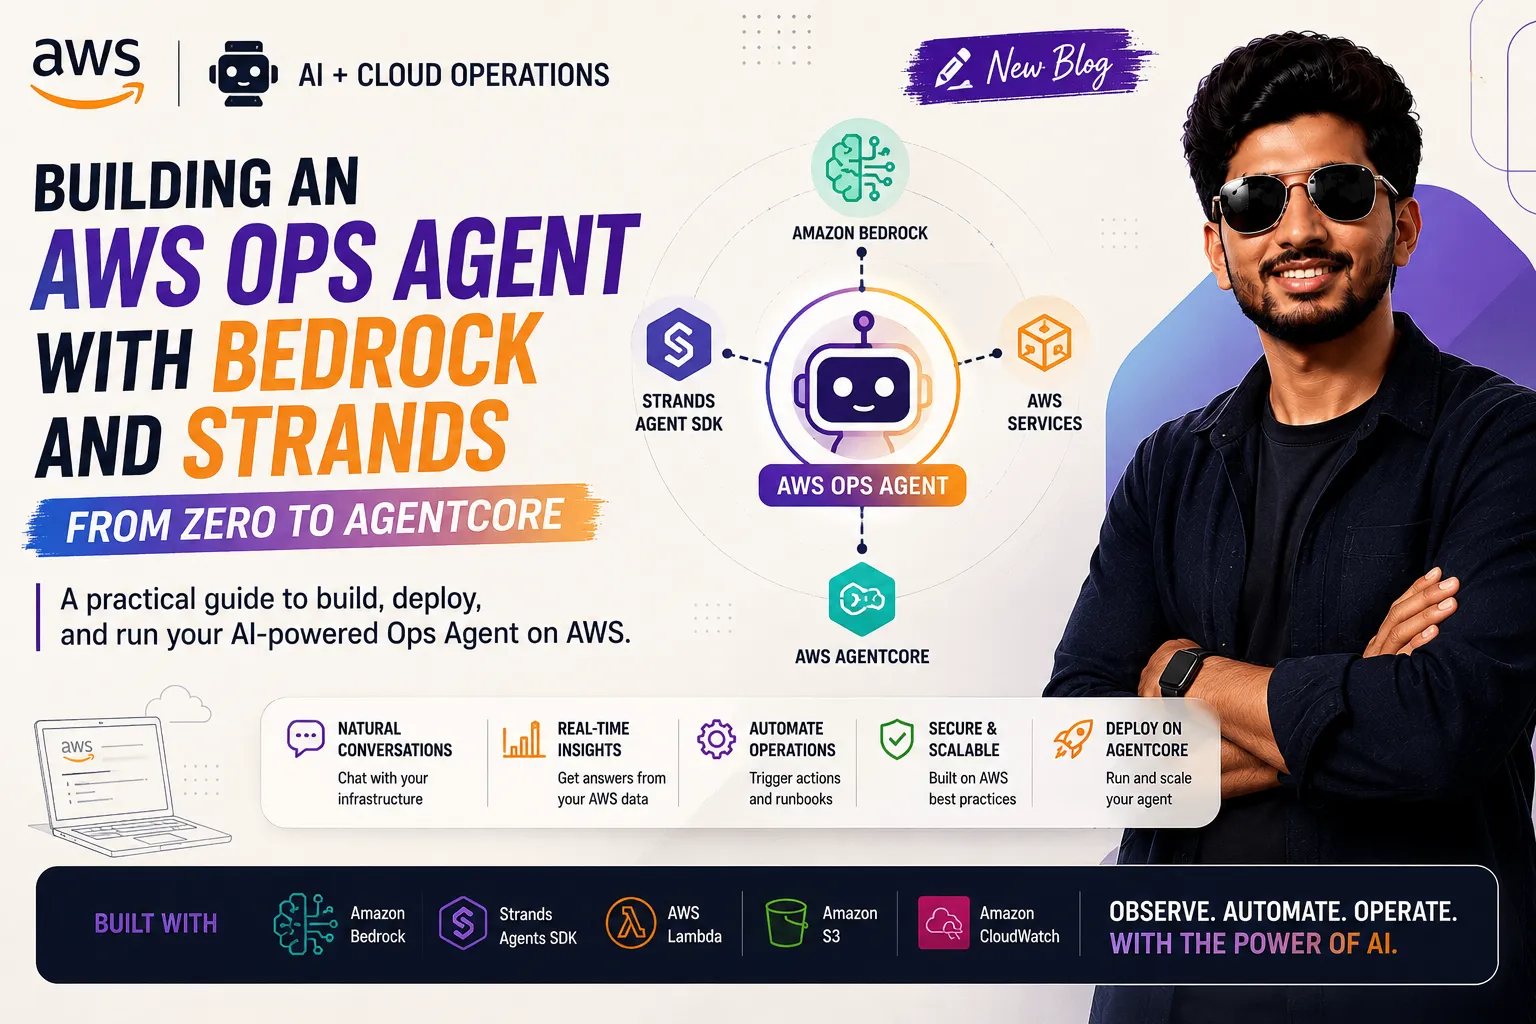
Building an AWS Ops Agent with Bedrock and Strands — From Zero to AgentCore
The Problem:- Checking whether an S3 bucket is public means opening the console, clicking into the bucket, clicking Permissions, and reading a JSON block. Do that for six buckets, plus checking EC2 instances, weekly spend, and IAM users missing MFA — weekly — and it’s obviously a job for something that can just answer the question.

In this post, we will:
- Build a Strands Agents SDK agent backed by Amazon Nova on Amazon Bedrock, with four read-only tools: EC2 instances, public S3 buckets, weekly spend, IAM users missing MFA
- Scope a least-privilege IAM policy to exactly what those four tools and the model call need — nothing broader
- Test the agent end-to-end against a real AWS account
- Deploy the agent to Amazon Bedrock AgentCore Runtime — console-first, no CLI
By the end, the agent answers real questions about a real AWS account, and is hosted on AgentCore Runtime with observability traces to show for it.
The Goal: One Agent, Four Read-Only Checks
1
2
3
4
5
6
7
                         Your AWS Account
      ─────────────────────────────────────────────────────────────
      EC2 (DescribeInstances)      Cost Explorer (GetCostAndUsage)
      S3 (List/GetPublicAccessBlock)   IAM (ListUsers/ListMFADevices)
                      ↑                              ↑
                      └──────── Ops Agent ───────────┘
                       (Strands Agent + Bedrock model)
Every tool is a plain read-only `Describe`/`List`/`Get` call — the agent can never change anything in the account, by design.
Step 1: Set Up Your Local Environment
1.1 — Create a Virtual Environment
A virtual environment keeps this project’s Python packages separate from anything else on your machine — standard practice, not optional. From your project folder:
1
2
3
python3 -m venv .venv
source .venv/bin/activate
pip install -r requirements.txt
`requirements.txt`: — these are the three packages this project needs:
1
2
3
=1.34
=0.1
=0.1`boto3` is AWS’s official Python SDK — it’s how any Python code talks to AWS. `strands-agents` is the agent framework doing the actual “decide which tool to call” work.
1.2 — Get AWS Credentials and Configure Them
If this is your first time using AWS from the command line, here’s the short version:
- In the AWS Console, go to IAM → Users → your user → Security credentials.
- Click Create access key, choose Command Line Interface (CLI), and confirm.
- You’ll get an Access Key ID and a Secret Access Key — copy both immediately, the secret is only shown once.
- Install the [AWS CLI ] if you don’t have it, then run:
1
aws configure
It’ll prompt for your Access Key ID, Secret Access Key, a default region (use `us-east-1` to match this post), and an output format (`json` is fine).
Confirm it worked:
1
aws sts get-caller-identity
Press enter or click to view image in full size
This should print your AWS account ID and the ARN (Amazon’s unique identifier format) of the user you just configured. If it errors, `aws configure` didn’t save correctly — run it again.
Step 2: Build the Four Read-Only Tools
Each tool is a plain Python function decorated with `@tool` from the Strands SDK — that decorator is what turns an ordinary function into something the agent knows it’s allowed to call. The docstring is the API contract with the model: it’s what the LLM actually reads to decide when to call this tool versus another one, not a comment for humans skimming the code.
1
2
3
4
5
6
7

|              Tool.           | AWS API calls           |     Returns |
|------------------------------|-------------------------|----------------------------------|
| `list_ec2_instances`         | `ec2:DescribeInstances` | Instance ID, name tag, type, state |
| `find_public_s3_buckets`     | `s3:ListAllMyBuckets`, `s3:GetBucketPublicAccessBlock` | Per-bucket public-access status |
| `get_cost_by_service`        | `ce:GetCostAndUsage`    | Cost per service, trailing N days |
| `list_iam_users_without_mfa` | `iam:ListUsers`, `iam:ListMFADevices` | Usernames missing MFA |
Here’s the shortest one, `list_iam_users_without_mfa` — the clearest example of the docstring → behavior mapping:
1
2
3
4
5
6
7
8
9
10
11
12
13
14
15
16
17
18
def list_iam_users_without_mfa() -> str:
"""List IAM users that do not have any MFA device enabled.
Returns:
A list of usernames missing MFA, or a confirmation that all users have MFA.
"""
iam = boto3.client("iam")
users = iam.list_users()["Users"]
missing = []
for user in users:
mfa = iam.list_mfa_devices(UserName=user["UserName"])["MFADevices"]
if not mfa:
missing.append(user["UserName"])
if not missing:
return "All IAM users have at least one MFA device enabled."
return "IAM users WITHOUT MFA enabled:\n" + "\n".join(missing)Walking through it: `boto3.client(“iam”)` opens a connection to AWS’s IAM service. `list_users()` gets every IAM user in the account. For each one, `list_mfa_devices()` checks whether they have multi-factor authentication set up. Anyone with an empty list gets added to `missing`. That’s it — no AI involved in this function at all. The AI’s only job is deciding when to call it, based on what the user asked.
The other three tools (in `tools.py`) follow the same shape: call a boto3 API, format the result as a readable string, return it.
Step 3: Wire Up the Strands Agent
`agent.py` builds a Strands `Agent` around a `BedrockModel` and the four tools. This is the file that ties everything together:
1
2
3
4
5
6
7
8
9
10
11
12
13
14
15
16
17
18
19
20
21
22
23
24
25
26
27
28
29
30
31
32
33
34
35
36
37
38
39
40
41
42
43
44
45
46
47
48
49
50
51
from strands import Agent
from strands.models import BedrockModel

from tools import (
    list_ec2_instances,
    find_public_s3_buckets,
    get_cost_by_service,
    list_iam_users_without_mfa,
)

MODEL_ID = "amazon.nova-lite-v1:0"  # see Step 5 for why Nova
REGION = "us-east-1"

SYSTEM_PROMPT = """You are an AWS operations assistant. You answer questions
about the user's own AWS account using the tools available to you.

Rules:
- Only use the provided tools to get information; never guess at account data.
- If a tool call fails (e.g. missing permissions), tell the user exactly
  which permission looks like it's missing rather than making up an answer.
- Keep answers concise and skimmable — bullet points over prose for lists.
- If asked about security issues (public buckets, missing MFA), be direct
  about the risk, don't downplay it.
"""

def build_agent() -> Agent:
    model = BedrockModel(model_id=MODEL_ID, region_name=REGION)
    return Agent(
        model=model,
        system_prompt=SYSTEM_PROMPT,
        tools=[list_ec2_instances, find_public_s3_buckets, get_cost_by_service, list_iam_users_without_mfa],
    )

def main() -> None:
    agent = build_agent()
    print("AWS Ops Agent ready. Ask about your account (Ctrl+C to quit).")
    print("Example: 'What's my EC2 spend this week and are any S3 buckets public?'\n")
    while True:
        try:
            prompt = input("> ")
        except (KeyboardInterrupt, EOFError):
            print("\nExiting.")
            break
        if not prompt.strip():
            continue
        response = agent(prompt)
        print(response)
        print()

if __name__ == "__main__":
    main()
If you’ve never seen a system prompt before: it’s a set of standing instructions given to the model before any user question, shaping how it behaves for the whole conversation. This one has three rules worth keeping intact even if you customize the rest — tool-only answers (no guessing), name the exact missing permission on failure, and don’t downplay security findings.
The `main()` function is just a simple loop: ask for input, hand it to the agent, print the response, repeat. This is what you run locally to talk to the agent in your terminal — see Step 6.
Step 4: Scope a Least-Privilege IAM Policy
What’s an IAM policy, concretely? It’s a JSON document listing exactly which AWS API actions an IAM user or role is allowed to call, and on which resources. If an action isn’t explicitly allowed, AWS denies it — that’s the default, and it’s why every tool call in this project needs a matching permission before it’ll work.
Rather than start from a broad, generic “Bedrock agent” policy copied from a tutorial, this one maps one-to-one to what the four tools and the model call actually touch — nothing more.
1
2
3
4
5
6
7
| Permission              | Why it's needed |
|-------------------------|--------------------------|
| `ec2:DescribeInstances` | `list_ec2_instances` |
| `s3:ListAllMyBuckets`, `s3:GetBucketPublicAccessBlock`, `s3:GetBucketAcl` | `find_public_s3_buckets` |
| `ce:GetCostAndUsage` | `get_cost_by_service` — **note: this API costs $0.01 per call**, not covered by Free Tier |
| `iam:ListUsers`, `iam:ListMFADevices` | `list_iam_users_without_mfa` |
| `bedrock:InvokeModel`, `bedrock:InvokeModelWithResponseStream` on the Nova Lite model ARN | Lets the agent actually call the model |
Here’s the full policy, ready to attach:
1
2
3
4
5
6
7
8
9
10
11
12
13
14
15
16
17
18
19
20
21
22
23
24
25
26
{
  "Version": "2012-10-17",
  "Statement": [
    {
      "Effect": "Allow",
      "Action": [
        "ec2:DescribeInstances",
        "s3:ListAllMyBuckets",
        "s3:GetBucketPublicAccessBlock",
        "s3:GetBucketAcl",
        "ce:GetCostAndUsage",
        "iam:ListUsers",
        "iam:ListMFADevices"
      ],
      "Resource": "*"
    },
    {
      "Effect": "Allow",
      "Action": [
        "bedrock:InvokeModel",
        "bedrock:InvokeModelWithResponseStream"
      ],
      "Resource": "arn:aws:bedrock:us-east-1::foundation-model/amazon.nova-lite-v1:0"
    }
  ]
}
How to actually attach this, step by step:
1. Open the IAM Console → Policies → Create policy.
2. Click the JSON tab and paste the policy above.
3. Click Next, give it a name like `aws-ops-agent-policy`, and click Create policy.
4. Go to IAM → Users → your user → Add permissions → Attach policies directly.
5. Search for the policy name you just created, check it, and click Add permissions.
2. Click the JSON tab and paste the policy above.
3. Click Next, give it a name like `aws-ops-agent-policy`, and click Create policy.
4. Go to IAM → Users → your user → Add permissions → Attach policies directly.
5. Search for the policy name you just created, check it, and click Add permissions.
The result is a policy that’s smaller than what a generic “Bedrock agent IAM policy” tutorial would hand you — it only contains what this agent actually does. If you add a fifth tool later, you add exactly the one or two permissions it needs, nothing more.
Step 5: Why Amazon Nova
`amazon.nova-lite-v1:0` is the model behind this agent. If you’re new to Bedrock: a model ID is just a string identifying which specific AI model you want to call — Bedrock hosts many, from Amazon and other providers, side by side behind the same API. Nova is Amazon’s own family of models, and Nova Lite is a fast, low-cost, multimodal one — a good fit for a tool-calling agent with a handful of well-defined functions like this one.
A few practical reasons it’s a solid default for a project like this:
- Billed directly by AWS, not through AWS Marketplace like some third-party providers — one less moving part when you’re setting up IAM.
- Cheap and fast — well-suited to a small, well-scoped tool set like these four read-only checks, without paying for capability the task doesn’t need.
With the permission from Step 4 in place, a quick sanity check confirms it end-to-end — this talks to Bedrock directly, without going through the agent at all, just to confirm the model itself is reachable:
1
source .venv/bin/activate
1
2
3
4
5
6
7
8
import boto3
client = boto3.client('bedrock-runtime', region_name='us-east-1')
response = client.converse(
modelId='amazon.nova-lite-v1:0',
messages=[{'role': 'user', 'content': [{'text': 'Reply with exactly: OK'}]}],
inferenceConfig={'maxTokens': 10},
)
print(response['output']['message']['content'][0]['text'])Save this as `test_model.py` and run `python test_model.py` — a successful run just prints `OK`.
Press enter or click to view image in full size
Step 6: Test the Agent End-to-End
Now the real thing — run the interactive loop from `agent.py`:
1
python agent.py
At the `>` prompt, type:
1
Are any of my S3 buckets public, and do all IAM users have MFA enabled?
The agent called both `find_public_s3_buckets` and `list_iam_users_without_mfa` on its own — you didn’t tell it which tools to use, it figured that out from the question and each tool’s docstring — then synthesized:
- 5 of 6 buckets didn’t have public access block fully enabled — flagged for manual review, not confirmed public
- 4 IAM users had no MFA device: including the agent’s own IAM user
Press enter or click to view image in full size
Real findings from a real account, via a tool-calling loop, end to end. Press Ctrl+C when you’re done to exit the loop.
Step 7: Deploy to Amazon Bedrock AgentCore Runtime
So far the agent only runs on your laptop. AgentCore Runtime is AWS’s managed hosting for agents like this one — it gives the agent a permanent, callable endpoint instead of something you have to run locally every time.
Getting there requires wrapping the agent in a container — a self-contained package with your code and everything it needs to run, so AWS can run it without needing your laptop’s exact setup. AgentCore offers a CLI-first path (`agentcore create`, using AWS CDK under the hood) and a console-first path. This post uses console-first, for a concrete reason: the AgentCore console’s “Host Agent” wizard only accepts a container image already sitting in ECR (Amazon’s container image storage service) — there’s no code-paste or zip-upload option in the console UI itself.
7.1 — Wrap the Agent for the AgentCore HTTP Contract
AgentCore Runtime expects any hosted agent to behave like a small web server with two specific endpoints: `POST /invocations` (send it a question, get an answer) and `GET /ping` (a health check AWS uses to confirm it’s still running) — listening on port `8080`, in an ARM64 container (a CPU architecture requirement, not something you need to think about beyond using the right base image in Step 7.2).
A roughly 40-line wrapper using FastAPI (a popular Python web framework) turns the existing agent into something that satisfies this contract:
1
2
3
4
5
6
7
8
9
10
11
12
13
14
15
16
17
18
19
20
from fastapi import FastAPI, HTTPException
from pydantic import BaseModel
from agent import build_agent
app = FastAPI()
agent = build_agent()
class InvocationRequest(BaseModel):
prompt: str
async def invoke_agent(request: InvocationRequest):
if not request.prompt.strip():
raise HTTPException(status_code=400, detail="Invalid input: 'prompt' must be a non-empty string")
result = agent(request.prompt)
return {"response": result.message["content"][0]["text"], "status": "success"}
async def ping():
return {"status": "Healthy"}Save this as `agentcore_app.py`. Test it locally before touching Docker at all — if it doesn’t work here, it won’t work in a container either:
1
uvicorn agentcore_app:app --host 0.0.0.0 --port 8080
In a second terminal:
1
2
3
4
curl http://localhost:8080/ping
curl -X POST http://localhost:8080/invocations \
  -H "Content-Type: application/json" \
  -d '{"prompt": "Say hello in exactly 3 words."}'
Press enter or click to view image in full size
7.2 — Build the ARM64 Image and Push to ECR
You’ll need [Docker Desktop ] installed and running for this part — it’s the one step in this whole build that has to happen outside a browser.
1
2
3
4
5
6
7
8
9
docker buildx create --use
docker buildx build --platform linux/arm64 -t aws-ops-agent:arm64 --load .

aws ecr get-login-password --region us-east-1 | \
  docker login --username AWS --password-stdin <ACCOUNT_ID>.dkr.ecr.us-east-1.amazonaws.com

docker buildx build --platform linux/arm64 \
  -t <ACCOUNT_ID>.dkr.ecr.us-east-1.amazonaws.com/aws-ops-agent:latest \
  --push .
Replace `<ACCOUNT_ID>` with your AWS account ID (the same one that printed from `aws sts get-caller-identity` in Step 1). This builds the image, logs Docker in to your private ECR registry, and pushes it — you’ll need to create the ECR repository first via ECR Console → Create repository, naming it `aws-ops-agent`.
Press enter or click to view image in full size
7.3 — Create the Execution Role
This is a second, separate IAM role from the one in Step 4 — this one isn’t for you, it’s for AWS itself to assume on the agent’s behalf while it’s running inside AgentCore Runtime.
In the console: IAM → Create role → Custom trust policy (paste #1) → Next → skip attaching an AWS-managed policy → Next → name it (e.g. aws-ops-agent-execution-role) → Create role.
Then open the new role → Add permissions → Create inline policy → JSON tab → paste #2 → save.
- Trust policy — lets the AgentCore service (not a person) assume this role:
1
2
3
4
5
6
7
8
9
10
11
12
13
{
  "Version": "2012-10-17",
  "Statement": [{
    "Sid": "AssumeRolePolicy",
    "Effect": "Allow",
    "Principal": { "Service": "bedrock-agentcore.amazonaws.com" },
    "Action": "sts:AssumeRole",
    "Condition": {
      "StringEquals": { "aws:SourceAccount": "<ACCOUNT_ID>" },
      "ArnLike": { "aws:SourceArn": "arn:aws:bedrock-agentcore:*:ACCOUNT_ID:*" }
    }
  }]
}
2. Permissions policy — what the role can actually do once assumed:
1
2
3
4
5
6
7
8
9
10
11
12
13
14
15
16
17
18
19
20
21
22
23
24
25
26
27
28
29
30
31
32
33
34
35
36
37
38
39
40
41
42
43
44
45
46
47
48
49
50
51
52
53
54
55
56
57
58
59
60
61
62
63
64
65
66
67
68
69
{
    "Version": "2012-10-17",
    "Statement": [
        {
            "Sid": "ECRImageAccess",
            "Effect": "Allow",
            "Action": [
                "ecr:BatchGetImage",
                "ecr:GetDownloadUrlForLayer"
            ],
            "Resource": [
                "arn:aws:ecr:us-east-1:<ACCOUNT_ID>:repository/*"
            ]
        },
        {
            "Effect": "Allow",
            "Action": [
                "logs:DescribeLogStreams",
                "logs:CreateLogGroup"
            ],
            "Resource": [
                "arn:aws:logs:us-east-1:<ACCOUNT_ID>:log-group:/aws/bedrock-agentcore/runtimes/*"
            ]
        },
        {
            "Effect": "Allow",
            "Action": [
                "logs:CreateLogStream",
                "logs:PutLogEvents"
            ],
            "Resource": [
                "arn:aws:logs:us-east-1:<ACCOUNT_ID>:log-group:/aws/bedrock-agentcore/runtimes/*:log-stream:*"
            ]
        },
        {
            "Sid": "ECRTokenAccess",
            "Effect": "Allow",
            "Action": [
                "ecr:GetAuthorizationToken"
            ],
            "Resource": "*"
        },
        {
            "Sid": "BedrockModelInvocation",
            "Effect": "Allow",
            "Action": [
                "bedrock:InvokeModel",
                "bedrock:InvokeModelWithResponseStream"
            ],
            "Resource": [
                "arn:aws:bedrock:us-east-1::foundation-model/amazon.nova-lite-v1:0"
            ]
        },
        {
            "Sid": "OurToolPermissions",
            "Effect": "Allow",
            "Action": [
                "ec2:DescribeInstances",
                "s3:ListAllMyBuckets",
                "s3:GetBucketPublicAccessBlock",
                "s3:GetBucketAcl",
                "ce:GetCostAndUsage",
                "iam:ListUsers",
                "iam:ListMFADevices"
            ],
            "Resource": "*"
        }
    ]
}
7.4 — Host the Agent
Open the AgentCore console and, in the left sidebar, click Runtime— it’s under the Build section, From there, start the Host Agent flow and fill in:
1
2
3
4
5
6
7
| Field | Value |
|---|---|
| **Docker image** | The ECR image URI pushed in 7.2 |
| **IAM service role** | The role from 7.3 |
| **Authentication** | IAM |
| **Environment variables** | None — boto3 picks up credentials from the execution role automatically |
| **Compute type** | microVMs (fully managed, serverless — not Instances, which runs on your own EC2 capacity) |
Press enter or click to view image in full size
Compute type can’t be changed after creation — microVMs matches the consumption-based pricing (pay only for what you use, no idle server cost) the rest of this project was billed under.
7.5 — Test in the Agent Sandbox
The AgentCore console has a built-in sandbox for testing a hosted agent directly — no extra script needed. Open your agent’s Runtime page and send the same test prompt from Step 6 to confirm it responds the same way through the deployed version.
Press enter or click to view image in full size
Step 8: View Observability Traces
AgentCore Runtime auto-configures CloudWatch logging for you — no extra setup. A trace is a step-by-step record of everything the agent did to answer one question: which tools it called, in what order, and how long each step took. From the Runtime’s console page, open the logs/traces view for a request that triggered two tool calls (e.g. the S3 + MFA question) — the trace visibly branches, showing both tool invocations.
Press enter or click to view image in full size
What We Accomplished
In this post, we:
- Built a Strands Agents SDK agent with four read-only AWS tools, backed by Amazon Nova on Amazon Bedrock
- Scoped a least-privilege IAM policy mapped one-to-one to what the tools and the model actually need, and walked through attaching it in the console
- Verified the agent end-to-end against a real AWS account, surfacing real findings (5 buckets flagged, 4 users missing MFA)
- Deployed the agent to Amazon Bedrock AgentCore Runtime via the console — wrapping it in a FastAPI contract, pushing an ARM64 image to ECR, and hosting it with microVMs compute
- Captured an Observability trace showing the deployed agent’s tool-calling behaviour
The agent now runs as a hosted, observable service — not just a local script. If you followed along, you now have a real, working example of an AI agent calling real AWS APIs, deployed on AWS’s own managed runtime for exactly this kind of workload.
What’s Next
Natural follow-ups for a second post:
- Wrapping the four tools as Lambda functions behind AgentCore Gateway as MCP tools, instead of in-process Python calls
- Adding AgentCore Memory for short- and long-term context across conversations
- AgentCore Identity, if this ever needs to act across more than one AWS account
If you found this helpful, follow along for the next part. Questions or issues? Drop them in the comments below — if you’re following along and get stuck on any step, that’s useful signal for what to clarify next time.
You can also read this article from my medium.com : https://medium.com/@fawazcp/building-an-aws-ops-agent-with-bedrock-and-strands-from-zero-to-agentcore-7f18aa027b56?sharedUserId=fawazcp
Enjoyed reading this content? Let the author know!
Your likes, comments, shares, and saves help creators reach more builders.

Loading recommendations
Loading article