

Building a Ready-to-Code Amazon SageMaker Studio Environment with AWS CDK
Learn how to automate the deployment of a complete Amazon SageMaker Studio environment with AWS CDK. This article covers the core components of the solution, including custom Docker images, Amazon ECR, Amazon S3, EventBridge, and AWS Lambda, and shows how they work together to deliver a consistent, ready-to-code workspace for every developer.

Introduction
Provisioning an Amazon SageMaker Studio domain is only the beginning of creating a productive machine learning environment.
A new user logs into Studio for the first time and is greeted with an empty workspace. The required Python libraries aren't installed, there are no starter notebooks, and everyone spends time configuring their environment before writing a single line of code.
While this may seem manageable for a small team, it quickly becomes difficult to maintain as organizations grow. Different users install different package versions, onboarding becomes inconsistent, and valuable time is spent repeating the same setup steps.
A better approach is to provide every user with a standardized development environment from day one.
In this article, we'll build an automated solution that transforms a blank SageMaker Studio workspace into a ready-to-code environment by combining custom Studio images, event-driven automation, and workspace initialization.
The solution includes:
- A custom SageMaker Studio Docker image with the required data science and database libraries
- Automated Docker image builds using AWS CodeBuild
- Amazon ECR to store and version container images
- Amazon EventBridge and AWS Lambda to automatically register new image versions with SageMaker Studio
- An Amazon S3 bucket used to store project assets
- A SageMaker Studio Lifecycle Configuration that synchronizes notebooks into every user's workspace
- Everything provisioned using AWS CDK (Python)
Solution Overview
The solution follows an event-driven architecture where each AWS service performs a single responsibility. When developers update the custom Studio image, the entire workflow executes automatically. From building the Docker image to making it available inside SageMaker Studio and initializing every user's workspace.
Here’s an architecture diagram of what we’ll implement:

Steps:
Step 1: Creating the Custom SageMaker Studio Image
Amazon SageMaker Studio includes several built-in images with popular machine learning frameworks and commonly used Python libraries. However, production workloads often require additional dependencies, tools, or configurations that are not available in the default images.
To address this, we build a custom Docker image based on the official SageMaker Studio base image. The image comes preconfigured with all the required libraries, packages, and tools, providing a consistent development environment for every team member. This approach eliminates manual setup, reduces environment inconsistencies, and ensures that everyone works with the same software stack from day one.
> requirements.txt:
seaborn
numpy==1.26.4
duckdb
pyarrow
> Dockerfile:
# Custom JupyterLab image for Amazon SageMaker Studio.
#
# Starts from the official SageMaker Distribution image, which already
# satisfies the JupyterLab-on-Studio startup contract (non-root user,
# bootstrap scripts, entrypoint), and layers on exactly the packages that
# are missing from it. Keeping this list short keeps Space cold-start fast.


FROM public.ecr.aws/sagemaker/sagemaker-distribution:3.5.1-cpu

ARG NB_USER="sagemaker-user"
ARG NB_UID=1000
ARG NB_GID=100

USER root

COPY requirements.txt /tmp/requirements.txt

RUN pip install --no-cache-dir -r /tmp/requirements.txt && \
    rm /tmp/requirements.txt

USER $NB_USER
# Do not override USER, ENTRYPOINT, or EXPOSE: the base image already runs
# as the non-root sagemaker-user and exposes what JupyterLab expects.
Step 2: Automatically Building the Docker Image
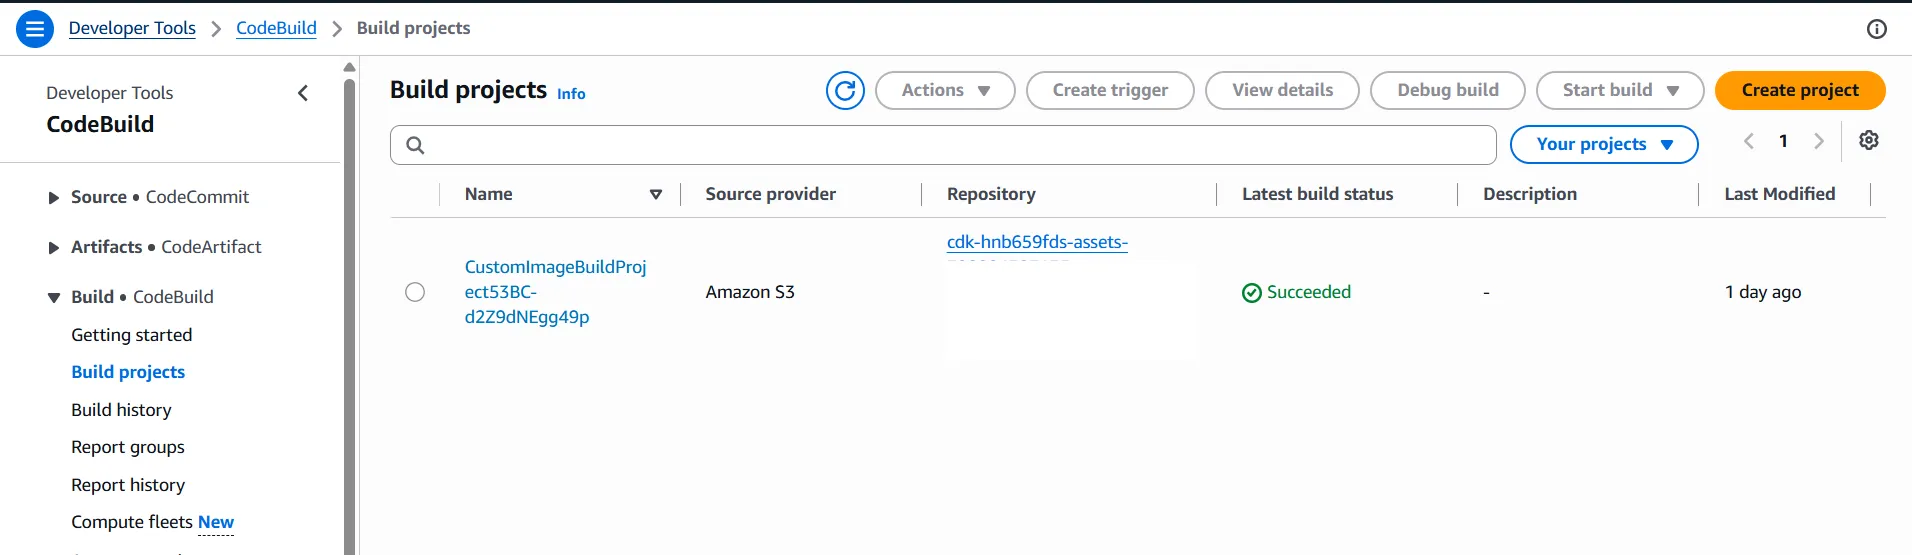
Once the Dockerfile has been updated, a new container image needs to be built. AWS CodeBuild handles this process automatically.
Its responsibilities are straightforward:
- Retrieve the latest source code
- Build the Docker image
- Tag the image
- Push the image to Amazon ECR
Once the image has been successfully published, CodeBuild's work is complete. It simply publishes the image to Amazon ECR and allows the rest of the workflow to continue through AWS events.
> buildspec.yml
# CodeBuild buildspec for the custom SageMaker Studio JupyterLab image.

version: 0.2

phases:
  pre_build:
    commands:
      - echo Logging in to ECR...
      - >-
        aws ecr get-login-password --region "$AWS_REGION"
        | docker login --username AWS --password-stdin "$ECR_REGISTRY"
      - IMAGE_TAG="build-${CODEBUILD_BUILD_NUMBER}"
      - echo "Image tag will be $IMAGE_TAG"
  build:
    commands:
      - echo Building Docker image...
      - docker build -t "$ECR_REPOSITORY_URI:$IMAGE_TAG" .
  post_build:
    commands:
      - echo Pushing Docker image to ECR...
      - docker push "$ECR_REPOSITORY_URI:$IMAGE_TAG"
      - echo "Build complete. Image pushed as $ECR_REPOSITORY_URI:$IMAGE_TAG"
> AWS Console: CodeBuild Project
Step 3: Publishing Images to Amazon ECR
Amazon Elastic Container Registry (Amazon ECR) acts as the centralized repository for our custom SageMaker Studio images. Each successful build creates a new version of the container image that can be securely stored, scanned, and managed.
Beyond storing images, Amazon ECR also becomes the event source for the next stage of our automation. Whenever a new image is pushed to the repository, Amazon ECR emits an event that can be consumed by Amazon EventBridge.
This allows the architecture to remain loosely coupled. CodeBuild doesn't need to know anything about SageMaker Studio.
> AWS Console: ECR images

Step 4: Automatically Registering Images with SageMaker Studio Domain
Although the image now exists inside Amazon ECR, SageMaker Studio still cannot use it.
Before the image becomes available to users, it must be registered as a SageMaker Image, and a new SageMaker Image Version must be created.
Instead of performing these steps manually after every image update, we automate the process using Amazon EventBridge and AWS Lambda.
When Amazon ECR detects a successful image push, it emits an event.
An Amazon EventBridge rule captures that event and invokes an AWS Lambda function.
The Lambda function performs the remaining automation by:
- Verify the SageMaker image resource Ensure that the SageMaker custom image exists before continuing with the deployment.
- Register the new image version Create a new version of the SageMaker custom image using the container image that was just pushed to Amazon ECR.
- Validate the image Wait until the new image version is fully processed and ready for use.
- Configure SageMaker Studio Ensure that the required JupyterLab image configuration is available for the custom image.
- Update the SageMaker Studio domain Register the latest custom image version with the SageMaker Studio domain so it becomes available to users when creating or launching JupyterLab spaces.
Because the workflow is event-driven, the automation only runs when a new image becomes available. There is no polling, no scheduled jobs, and no manual intervention.
> Lambda function -Python :
import os
import time

import boto3
from botocore.exceptions import ClientError

sagemaker = boto3.client("sagemaker")

DOMAIN_ID = os.environ["DOMAIN_ID"]
EXECUTION_ROLE_ARN = os.environ["EXECUTION_ROLE_ARN"]
IMAGE_NAME = os.environ["SAGEMAKER_IMAGE_NAME"]
APP_IMAGE_CONFIG_NAME = os.environ["APP_IMAGE_CONFIG_NAME"]

IMAGE_POLL_INTERVAL_SECONDS = 5
IMAGE_POLL_TIMEOUT_SECONDS = 60

IMAGE_VERSION_POLL_INTERVAL_SECONDS = 5
IMAGE_VERSION_POLL_TIMEOUT_SECONDS = 180


def on_image_pushed(event, context):
    """Entry point invoked by the EventBridge rule on a successful ECR push."""
    detail = event["detail"]
    repository_name = detail["repository-name"]
    image_digest = detail["image-digest"]
    image_tag = detail.get("image-tag", "untagged")

    account_id = context.invoked_function_arn.split(":")[4]
    region = os.environ["AWS_REGION"]
    registry = f"{account_id}.dkr.ecr.{region}.amazonaws.com"
    base_image = f"{registry}/{repository_name}@{image_digest}"

    print(
        f"Processing push of {repository_name}:{image_tag} "
        f"(digest {image_digest}) as base image {base_image}"
    )

    _ensure_sagemaker_image_exists()
    _wait_for_image_created()
    version_number = _create_image_version(base_image)
    _wait_for_image_version(version_number)
    _ensure_app_image_config_exists()
    _attach_image_to_domain(version_number)

    print(
        f"Attached {IMAGE_NAME} version {version_number} to domain {DOMAIN_ID}"
    )


def _ensure_sagemaker_image_exists():
    try:
        sagemaker.create_image(
            ImageName=IMAGE_NAME,
            RoleArn=EXECUTION_ROLE_ARN,
            DisplayName=IMAGE_NAME,
        )
        print(f"Created SageMaker image {IMAGE_NAME}")
    except ClientError as error:
        if error.response["Error"]["Code"] != "ResourceInUse":
            raise
        print(f"SageMaker image {IMAGE_NAME} already exists, continuing")


def _wait_for_image_created() -> None:
    """Poll the SageMaker "Image" resource's own status until CREATED.
    """
    elapsed = 0
    while elapsed < IMAGE_POLL_TIMEOUT_SECONDS:
        response = sagemaker.describe_image(ImageName=IMAGE_NAME)
        status = response["ImageStatus"]
        if status == "CREATED":
            return
        if status == "CREATE_FAILED":
            raise RuntimeError(
                f"Image {IMAGE_NAME} failed to create: "
                f"{response.get('FailureReason', 'unknown reason')}"
            )
        time.sleep(IMAGE_POLL_INTERVAL_SECONDS)
        elapsed += IMAGE_POLL_INTERVAL_SECONDS

    raise TimeoutError(f"Timed out waiting for image {IMAGE_NAME} to become CREATED")


def _create_image_version(base_image: str) -> int:
    response = sagemaker.create_image_version(
        ImageName=IMAGE_NAME,
        BaseImage=base_image,
    )
    version_number = int(response["ImageVersionArn"].rsplit("/", 1)[-1])
    print(f"Created image version {version_number} for {IMAGE_NAME}")
    return version_number


def _wait_for_image_version(version_number: int) -> None:
    elapsed = 0
    while elapsed < IMAGE_VERSION_POLL_TIMEOUT_SECONDS:
        response = sagemaker.describe_image_version(
            ImageName=IMAGE_NAME,
            Version=version_number,
        )
        status = response["ImageVersionStatus"]
        if status == "CREATED":
            return
        if status == "CREATE_FAILED":
            raise RuntimeError(
                f"Image version {version_number} failed to create: "
                f"{response.get('FailureReason', 'unknown reason')}"
            )
        time.sleep(IMAGE_VERSION_POLL_INTERVAL_SECONDS)
        elapsed += IMAGE_VERSION_POLL_INTERVAL_SECONDS

    raise TimeoutError(
        f"Timed out waiting for image version {version_number} to become CREATED"
    )


def _ensure_app_image_config_exists():
    """Create (or repair) the JupyterLab App Image Config for this image.
    """
    app_image_config = {
        "AppImageConfigName": APP_IMAGE_CONFIG_NAME,
        "JupyterLabAppImageConfig": {
            "FileSystemConfig": {
                "MountPath": "/home/sagemaker-user",
                "DefaultUid": 1000,
                "DefaultGid": 100,
            },
            "ContainerConfig": {
                "ContainerEntrypoint": ["jupyter-lab"],
                "ContainerArguments": [
                    "--ServerApp.base_url=/jupyterlab/default",
                    "--ServerApp.ip=0.0.0.0",
                    "--ServerApp.token=",
                    "--no-browser"
                ]
            }
        },
    }
    try:
        sagemaker.create_app_image_config(**app_image_config)
        print(f"Created app image config {APP_IMAGE_CONFIG_NAME}")
    except ClientError as error:
        if error.response["Error"]["Code"] != "ResourceInUse":
            raise
        sagemaker.update_app_image_config(**app_image_config)
        print(
            f"App image config {APP_IMAGE_CONFIG_NAME} already existed, "
            "re-applied FileSystemConfig in case it was stale"
        )


def _attach_image_to_domain(version_number: int) -> None:
    domain = sagemaker.describe_domain(DomainId=DOMAIN_ID)
    user_settings = domain.get("DefaultUserSettings", {})
    jupyterlab_settings = user_settings.get("JupyterLabAppSettings", {})
    custom_images = jupyterlab_settings.get("CustomImages", [])

    # Drop any existing entry for this image name, then append the new
    # version, so re-runs replace rather than duplicate.
    custom_images = [
        entry for entry in custom_images if entry.get("ImageName") != IMAGE_NAME
    ]
    custom_images.append(
        {
            "ImageName": IMAGE_NAME,
            "AppImageConfigName": APP_IMAGE_CONFIG_NAME,
            "ImageVersionNumber": version_number,
        }
    )

    jupyterlab_settings["CustomImages"] = custom_images
    user_settings["JupyterLabAppSettings"] = jupyterlab_settings

    sagemaker.update_domain(
        DomainId=DOMAIN_ID,
        DefaultUserSettings=user_settings,
    )
> EventBridge - Event pattern rule:
{
  "detail-type": ["ECR Image Action"],
  "detail": {
    "repository-name": ["sagemaker-studio/ds-lite"],
    "result": ["SUCCESS"],
    "action-type": ["PUSH"]
  },
  "source": ["aws.ecr"]
}
> AWS Console: Lambda Function Overview

Step 5: Centralizing Starter JupyterLab Notebooks
A fully configured development environment includes more than preinstalled libraries. It also provides starter notebooks, giving users a ready-to-use workspace instead of an empty environment.
These notebooks are stored in a centralized Amazon S3 bucket, making them easy to maintain and update independently of the custom SageMaker Studio image.
This approach allows new notebook templates and examples to be distributed without rebuilding or redeploying the image.
> S3 notebooks:

Step 6: Initializing Every Workspace Automatically
The final piece of the solution is ensuring every Studio user automatically receives those notebooks. This is achieved using a SageMaker Studio Lifecycle Configuration.
Each time a Studio application starts, the Lifecycle Configuration executes automatically.
Its responsibilities are simple:
- Connect to Amazon S3
- Download the latest notebook templates
- Copy them into the user's home directory
- Preserve a consistent workspace layout for every user
From the user's perspective, everything simply appears when Studio launches.
There is no need to download notebooks, clone repositories, or copy template files manually. Every new environment starts with the same curated content.
> Lifecycle Configuration:
# JupyterLab Lifecycle Configuration that syncs the sample notebooks
# from S3 into the user's home directory at Space startup.

#!/bin/bash
set -x
mkdir -p /home/sagemaker-user/notebooks
aws s3 sync s3://$BUCKET_NAME/notebooks/ /home/sagemaker-user/notebooks/ --exact-timestamps --no-progress || echo 'Warning: S3 sync failed, continuing JupyterLab startup'
> AWS Console: Lifecycle configurations

Step 7: Explore the Ready-to-Code Environment
After deployment, the SageMaker Domain comes with a custom image and a lifecycle config attached to it. And when a new user opens Studio, they can access JupyterLab Space with all the required Python libraries and a consistent development environment aligned with the rest of the team.
> Results:
- SageMaker Domains:

- Domain Details:

- JupyterLab Space:

- Starter notebooks are preloaded at launch:

Conclusion
In this project, we built a production-style In this article, we've successfully built a fully automated SageMaker Studio environment using custom images, centralized notebooks, and event-driven automation. This approach provides a consistent development experience, reduces manual setup, and simplifies ongoing maintenance. The complete project is available on GitHub for anyone who wants to explore the implementation or adapt it to their own environment.
References
- Amazon SageMaker Studio https://docs.aws.amazon.com/sagemaker/latest/dg/studio-updated.html
- Amazon SageMaker Studio UI overview https://docs.aws.amazon.com/sagemaker/latest/dg/studio-updated-ui.html
- Bring your own image (BYOI) https://docs.aws.amazon.com/sagemaker/latest/dg/studio-updated-byoi.html
- Launch a custom image in Studio https://docs.aws.amazon.com/sagemaker/latest/dg/studio-updated-byoi-how-to-launch.html
- SageMaker JupyterLab https://docs.aws.amazon.com/sagemaker/latest/dg/studio-updated-jl.html
- What is AWS CodeBuild? https://docs.aws.amazon.com/codebuild/latest/userguide/welcome.html
- Amazon ECR private registry https://docs.aws.amazon.com/AmazonECR/latest/userguide/Registries.html
Enjoyed reading this content? Let the author know!
Your likes, comments, shares, and saves help creators reach more builders.

Loading recommendations
Loading article