
How to Install Amazon Q CLI (Kiro CLI) on a Linux Machine — Local Laptop & EC2 Instance
A Step-by-Step Guide to Install Amazon Q CLI (Kiro CLI) on a Linux Machine — Local Laptop & EC2 Instance

Prerequisites
Before you begin, make sure you have:
- Internet connection on both machines
- AWS Account (active)
- AWS Builder ID (used for login with Kiro CLI)
- Linux Machine (Ubuntu or another distro) — two contexts:
- Local Linux laptop
- AWS EC2 Linux instance (e.g., Amazon Linux 2, Ubuntu
Overview of Amazon Q CLI vs Kiro CLI
Amazon Q CLI has been renamed and upgraded to Kiro CLI — this new version retains all core Amazon Q functions (agentic workflows, command-line AI), plus additional enhancements.

PART 1 — Install Kiro CLI on Local Linux Laptop
Here’s how you install and first configure Kiro CLI on your local Linux computer.
Step 1 — Open Terminal
Open your Linux terminal application (GNOME Terminal, Konsole, etc.). You’ll be entering all commands here.
Step 2 — Run Official Install Script
Use the official install command provided by Kiro:
1
curl -fsSL https://cli.kiro.dev/install | bash
This script installs the latest Kiro CLI on your system — no manual downloads required.
Note: If you encounter permission issues, re-run with sudo, but be careful and understand how the script works before escalating privileges.
Step 3 — Add Kiro to Your PATH
The installer typically places the
kiro executable in ~/.local/bin. To use the command from any folder, you must add this directory to your shell configuration.A. For macOS (and modern Linux with Zsh):
Open your Zsh config:
1
nano ~/.zshrc
Add this line to the very bottom:
1
export PATH="$HOME/.local/bin:$PATH"
Save (Ctrl+O, Enter) and Exit (Ctrl+X).
B. For Linux (Ubuntu/Debian with Bash):
- Open your Bash config:
nano ~/.bashrc - Add this line to the very bottom:
1
export PATH="$HOME/.local/bin:$PATH"
Save (Ctrl+O, Enter) and Exit (Ctrl+X).
Step 4 — Refresh Your Shell
Apply the changes immediately without restarting your computer:
1
2
3
4
5
# For Mac/Zsh users:
source ~/.zshrc

# For Linux/Bash users:
source ~/.bashrc
This ensures any CLI environment variables that were set take effect.
Step 5 — Verify Installation
To confirm the installation:
1
kiro-cli --version
You should see a version number printed, indicating Kiro CLI is installed correctly.
Step 6 — Login With AWS Builder ID
Kiro supports multiple login methods — for beginners, the AWS Builder ID is easiest.
Run:
1
kiro-cli login
Follow the prompts to sign in with your AWS Builder ID credentials.
Step 7— Quick Test
Once logged in, run:
1
kiro-cli
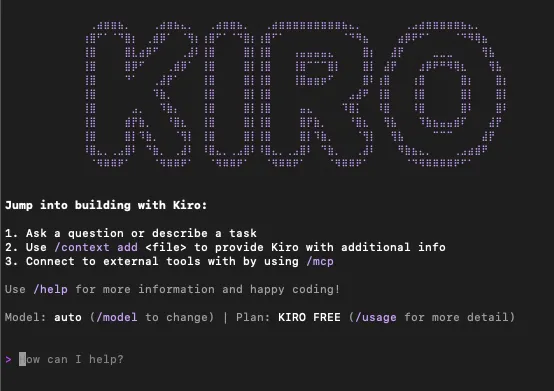
This opens an interactive Kiro session in your terminal. Try a simple command:
1
help
You should see a list of available commands.
PART 2 — Install Kiro CLI on AWS EC2 (Linux Instance)
Installing on an EC2 Linux instance (e.g., Amazon Linux 2 or Ubuntu) is similar to the laptop process, but with SSH access.
Step 1 — Launch & Connect to EC2
- Open AWS Management Console
- Launch a Linux EC2 instance
- Configure security group to allow SSH
- SSH into the instance from your local terminal:
1
ssh -i /path/to/your/key.pem ec2-user@<EC2_PUBLIC_IP>
(Use ubuntu@ if using Ubuntu AMI)
Step 2 — Update Packages
Once in your EC2 session, update packages:
1
sudo yum update -y    # Amazon Linux
OR
1
sudo apt update && sudo apt upgrade -y   # Ubuntu
Step 3 — Install Kiro CLI
Run the same official script:
1
curl -fsSL https://cli.kiro.dev/install | bash
Note: Update and Install Unzip
Run these two commands to refresh your package list and install the missing dependency:
1
sudo apt install unzip -y
Ensure the system now recognizes the command:
1
unzip -v
Step 4 — Add to PATH and Restart Shell
Most local CLI tools are installed to
~/.local/bin. If the installer finished but the command kiro returns "command not found," follow these steps:1
nano ~/.bashrcScroll to the very bottom of the file and paste this line:
1
export PATH="$HOME/.local/bin:$PATH"
Press Ctrl + O, then Enter to save then press Ctrl + X to exit the editor.
1
 source ~/.bashrc
Step 5 — Verify Installation
1
kiro-cli --version
Should print a version number.
Step 6 — Login With AWS Builder ID
Kiro on EC2 will prompt you to authenticate just like on a local laptop. Use:
1
kiro-cli login
Follow the prompts to login.
Step 7 — Test CLI
Inside the EC2 terminal:
1
kiro-cli
Run a simple prompt to confirm everything is working.
Tips for Students & Beginners
- Keep your AWS credentials safe. Do not share them.
- If using different Linux distros, the install script works universally.
- Use kiro-cli help to explore more commands.
- Know that this CLI connects AI-powered workflows directly from your terminal, helping to automate tasks and generate code faster than traditional methods.
Conclusion
In this workshop blog, you successfully installed Amazon Q CLI (Kiro CLI) on:
✔ Your local Linux laptop
✔ A remote AWS EC2 Linux instance
✔ A remote AWS EC2 Linux instance
With prerequisites met (AWS account, Builder ID, Linux system), you now have a powerful AI CLI installed, authenticated, and ready to use. 🎉
For next steps, explore CLI commands, build simple development workflows, and integrate Kiro into your AWS projects. KIRO
Enjoyed reading this content? Let the author know!
Your likes, comments, shares, and saves help creators reach more builders.

Loading recommendations
Loading article