
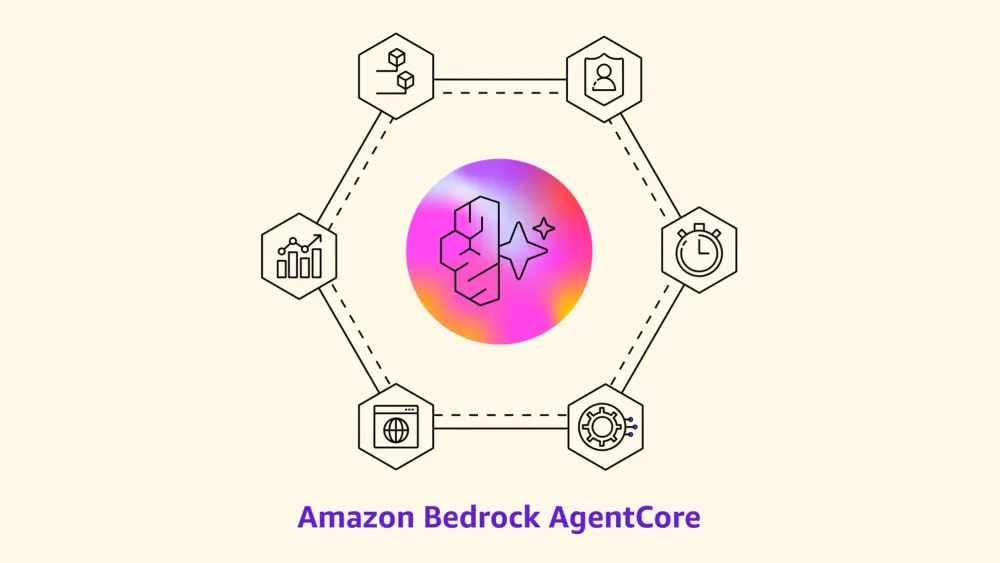
Deploying Claude Agent SDK on Amazon Bedrock AgentCore Runtime
Learn how to deploy Claude Agent SDK agents to production with just three lines of code using Amazon Bedrock AgentCore Runtime's serverless infrastructure.

Deploying Claude Agent SDK on Amazon Bedrock AgentCore
AI agents are evolving beyond simple question-answering systems into sophisticated tools that can plan, execute complex workflows, and use external tools to accomplish real-world tasks. Modern agent frameworks like Anthropic's Claude Agent SDK make building these capabilities more accessible than ever - you can create agents that don't just respond to queries, but can search the web, query databases, analyze data, and chain multiple actions together autonomously.
But here's the challenge: building an agent that works on your laptop is one thing. Deploying it to production where it can handle real users, scale automatically, and run reliably? That's a different story entirely.
This is where Amazon Bedrock AgentCore runtime comes in. By providing a serverless, secure environment purpose-built for AI agents, AgentCore runtime along with other AgentCore services (AgentCore Memory, AgentCore Gateway etc) makes it possible to deploy agent frameworks like Claude Agent SDK without the complexity of managing infrastructure. You get session isolation through dedicated microVMs, extended execution times up to 8 hours, and automatic scaling—all while maintaining the security and observability you need for production systems.
In this post, I'll walk you through deploying a Claude Agent SDK agent to AgentCore Runtime. As shown in the architecture diagram below, AgentCore Runtime provides isolated microVM environments for each session, handling the infrastructure complexity while you focus on your agent logic. What surprised me most? The deployment required just three lines of code changes to my existing agent. Let me show you how it works.
What is Claude Agent SDK?
The Claude Agent SDK is Anthropic’s official developer toolkit for building autonomous, production-grade AI agents using Claude models. It extends the Claude Code foundation into a general-purpose framework that handles context, tool use, memory, and control—allowing developers to build agents that can understand tasks, interact with files and APIs, and iterate intelligently until goals are met.
The core design principle is to give Claude agents access to a computer, allowing them to work like humans do - with the ability to find files, write and edit them, run commands, and iterate on tasks until they succeed. check out engineering blog post for details
What is Amazon Bedrock AgentCore?
Once I had my agent working locally, the natural question became: how do I actually run this in production?
Amazon Bedrock AgentCore provides the infrastructure layer for deploying AI agents. The Runtime component is a serverless compute environment designed specifically for agent workloads—not just containers with "AI" added to the name, but an environment built for the unique requirements of agentic systems.
Here's what makes Runtime different. Each invocation gets its own isolated microVM environment, so multiple agents or users never interfere with each other. You get up to 8 hours of execution time per invocation, which is important for agents that need to perform long-running research or data analysis tasks. And it's completely framework-agnostic—whether you're using Claude Agent SDK, LangGraph, CrewAI, or something custom, Runtime doesn't care about your implementation details.
The SDK supports both Python and TypeScript, for the complete technical details, the Amazon Bedrock AgentCor e covers the full capabilities. But the core idea is simple: serverless execution for agents, without the operational complexity.
1: Running it locally first (Python)
You can follow Claude Agent SDK Python Tutorial to install the SDK in your local and as part of this tutorial, you will also install Claude Code 2.0.0+ which is required by the SDK.In this case I install the sdk with version 0.1.3 and then latest version of Claude Code which is 2.0.27
1.1 Verify Claude Code is working properly
As SDK requires Claude Code which supports both subscription and API based usage.In this case, I integrate Claude Coode with bedrock and the key environment variables are:
-
export AWS_BEARER_TOKEN_BEDROCK=xxxxx(your API key for bedrock)
-
export CLAUDE_CODE_USE_BEDROCK=1(enable Claude Code to use Bedrock)
-
export AWS_REGION=xxxx(your region)
-
export ANTHROPIC_MODEL=global.anthropic.claude-sonnet-4-5-20250929-v1:0(default Claude Code model, used by Claude Code for general purpose operations, can be set to other Claude models on bedrock)
-
export ANTHROPIC_SMALL_FAST_MODEL_AWS_REGION= global.anthropic.claude-haiku-4-5-20251001-v1:0(small and fast Claude Code model, used by Claude Code for Bash operations etc, can be set to other Claude models on bedrock)
You can verify the model setting via
/model command in Claude Code CLI.
1.2 Sample code and invoke it locally
We will be using the sample code from Claude Agent SDK Python Quick Start and I named it as
claude_agent_quick_start.py for simplicity.Python
#!/usr/bin/env python3"""Quick start example for Claude Code SDK."""import anyiofrom claude_agent_sdk import (AssistantMessage,ClaudeAgentOptions,ResultMessage,TextBlock,query,)async def basic_example():"""Basic example - simple question."""print("=== Basic Example ===")async for message in query(prompt="What is 2 + 2?"):if isinstance(message, AssistantMessage):for block in message.content:if isinstance(block, TextBlock):print(f"Claude: {block.text}")print()async def with_options_example():"""Example with custom options."""print("=== With Options Example ===")options = ClaudeAgentOptions(system_prompt="You are a helpful assistant that explains things simply.",max_turns=1,)async for message in query(prompt="Explain what Python is in one sentence.", options=options):if isinstance(message, AssistantMessage):for block in message.content:if isinstance(block, TextBlock):print(f"Claude: {block.text}")print()async def with_tools_example():"""Example using tools."""print("=== With Tools Example ===")options = ClaudeAgentOptions(allowed_tools=["Read", "Write"],system_prompt="You are a helpful file assistant.",)async for message in query(prompt="Create a file called hello.txt with 'Hello, World!' in it",options=options,):if isinstance(message, AssistantMessage):for block in message.content:if isinstance(block, TextBlock):print(f"Claude: {block.text}")elif isinstance(message, ResultMessage) and message.total_cost_usd > 0:print(f"\nCost: ${message.total_cost_usd:.4f}")print()async def main():"""Run all examples."""await basic_example()await with_options_example()await with_tools_example()if __name__ == "__main__":anyio.run(main)
Run
python claude_agent_quick_start.py You should see the following output:
2 Adding AgentCore wrapper and test it locally
Now we will add AgentCore wrapper to the code to deploy it to AgentCore Runtime and please also make sure you have installed the AgentCore in your local and in this case I install the AgentCore Python SDK with version 1.0.4. For detail AgentCore Python SDK
The beauty of AgentCore is in its simplicity, you can add AgentCore wrapper to your existing agent code in just a couple of lines of code to make an agent compatible with AgentCore:
Python
# 1. Import the AgentCore runtimefrom bedrock_agentcore import BedrockAgentCoreAppfrom claude_agent_sdk import (AssistantMessage,ClaudeAgentOptions,ResultMessage,TextBlock,query,)app = BedrockAgentCoreApp()async def basic_example():"""Basic example - simple question."""print("=== Basic Example ===")async for message in query(prompt="What is 2 + 2?"):if isinstance(message, AssistantMessage):for block in message.content:if isinstance(block, TextBlock):print(f"Claude: {block.text}")print()async def with_options_example(payload: dict=None):"""Example with custom options."""print("=== With Options Example ===")# Use prompt from payload if provided, otherwise use defaultprompt = "Explain what Python is in one sentence."if payload and "prompt" in payload:prompt = payload["prompt"]options = ClaudeAgentOptions(system_prompt="You are a helpful assistant that explains things simply.",max_turns=1,)async for message in query(prompt=prompt, options=options):if isinstance(message, AssistantMessage):for block in message.content:if isinstance(block, TextBlock):print(f"Claude: {block.text}")print()async def with_tools_example():"""Example using tools."""print("=== With Tools Example ===")options = ClaudeAgentOptions(allowed_tools=["Read", "Write"],system_prompt="You are a helpful file assistant.",)async for message in query(prompt="Create a file called hello.txt with 'Hello, World!' in it, it is saved in the current directory",options=options,):if isinstance(message, AssistantMessage):for block in message.content:if isinstance(block, TextBlock):print(f"Claude: {block.text}")elif isinstance(message, ResultMessage) and message.total_cost_usd > 0:print(f"\nCost: ${message.total_cost_usd:.4f}")print()# 2. Decorate your agent function with @app.entrypoint@app.entrypointasync def main(payload: dict=None):"""Run all examples."""await basic_example()await with_options_example(payload)await with_tools_example()if __name__ == "__main__":app.run()
That's all you need to do to make your agent compatible with AgentCore Runtime and this pattern is applicable to most of Python agent framework like LangGraph, CrewAI, etc to make AgentCore framework-agnostic.
Test it with
python claude_agent_quick_start_agentcore.py it will start the runtime server and by default, it is running on port 8080. As you can see below, the server is running and ready to accept invocation requests.
Open a new terminal and invoke the agent with:
Bash
curl -X POST http://localhost:8080/invocations -H "Content-Type: application/json" -d '{"prompt": "what is the largest language model?"}'
Back to the terminal window that is running the agentcore server, you should see the following output, so the AgentCoer rapper is working properly.

3 Deploying to AgentCore Runtime using AgentCore Starter Toolkit
Let’s walk through the actual deployment process using the AgentCore Starter ToolKit which dramatically simplifies the deployment workflow.The AgentCore Starter Toolkit is a CLI tool that helps you deploy your agent to AgentCore Runtime.
Prerequisites
Before you begin, make sure you have:
- Python 3.10 or higher
- AWS credentials configured
- Amazon Bedrock AgentCore SDK installed
3.1 IAM permissions
When deploying an agent in AgentCore Runtime, you'll need to configure two distinct AWS Identity and Access Management (IAM) permission sets. The first is your developer role, which grants you the necessary permissions to create and manage AgentCore resources. The second is the agent's execution role, which provides the runtime permissions your agent requires to operate within the AgentCore environment.
The AgentCore Starter Toolkit now simplifies this process by automatically generating the execution role when you set auto_create_execution_role=True during deployment. However, you'll still need to manually configure your developer permissions according to the guidelines outlined in the IAM Permissions for AgentCore Runtime documentation
3.2 Adding AgentCore wrapper to your agent code
We have completed it in the previous section, so you can skip this step.
3.3 Deploying to AgentCore Runtime
In this case, we are using the starter toolkit command to deploy. Please install the toolkit first with and then verify the installation.
pip install bedrock-agentcore-starter-toolkit agentcore --help 
Create the file called
requirements.txt with the following dependencies, during agentcore deployment, it will automatically install those dependencies plaintext
txtbedrock-agentcore==1.0.4claude-agent-sdk==0.1.3
3.3.1 AgentCore configure
Run the following command to configure the agentcore
agentcore configure -e claude_agent_quick_start_agentcore.py - The `e` or `-entrypoint` flag specifies the entrypoint file for your agent (the Python file containing your agent code)
- This command creates configuration for deployment to AWS
- Accept the default values unless you have specific requirements
- The configuration information is stored in a hidden file named .bedrock_agentcore.yaml
By default, the starter toolkit deploys to the
us-west-2 AWS Region. To use a different Region: agentcore configure -e my_agent.py -r us-east-1 below is one of examples:

3.3.2 Adjust dockerfile to add the Claude Code installation
The configuration above will generate a Dockerfile under
.bedrock_agentcore/ and now we need to update this Dockerfile to add the Claude Code so during the deployment, AgentCore will install the Claude Code automatically. The new file looks like below:dockerfile
FROM ghcr.io/astral-sh/uv:python3.12-bookworm-slimWORKDIR /app# All environment variables in one layerENV UV_SYSTEM_PYTHON=1 \UV_COMPILE_BYTECODE=1 \UV_NO_PROGRESS=1 \PYTHONUNBUFFERED=1 \DOCKER_CONTAINER=1 \AWS_REGION=us-west-2 \AWS_DEFAULT_REGION=us-west-2# Install Node.js and npm (THIS IS FOR CLAUDE CODE)RUN apt-get update && apt-get install -y \nodejs \npm \&& rm -rf /var/lib/apt/lists/*# Install Claude Code CLI globally (THIS IS FOR CLAUDE CODE)RUN npm install -g @anthropic-ai/claude-codeCOPY requirements.txt requirements.txt# Install from requirements fileRUN uv pip install -r requirements.txtRUN uv pip install aws-opentelemetry-distro>=0.10.1# Signal that this is running in Docker for host binding logicENV DOCKER_CONTAINER=1# Create non-root userRUN useradd -m -u 1000 bedrock_agentcoreUSER bedrock_agentcoreEXPOSE 9000EXPOSE 8000EXPOSE 8080# Copy entire project (respecting .dockerignore)COPY . .# Use the full module pathCMD ["opentelemetry-instrument", "python", "-m", "claude_agent_quick_start_agentcore"]
As you can see, we added the following lines to the Dockerfile:
dockerfile
# Install Node.js and npm (THIS IS FOR CLAUDE CODE)RUN apt-get update && apt-get install -y \nodejs \npm \&& rm -rf /var/lib/apt/lists/*# Install Claude Code CLI globally (THIS IS FOR CLAUDE CODE)RUN npm install -g @anthropic-ai/claude-code
3.3.3 AgentCore launch
There are three launch modes

We will be using the default mode so it will build your container using AWS CodeBuild (no Docker required locally), create necessary AWS resources (ECR repository, IAM roles, etc.), deploy your agent to Amazon Bedrock AgentCore Runtime and configure CloudWatch logging.
Run command below to launch the agent, and please make sure you have set the environment variables correctly and they will be passed to the container during the deployment.
agentcore launch -a claude_agent_quick_start_agentcore --env CLAUDE_CODE_USE_BEDROCK=1 --env AWS_BEARER_TOKEN_BEDROCK=xxxxxxxxx --env DEBUG=true --env ANTHROPIC_MODEL=global.anthropic.claude-sonnet-4-5-20250929-v1:0 --env ANTHROPIC_SMALL_FAST_MODEL=global.anthropic.claude-haiku-4-5-20251001-v1:0 Once it is deployed and launched, you will see

### 3.3.4 AgentCore invoke
Let's invoke the agent with the following command:
agentcore invoke '{"prompt": "what is the largest language model?"}' 
Check the CloudWatch logs to see the invocation details.

And all of this is happening in that isolated AgentCore Runtime environment, not on my laptop. I could fire off a request and close my terminal, and the agent would keep running. Session isolation means if someone else invoked the same agent at the same time, their session wouldn't interfere with mine.
What I Actually Learned
1. The Integration Really Is That Simple
I kept waiting for the other shoe to drop. There's gotta be more configuration, more setup, more... something. But no. The AgentCore wrapper pattern is genuinely three lines of code. Import, decorate, run. That's it.
This is huge because it means you're not rewriting your agent to fit some framework's requirements. You're just wrapping what you already have.
2. Session Isolation Matters More Than I Thought
When I was running locally, I didn't think much about isolation. It was just me using the agent. But in production, you might have multiple users invoking the same agent simultaneously. AgentCore's MicroVM isolation means each invocation gets its own clean environment. No shared state, no memory leaks between sessions, no weird interactions.
3. The 8-Hour Execution Window Opens Up New Possibilities
Most serverless platforms give you minutes, not hours. The fact that AgentCore lets your agent run for up to 8 hours (Asynchronous job maximum duration) and that means you can build agents that do really deep research, handle long-running workflows, or process large datasets without worrying about timeouts.
I haven't fully explored this yet, but I'm already thinking about agents that could run overnight data analysis or research projects that need hours to complete.
Conclusion
Remember that challenge I mentioned at the start? Building an agent that works locally versus deploying it to production? What surprised me most about this journey wasn't the deployment process itself—it was how little friction there was between the two worlds.
I expected complexity. Configuration files, custom deployment scripts, infrastructure diagrams, the works. Instead, I got three lines of code and a deployment command. The AgentCore wrapper pattern respected the agent I'd already built, rather than forcing me to rebuild it around someone's framework requirements.
What really stuck with me was the realization that session isolation and 8-hour execution windows aren't just nice-to-have features—they fundamentally change what kinds of agents you can build. You're not thinking about timeouts or shared state anymore. You're thinking about what your agent can actually accomplish.
Cleaning Up (Optional)
You can use
agentcore destroy to destroy the agent and resources created by AgentCore.
Resources:
Enjoyed reading this content? Let the author know!
Your likes, comments, shares, and saves help creators reach more builders.

Loading recommendations
Loading article