
Pixel Perfect Power: Building Tetris with Amazon Q CLI
Learn to rapidly build a classic Tetris game using Amazon Q CLI & Pygame! Create a fully functional, pixel-perfect experience without complex setup.

INTRODUCTION
I’ve always loved the challenge and strategic thinking of Tetris, and I wanted to recreate that experience using Python and Pygame. But instead of building it from scratch, I leveraged Amazon Q CLI to accelerate the development process – a surprisingly effective approach! This project was a fantastic learning experience, demonstrating how AI can be a powerful tool for developers.
I started by setting up a Linux environment with WSL on Windows, then used Amazon Q to help generate code for core game logic. Breaking down the game into smaller components (piece generation, movement, collision detection, scoring) made it much easier to build a fully playable Tetris experience. Amazon Q isn’t just a chatbot; it's a developer assistant that helps with coding, debugging, and automation through natural language. It significantly reduced my time spent on boilerplate code and allowed me to focus on the core gameplay mechanics.
And now, I’m excited to share how I built this Tetris game using Python, Pygame, and Amazon Q CLI! This guide will walk you through the setup – WSL and all – and show you exactly how I used prompts to generate and refine the code. You can even check out my GitHub repo https://github.com/ImSaMPro/Tetris-Amazon-Q-CLI-DEMO and try it yourself! I’ll also highlight some key improvements we made along the way, focusing on making the game more visually appealing and engaging.
PREREQUISITES
- Windows 10 or 11 with WSL enabled
- Ubuntu installed via WSL (version 2 is highly recommended)
- Python 3.9+ installed on WSL
INSTALLATION AND SETUP
Setup Windows Subsystem for Linux (WSL) version 2
- Step 1: Open Windows Terminal
- Step 2: Type
wsl.exe --list --online(This will list your installed distributions.) - Step 3: Type
wsl.exe --install Ubuntu-24.04(Installs the latest Ubuntu release – adjust if you want a different version) - Step 4: To launch Ubuntu type
wsl.exe -d Ubuntu-24.04 - Step 5: You will be asked to “
create a default unix user account”, type “ubuntu” - Step 6: You will be asked to “
create new password”, try to use a string password with letter, numbers, capital letters, and symbols. (Important for security!) - Step 7: First command type
sudo apt update - Step 8: Second command type
sudo apt upgrade -y
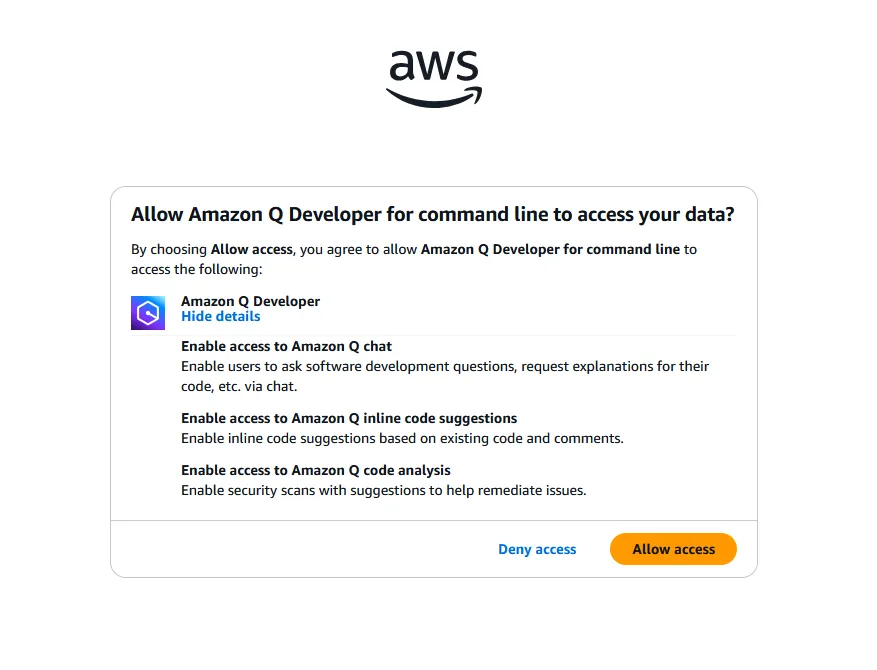
Installing Amazon Q for command line
- Step 1: To install Amazon Q for command line for Ubuntu, type
wget https://desktop-release.q.us-east-1.amazonaws.com/latest/amazon-q.deb - Step 2: Install the package:
sudo apt-get install -ffollowed bysudo dpkg -i amazon-q.deb - Step 3: Now connect and login with your AWS Builder account, type
q loginand hit enter. - Step 4: Select “
Use for Free with Builder ID” using spacebar - Step 5: Type
qand hit enter, you will be greeted with Amazon Q Cli Chat interface.
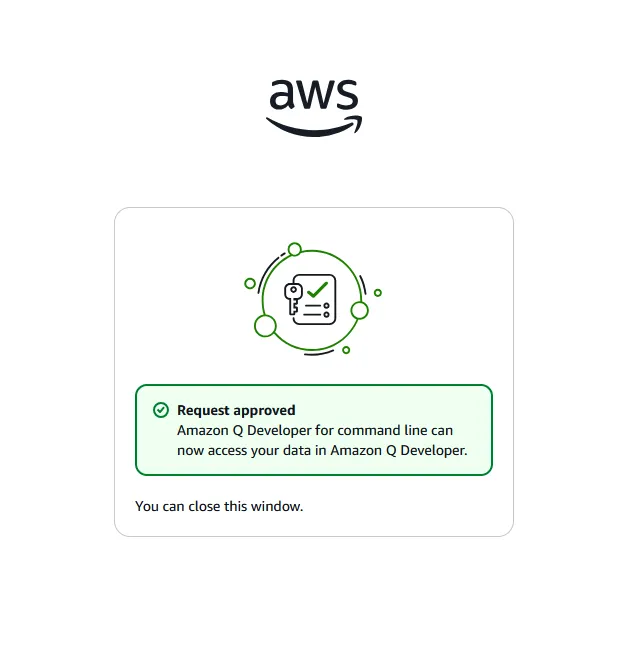
COMMIN ISSUES
Here are some common issues you might encounter when using Amazon Q for command line:
- Authentication failures: If you're having trouble authenticating, try running q login to re-authenticate. Double-check your AWS credentials in the AWS console.
- Autocomplete not working: Ensure your shell integration is properly installed by running q doctor. This will check for and fix common configuration issues.
- SSH integration issues: Verify that your SSH server is properly configured to accept the required environment variables. (This is less common, but can happen.)
TROUBLESHOOTING STEPS
Follow these steps to troubleshoot issues with Amazon Q for command line:
- Run q doctor to identify and fix common issues.
- Check your internet connection.
- Verify that you're using a supported environment (WSL 2 is crucial).
- Try reinstalling Amazon Q for command line.
- If the issue persists, report it using q issue.
PROMPT I USED IN AMAZON Q CLI CHAT INTERFACE
1
2
3
4
5
6
7
8
9
10
11
12
13
14
15
16
17
18
19
20
21
22
23
24
25
26
27
28
29
30
31
32
33
34
35
36
37
38
39
40
41
42
43
44
45
46
47
48
49
50
51
52
53
54
“You are an expert Python programmer specializing in creating games using the Pygame library. Your task is to generate the core Pygame code for a basic Tetris game. The goal is to create a playable version with falling blocks, rotation, movement, and scoring. Don't worry about advanced features like level progression or power-ups initially – focus on getting the fundamental mechanics working.

Here’s what I need:

Game Setup & Window:

Create a Pygame window (1000x1000 pixels) with a black background.
Set up the game loop using pygame.time.Clock() to control frame rate. Aim for approximately 30 frames per second.
Include basic initialization code: pygame.init(), setting the display, and handling events (keyboard input).
Tetromino Generation:

Define a list of Tetris pieces (tetrominos) – I want at least 4 different shapes (I, O, T, L, J, S, Z). Each tetromino should be represented as a 2D array (list of lists) where each inner list represents a row of the block. For example:
I: [[1, 1, 1, 1]]
O: [[1, 1], [1, 1]]
Implement a function to randomly select a tetromino from this list.
Block Representation:

Use Pygame’s Surface objects to represent the Tetris blocks visually. Each block should be a rectangle with a distinct color (e.g., red for 'I', blue for 'O', etc.). Use pygame.draw.rect() to draw these rectangles on the screen.
The blocks should have a fixed size (e.g., 20x20 pixels).
Falling Block Logic:

Implement the logic for a falling block:
Move the block down one row every frame if it doesn't collide with the bottom of the screen.
Handle left and right movement – move the block horizontally, checking for collisions with the walls.
Implement rotation (90-degree rotations clockwise). The rotation should be done by rotating the 2D array representing the tetromino. Ensure that the rotated shape doesn't go out of bounds.
Collision Detection:

Implement collision detection between the falling block and the game board (the playing field). The game board should be a 2D list (list of lists) initialized with all values set to 0 (empty). When a block lands on an occupied cell, that cell should be marked as filled (e.g., with a value other than 0 – like 1).
Game Board & Clearing Lines:

Create a game board represented by a 2D list. The board size should be 20x1000 (20 rows, 1000 columns).
When the falling block lands and there are consecutive filled cells in any row, clear those lines from the board. (You don't need to implement scoring yet.)
Score Counter:

Create a text surface to display the score on the screen. Position it on the top-right corner of the window (or the "tight side" as you requested). The font should be clear and readable.
Display the following information:
“High Score: [High Score Value]”
“Last Game Score: [Last Game Score Value]”
“This Game Score: [Current Game Score Value]”
Update the score display every frame as the game progresses.
Basic Output:

Display the game board on the screen using pygame.draw.rect() or similar.
Display the falling block on the screen.
Use pygame.display.flip() to update the display after each frame.
Important Considerations & Style Guidelines:

Code Clarity: Write clean, well-commented code. Use descriptive variable names.
Modularity: Break down the code into functions for better organization (e.g., a function for generating a tetromino, a function for handling keyboard input, a function for drawing the board).
Error Handling: Include basic error handling (e.g., check if Pygame is initialized correctly). Don't worry about extensive error handling for now.
Start Simple: Prioritize getting the core mechanics working before adding complexity.
Output Format:

Please provide the complete Python code as a single block of text, ready to be copied and run. Include any necessary imports at the beginning.”
GAME WINDOWS
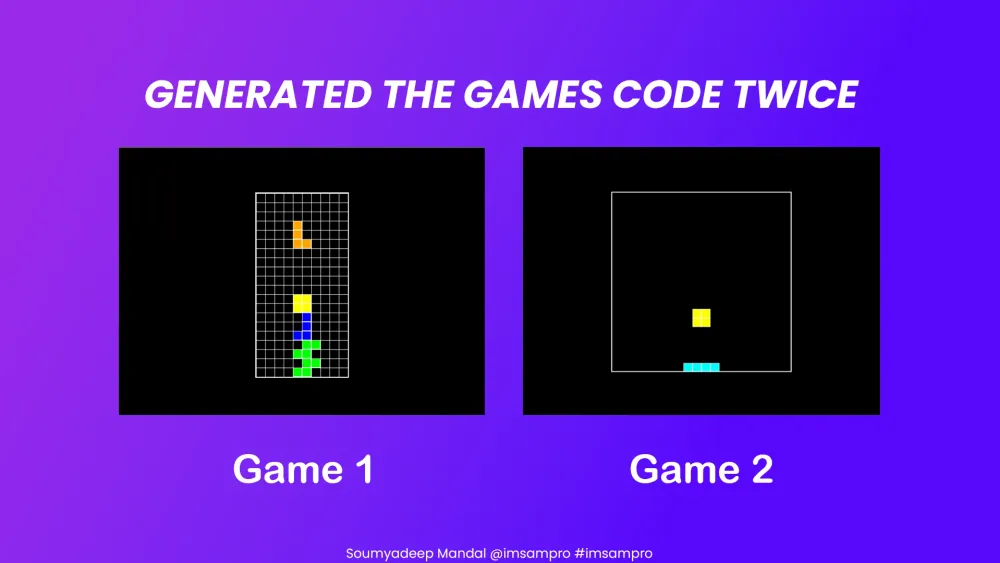
GAME IMPLEMENTATION & HOW TO PLAY INSTRUCTION BY AMAZON Q CLI
This code implements a basic Tetris game with the following features:
1. A 1000x1000 pixel window with a black background
2. All seven standard Tetris pieces (I, 0, T, L, J, S, Z) with different colors
3. Basic game mechanics:
- Falling blocks that move down automatically
- Left/right movement with arrow keys
- Rotation with up arrow key
- Fast drop with space bar
- Collision detection with walls and other blocks
- Line clearing when a row is filled
- Game over detection when a new piece can't be placed
4. Score tracking:
- Current game score
- Last game score
- High score
- Scoring system based on number of lines cleared at once
5. Visual elements:
- Grid display
- Colored blocks
- Score display on the right side
- Game over message
To play the game:
- Use left/right arrow keys to move the piece horizontally
- Use up arrow key to rotate the piece
- Use down arrow key to move the piece down faster
- Use space bar to drop the piece instantly
- Press R to restart after game over
The game runs at 30 FPS as requested, and the board is sized appropriately within the 1000x1000 window.
WHAT I LEARNED
What I learned is that even complex projects can be tackled with a strategic approach and the right tools.
- Prompt-Driven Code Synthesis: I discovered the art of “prompt-driven code synthesis” – crafting highly specific, iterative prompts for Amazon Q that yielded surprisingly functional and reusable code snippets. It’s about teaching the AI exactly what you need, not just asking vague questions.
- Bridging the Gap Between Intent & Implementation: The biggest challenge wasn't simply generating code; it was translating my high-level game design ideas into precise instructions for Amazon Q to execute. This honed my ability to break down complex tasks into smaller, AI-digestible steps.
- Adaptive Debugging with AI Assistance: Instead of traditional debugging, I used Amazon Q to diagnose and suggest fixes for unexpected errors – a surprisingly effective way to accelerate the development process. It shifted from finding bugs to collaborating on solutions.
- Reframing "Learning" as a Collaborative Process: I realized that learning isn't just about absorbing information; it’s about actively shaping an AI’s output through feedback and refinement – a truly symbiotic approach to software development.
Want to Try It Yourself?
Ready to build your own Tetris adventure, guided by the power of AI? Here’s how:
- Download the Code: Grab the project from my GitHub repository https://github.com/ImSaMPro/Tetris-Amazon-Q-CLI-DEMO
- Set Up Your Environment
- Launch & Experiment
- Become a Prompt Engineer: Don’t just run the code; talk to it.
Feel free to star the repo, share your feedback, or contribute enhancements.
Till that time .. Keep Learning... Keep Growing!!
Happy Generating! Happy Re-Generating!!
Thanks for reading!
Soumyadeep Mandal
https://www.linkedin.com/in/imsampro
Soumyadeep Mandal
https://www.linkedin.com/in/imsampro
Enjoyed reading this content? Let the author know!
Your likes, comments, shares, and saves help creators reach more builders.

Loading recommendations
Loading article