

Q-Bits: Creating A CloudFront Distribution Using Amazon Q Developer
Learn how using the latest capabilities of Amazon Q Developer you can deploy a best practice CloudFront distribution

Welcome to another instalment of Q-Bits , our regular series showcasing cool ways Amazon employees are leveraging Amazon Q Developer. Today, we will explore how Q Developer can help us to construct a CloudFront distribution following best practices within AWS CDK.
Introduction
A common pattern for hosting static websites involves deploying assets into an Amazon S3 bucket, and fronting it with an Amazon CloudFront distribution. This benefits by providing lower latency to your end users and improves the security posture by adding protection at the edge.
For both of these reasons I have recently decided to add a CloudFront distribution in front of a static website I have built. Today I am going to use Amazon Q Developer to help me create this distribution without me needing to spends hours searching through documentation.
Initialising Our Project
To follow best practices I have decided to package my infrastructure through Infrastructure as Code, specifically as CDK . My language of choice is Python, but I always forget which flag I needed to add to initialise a fresh CDK project in Python. I could switch to my browser, but I am actually to use the Q CLI enabling me to provide it an ask and have it work through that step by step.
By running
q chat on my command line I give it the instruction Create a fresh CDK python stack in the current folder and let it get to work.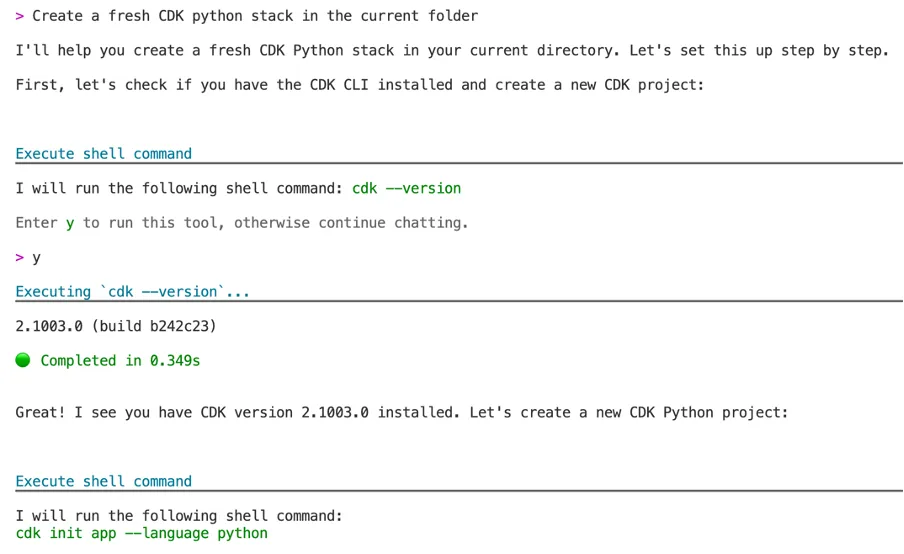
After a couple of minutes it finishes. Not only did this create my CDK project, it also created a virtual environment for me and then installed my dependencies. It even summarises the actions it took and gives me some next steps.
plaintext
Great! I've successfully created a fresh CDK Python stack in your current directory. Here's what was done:1. Created a new CDK Python project with cdk init app --language python2. Set up a Python virtual environment with python3 -m venv .venv3. Activated the virtual environment and installed dependencies with pip install -r requirements.txtThe project structure is now ready:• app.py: The main entry point for your CDK application• q_bits_cloudfront/q_bits_cloudfront_stack.py: Your main stack definition• .venv/: Virtual environment for Python dependencies• Various configuration files like cdk.json, requirements.txt, etc.To start working with this stack, you can:1. Modify the q_bits_cloudfront_stack.py file to define your CloudFront resources2. Run cdk synth to generate CloudFormation templates3. Run cdk deploy to deploy your stack to AWSThe virtual environment is already activated in your current session. For future sessions, remember to activate it with:source .venv/bin/activate
I am now ready to proceed to creating the CloudFront distribution.
Creating The CloudFront Distribution
Opening my IDE of choice (VS Code), I have multiple options for writing code using Q Developer:
- Inline code generation allows me to have code suggested based on comments I write or the method I am writing
- Inline chat allows me to provide Q Developer an ask directly in the editor pane to allow me to keep my flow
- The Q chat panel offers the flexibility to have a fully conversational dialogue with Q
For getting started I will use the Q chat capabilities. After opening it up I ask a question
How can I add a CloudFront Distribution? . 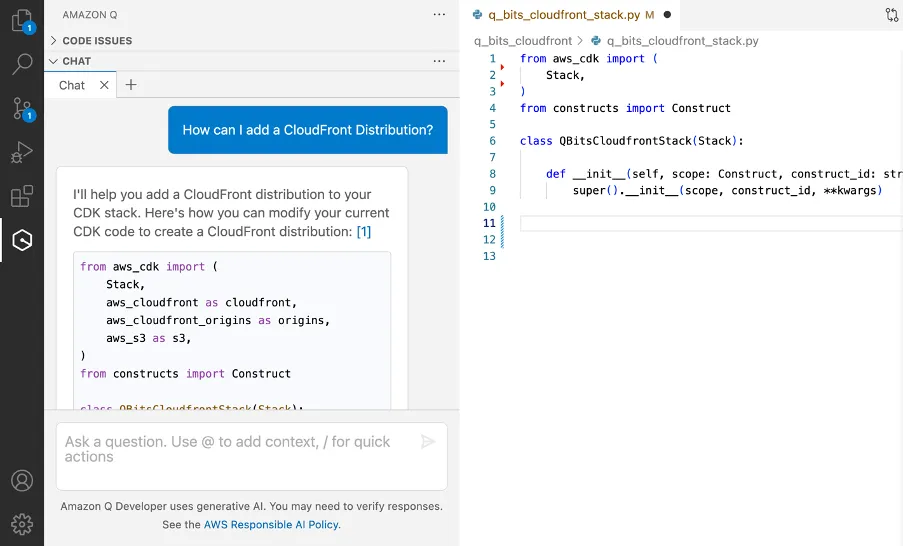
Without even mentioning that this is a CDK stack, Q Developer immediately identifies based on the context of the open file that this is a CDK Project. It returns code my specific use case that I can immediately copy into my editor.
Python
from aws_cdk import (Stack,aws_cloudfront as cloudfront,aws_cloudfront_origins as origins,aws_s3 as s3,)from constructs import Constructclass QBitsCloudfrontStack(Stack):def __init__(self, scope: Construct, construct_id: str, **kwargs) -> None:super().__init__(scope, construct_id, **kwargs)# Create an S3 bucket as the originbucket = s3.Bucket(self, "XXXXXXXXXXXXX")# Create CloudFront distributiondistribution = cloudfront.Distribution(self,"Distribution",default_behavior=cloudfront.BehaviorOptions(origin=origins.S3Origin(bucket),viewer_protocol_policy=cloudfront.ViewerProtocolPolicy.REDIRECT_TO_HTTPS,cache_policy=cloudfront.CachePolicy.CACHING_OPTIMIZED,),default_root_object="index.html",enable_logging=True,http_version=cloudfront.HttpVersion.HTTP2,price_class=cloudfront.PriceClass.PRICE_CLASS_100 # Use only North America and Europe)
It even provides me with recommendations to go further such as being able to add my own custom domain to this CloudFront distribution.
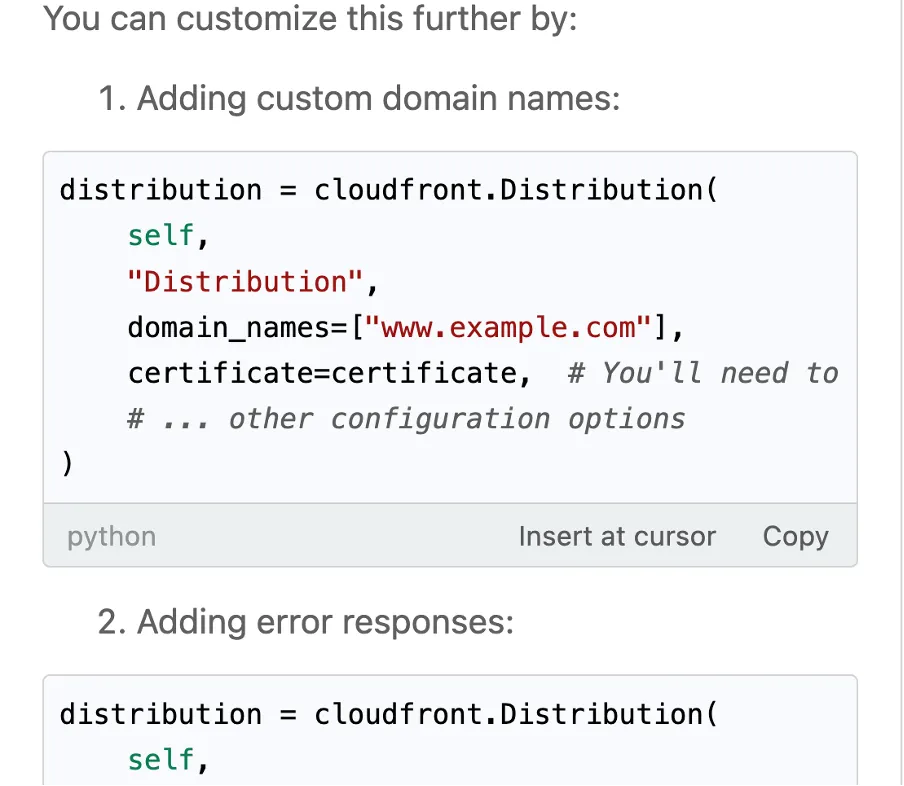
I have noticed one problem though, which is that is that the code provided creates a bucket from scratch. I hadn't called this out when I asked Q Developer to generate the code, so I provide a further ask into the chat
This is great, but I need to reference an S3 bucket I already created. How can I use that instead? .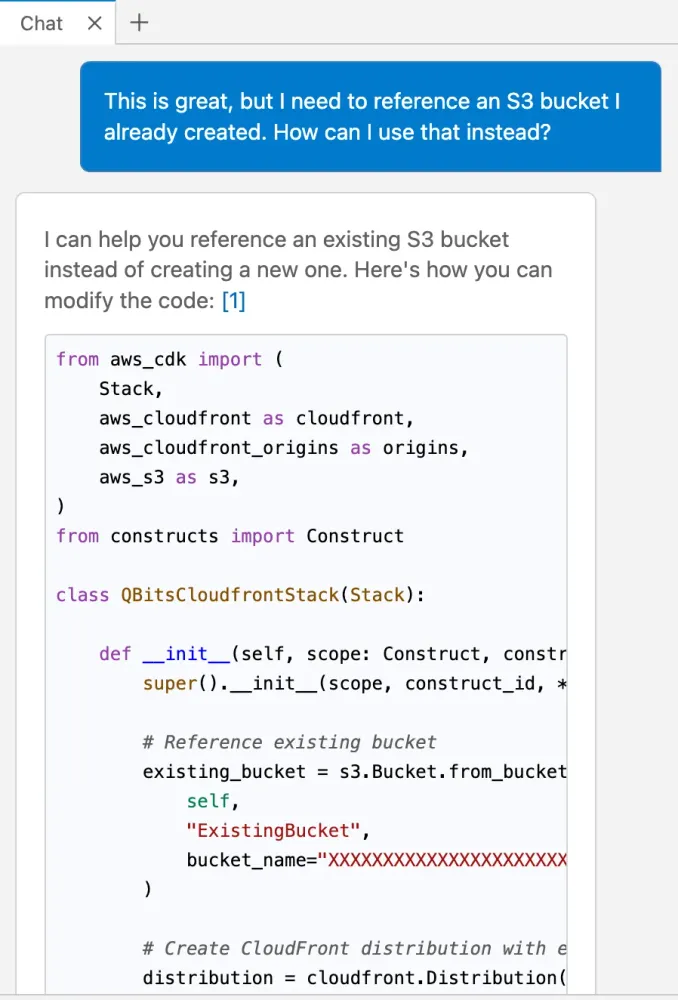
Q has now updated the existing code it recommended to use the
s3.Bucket.from_bucket_name method to import the bucket I had directly into my code. It's ready to now deploy, I return to my command line and ask Q to deploy the CDK stack. It does this by running cdk deploy .Granting CloudFront Access To S3
After my deploy is complete I go to open the URL for my newly created CloudFront distribution but rather than seeing my web project, I am returned with an error from the S3 bucket.
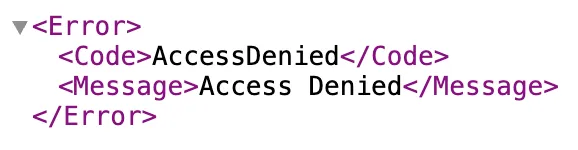
I paste this error into the Q chat panel which provides insights into why this might be occurring. As S3 buckets are private by default CloudFront is unable to return the content. To allow CloudFront to speak directly with it I am advised to create an origin access control attached to the distribution, and then to update my S3 bucket policy .
Again I return to the chat, this time asking
Can you add an origin access control to this CloudFront distribution? Additionally output the distribution ID as output so I can update the bucket policy . It is important to return the distribution ID as the bucket policy will need to be updated manually outside of CDK.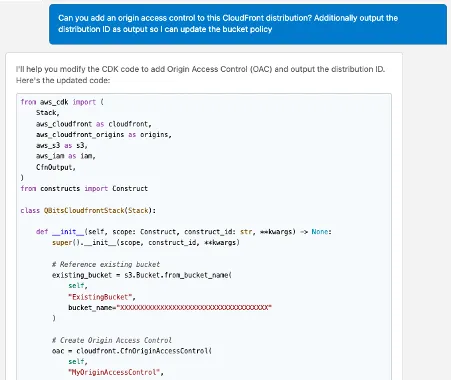
Again that chat updates the source code suggestions, this time adding an origin access control and using CfnOutput to exporting the value of the CloudFront distribution ID.
Python
from aws_cdk import (Stack,aws_cloudfront as cloudfront,aws_cloudfront_origins as origins,aws_s3 as s3,aws_iam as iam,CfnOutput,)from constructs import Constructclass QBitsCloudfrontStack(Stack):def __init__(self, scope: Construct, construct_id: str, **kwargs) -> None:super().__init__(scope, construct_id, **kwargs)# Reference existing bucketexisting_bucket = s3.Bucket.from_bucket_name(self,"ExistingBucket",bucket_name="XXXXXXXXXXXXXXXXXXXXXXXXXXXXXXXXXXXXX")# Create Origin Access Controloac = cloudfront.CfnOriginAccessControl(self,"MyOriginAccessControl",origin_access_control_config=cloudfront.CfnOriginAccessControl.OriginAccessControlConfigProperty(name="MyOAC",origin_access_control_origin_type="s3",signing_behavior="always",signing_protocol="sigv4"))# Create CloudFront distribution with existing bucketdistribution = cloudfront.Distribution(self,"Distribution",default_behavior=cloudfront.BehaviorOptions(origin=origins.S3BucketOrigin(existing_bucket,origin_access_control_id=oac.attr_id,),viewer_protocol_policy=cloudfront.ViewerProtocolPolicy.REDIRECT_TO_HTTPS,cache_policy=cloudfront.CachePolicy.CACHING_OPTIMIZED,),default_root_object="index.html",enable_logging=True,http_version=cloudfront.HttpVersion.HTTP2,price_class=cloudfront.PriceClass.PRICE_CLASS_100)# Output the distribution IDCfnOutput(self,"DistributionId",value=distribution.distribution_id,description="CloudFront Distribution ID")
Now that I have an origin access control in my code, I have the CLI deploy the latest version of my CDK stack. With the stack deployed I ask the
q chat on the CLI to make the bucket policy changes needed by giving it the prompt Update my S3 buckets bucket policy to allow requests from the distribution created in this stack .It reviews the distribution created in the stack to get the distribution ID, identifies the S3 bucket which needs a policy change and creates the correct bucket policy all without me needing to give it the series of steps it needs to follow. Finally it gives me a summary of the actions it took.
plaintext
Great! I've successfully updated your S3 bucket policy to allow requests from the CloudFront distribution created in your stack. Here's what I did:1. Identified your CloudFront distribution ID (XXXXXXXXXXXXXXXX) from the stack outputs2. Created a bucket policy that:• Allows the CloudFront service principal to access your bucket• Restricts access to only your specific CloudFront distribution using the AWS:SourceArn condition• Grants the s3:GetObject permission needed for CloudFront to serve contentThe policy I applied follows AWS best practices by:• Using the service principal approach (recommended for CloudFront OAC)• Including a condition to restrict access to only your specific distribution• Limiting permissions to only what's needed (GetObject)Your CloudFront distribution should now be able to access and serve content from your S3 bucket while maintaining security by preventing direct public access to your bucket objects.
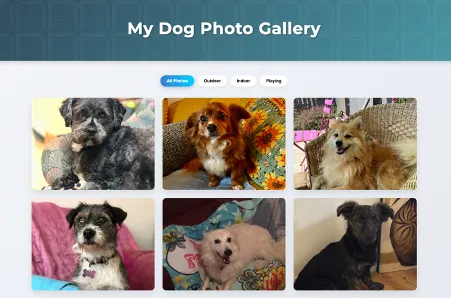
Now that the bucket policy is in place I return to my web browser to check the site loads. I hit refresh and am greeted by the static website I built to as a photo gallery for my dogs.
Adding Authentication
Before I wrap up I need to make one final change, authentication. I only want to share this site with family and friends and so I will need to have a username/password protection before people can access it.
This feels like it might require changes to the CDK code and some custom code alongside that. This time I will use the agent for software development to do all of this for me. I activate the agent by typing
/dev into the chat panel and give it a task to work on. Similar to chat that is passed as a prompt. The task is Add password protection to the CloudFront distribution .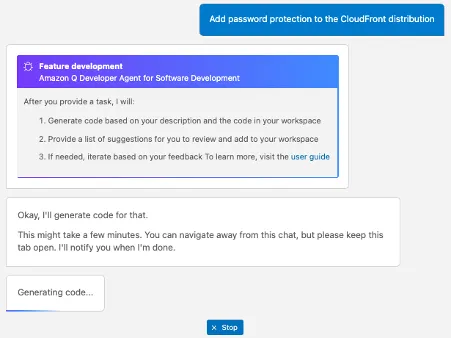
The agent takes my task and immediately begins to come up with a plan for how it will proceed. As it works through this plan it will explore my workspace, open relevant files and make changes. I am able to see in real-time the changes and actions it is taking. I can see that it is looking to use Lambda@Edge to hook into one of the CloudFront events and intercept the logic, specifically adding basic authentication.
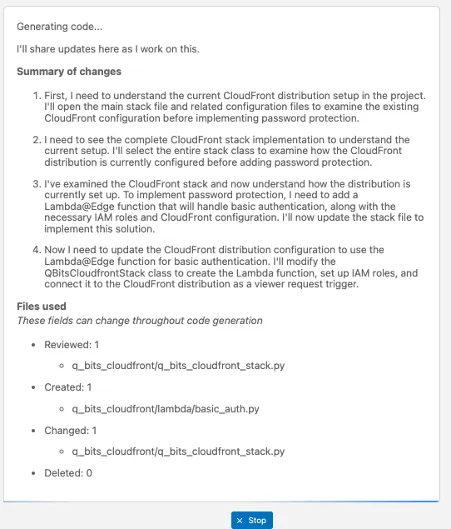
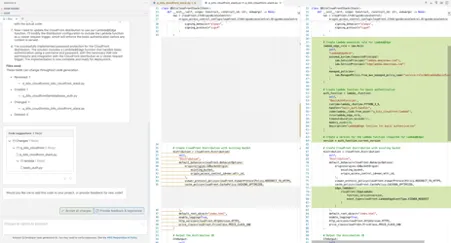
Once the agent is completed I am presented with a the suggested code changes that were made, I am able to review this directly in my IDE. I review it just like I would my peers work, once I am happy I accept the changes which are then merged into my current workspace.
Finally I ask
q chat on the CLI to deploy my CDK code one last time. Once it lets me know that it has completed I return to the browser and refresh to see that I am now asked to provide a username and password to get access to the site.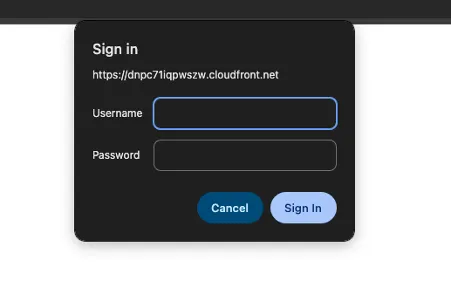
Conclusion
In this article we saw how through a combination of the CLI, Q chat panel and the agent for software development I was able to create a CloudFront distribution securely set up for my static website.
I could now continue to use other features of Q Developer to further improve the code such as:
- Generating unit tests for my Lambda function.
- Running a code review in my IDE to identify any security vulnerabilities or bad practices.
- Creating a README for my CDK project, including generating an architecture diagram from the CDK.
If you are interested in exploring Q Developer for yourself, please check out the getting started documentation. It includes a free tier to help you get started.
Enjoyed reading this content? Let the author know!
Your likes, comments, shares, and saves help creators reach more builders.

Loading recommendations
Loading article