
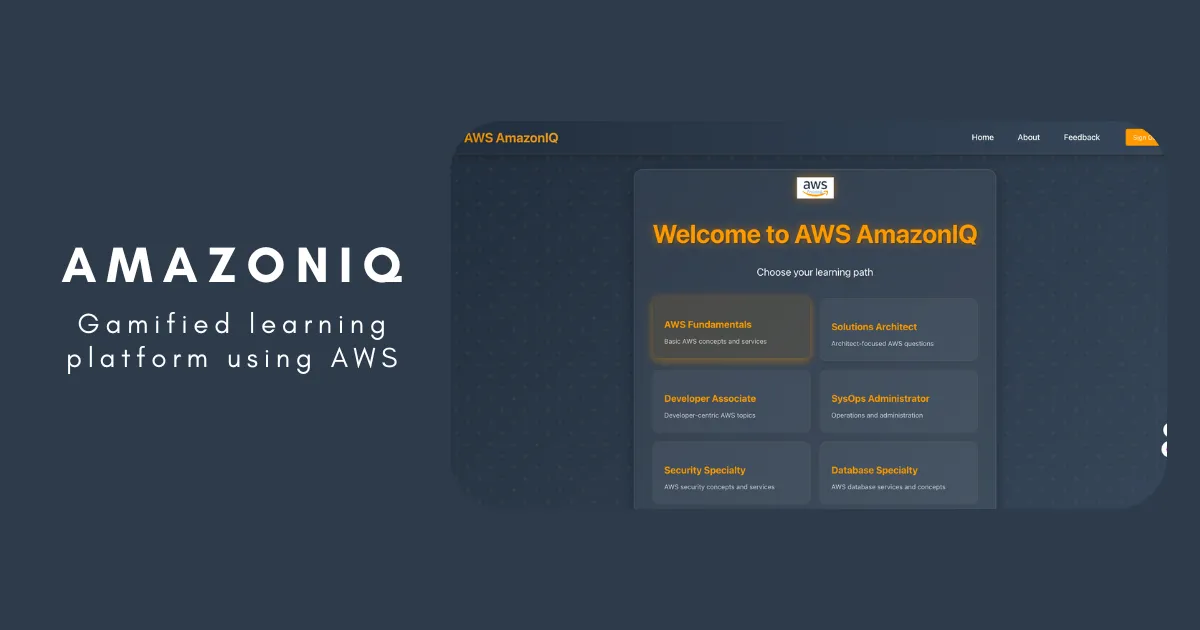
AmazonIQ - StepbyStep guide
AmazonIQ is a gamified AWS certification quiz app with interactive modes, real-time feedback, AWS Cognito authentication, and CI/CD via Amplify.


Building AmazonIQ: Step-by-Step Guide
Pre-requisites:
- Install Node.js.
- Set up an AWS account and create a IAM user
Overview of Steps:
- Set up the environment.
- Create a React app.
- Add authentication with Cognito.
- Add functionality and styling.
- Push local code to GitHub.
- Host the frontend in Amplify via GitHub (for CI/CD).
- Test your application.
Step 1: Set Up the Environment
Run the following commands in your terminal:
Command 1: Install the AWS Amplify CLI globally to configure and manage AWS services from the command line.
npm install -g @aws-amplify/cliCommand 2: Configure Amplify by signing in to your AWS account. Use an IAM user instead of the root user for security.
amplify configureRefer to the Amplify documentation if needed.
Step 2: Create the React App
Command 3: Create a React app and navigate to the app directory.
npx create-react-app <name-of-your-app>
cd <name-of-your-app>Command 4: Initialize a new Amplify project to set up necessary configuration files and connect the app to AWS backend services.
amplify initStep 3: Add Authentication with Cognito
Command 5: Add authentication to your app. When prompted, choose the default configuration and set up email-based user sign-in.
amplify add authCommand 6: Push the configuration to AWS.
amplify pushStep 4: Add Functionality and Styling
AmazonIQ is a gamified quiz platform that helps students prepare for AWS certifications in an engaging way. Key features include:
- Interactive quiz sessions tailored to specific AWS certification exams.
- Single-player and double-player game modes.
- Gamified elements like scoring and real-time feedback.
- Dynamic question shuffling and unlimited play sessions.
Command 7: Install AWS Amplify's core library and pre-built React UI components for seamless AWS integration.
npm install aws-amplify @aws-amplify/ui-reactStep 5: Push Local Code to GitHub
Step 1: Create a new public repository in GitHub.
Commands: Run the following commands to push your code to the repository:
git initgit add .git commit -m "Initial Commit"git branch -M maingit remote add origin <repository-url>git push -u origin mainStep 6: Host the Frontend in Amplify via GitHub (CI/CD)
- Go to Amplify and select Front-End Environments.
- Click GitHub and connect your branch.
- Select the repository and choose the deployed backend environment (e.g., dev environment).
- Create an IAM role named AdministratorAccess-Amplify in the AWS IAM Console.
- Assign the role, click Next, and save the configuration to deploy.
This setup automates CI/CD and refreshes the hosted app whenever new functionality is added.
Step 7: Test Your Application
Command 8: Start your application locally to test its functionality.
npm startYour application is now live and ready to use!
Access the deployed app here: AmazonIQ .
Key Contributions of Amazon Q Developer
1. Streamlining Development Tasks:
- Created consistent styling for multiple components (e.g.,
Homepage.css,About.css,Feedback.css). - Converted README into a structured JSON format for questions and answers.
- Developed well-structured React components with proper state management.
- Simplified updates like adding buttons, modifying routes, and improving CSS.
2. Problem-Solving:
- Fixed score calculation issues in the SinglePlayerQuiz.
- Resolved routing hierarchy and state management challenges.
- Enhanced user feedback mechanisms for better interactivity.
3. Ensuring Code Quality:
- Generated well-documented code.
- Implemented error handling to prevent runtime issues.
- Followed React best practices for maintainable code.
4. Feature Enhancements:
- Added interactive elements for engaging gameplay.
- Introduced responsive design for better usability on multiple devices.
- Integrated smooth transitions and animations for improved aesthetics.
5. Improving App Architecture:
- Structured components logically for maintainability.
- Used React Router for efficient navigation.
- Organized CSS with a modular approach.
6. Enhancing User Experience:
- Improved navigation flow for intuitive use.
- Added loading states for smoother interactions.
- Maintained consistent styling across the application.
7. Boosting Development Efficiency:
- Reduced development time by providing complete code solutions.
- Debugged issues quickly and effectively.
8. Modern Development Practices:
- Leveraged React hooks for state and lifecycle management.
- Utilized CSS animations for dynamic visuals.
- Incorporated responsive design principles for cross-device compatibility.
9. Educational Value:
- Explained code changes for better understanding.
- Offered alternative approaches to problem-solving.
- Included documentation for easy reference and learning.
Enjoyed reading this content? Let the author know!
Your likes, comments, shares, and saves help creators reach more builders.

Loading recommendations
Loading article