Many people use Amazon RDS for MySQL for its ease of deployment and high availability, however its performance directly depends on the quality of the SQL statements we write to query it. Writing performant SQL might seem like magic: from indexes, to functions and subquery expressions, till data cardinality, there are a lot of factors into play when it comes to writing a well tuned SQL statement. This blog showcases how, using the AI-driven insights provided by EverSQL by Aiven, I was able to identify a slow performing query and automatically receive optimisation suggestions which made it 23x faster, all for free!
A fully integrated experience is now available for PostgreSQL® in Aiven AI Database Optimizer check it out for FREE
If you are interested in getting the best performance from your Amazon RDS for MySQL database, read the blog! What you will learn
How to enable Amazon RDS for MySQL slow queries log, a feature which tracks non-performant SQL statements in your database
How to connect the EverSQL sensor to an Amazon RDS for MySQL instance and start receiving performance insights and optimization suggestions
How to optimize a query by adding indexes and rewriting the SQL statement
Create an Amazon RDS for MySQL service
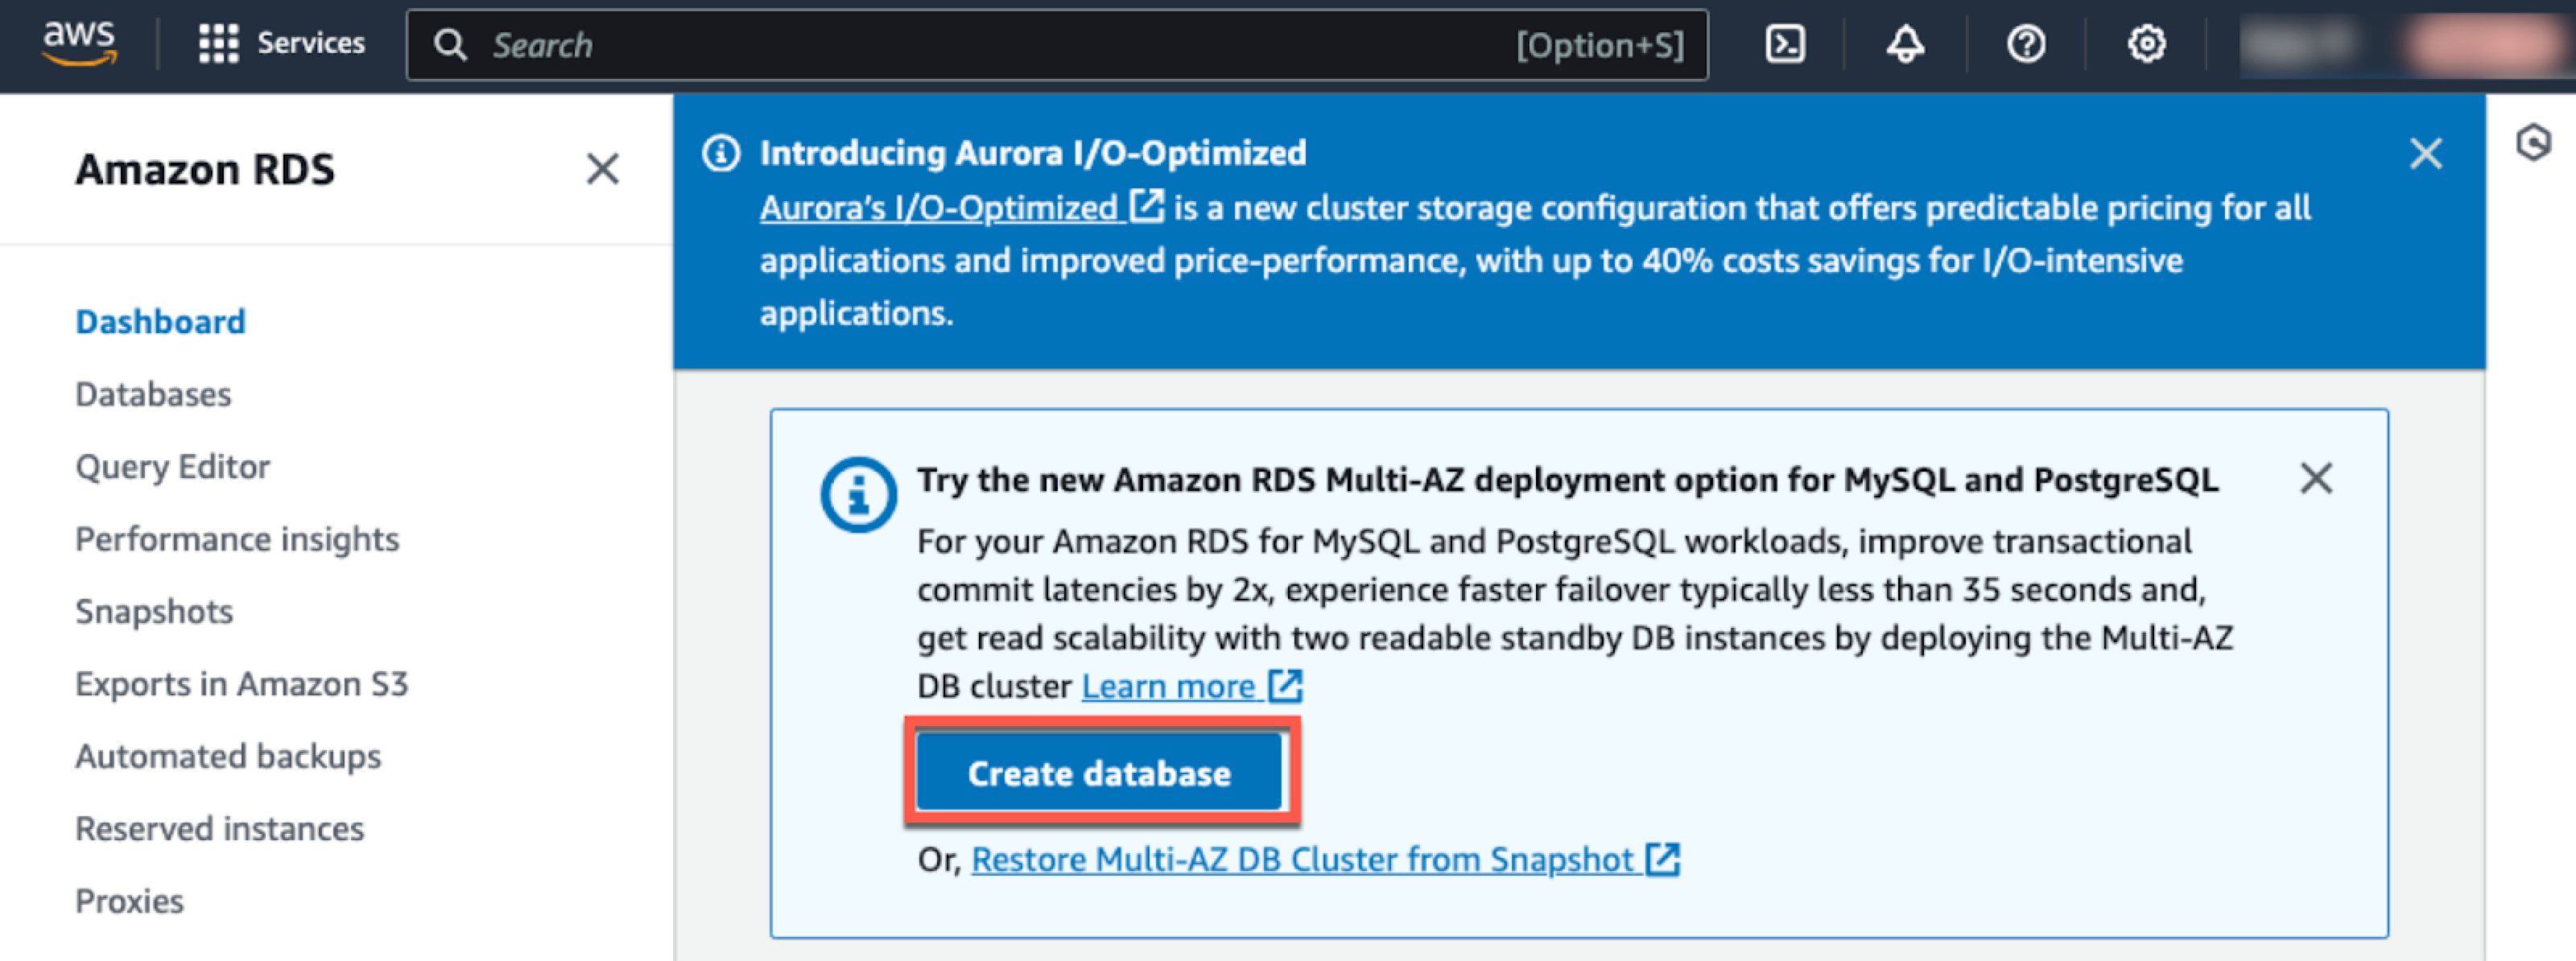
If you don’t have an Amazon RDS for MySQL service up & running already you can create one by navigating to the RDS page in the AWS console and click on Create Database.
In the Engine options section select MySQL and the 8.0.33 as version
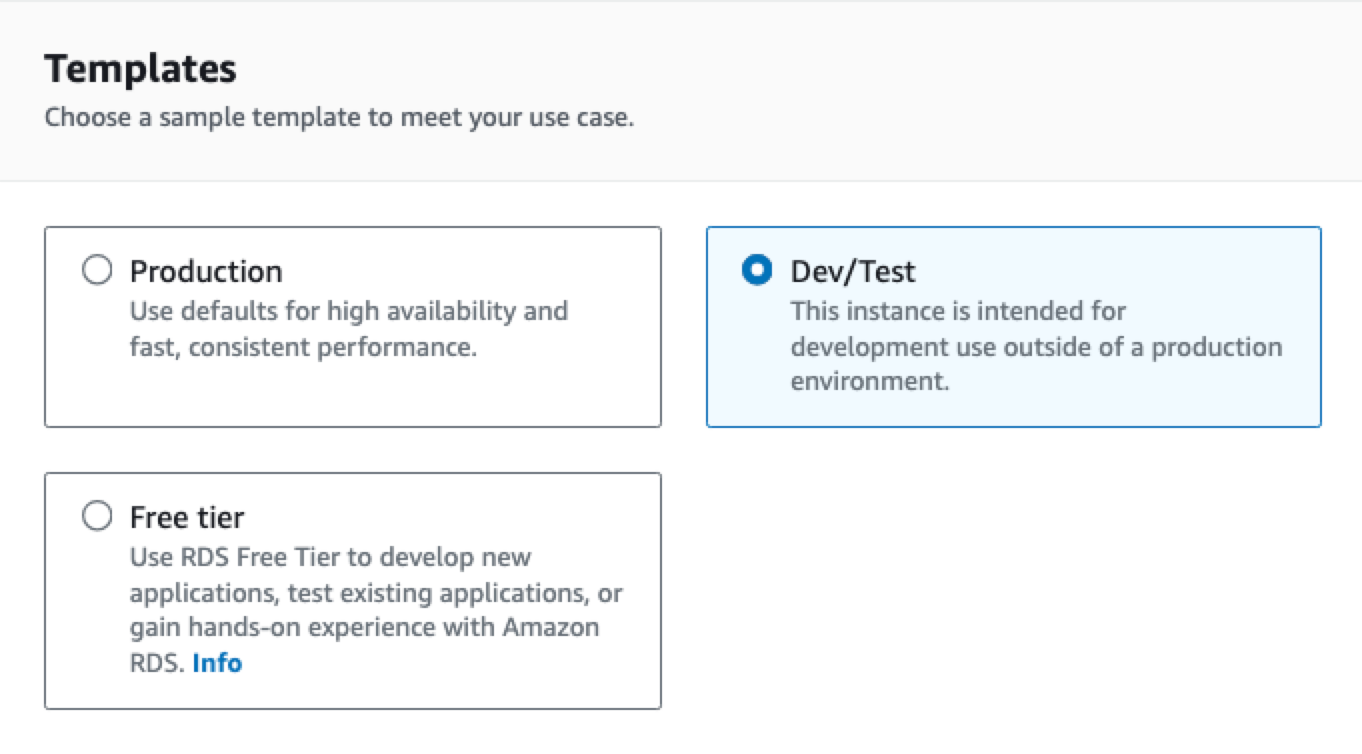
Select the Dev/Test Template that is sufficient for our example
In the Settings section leave database-1 as DB instance identifier and set a Master password
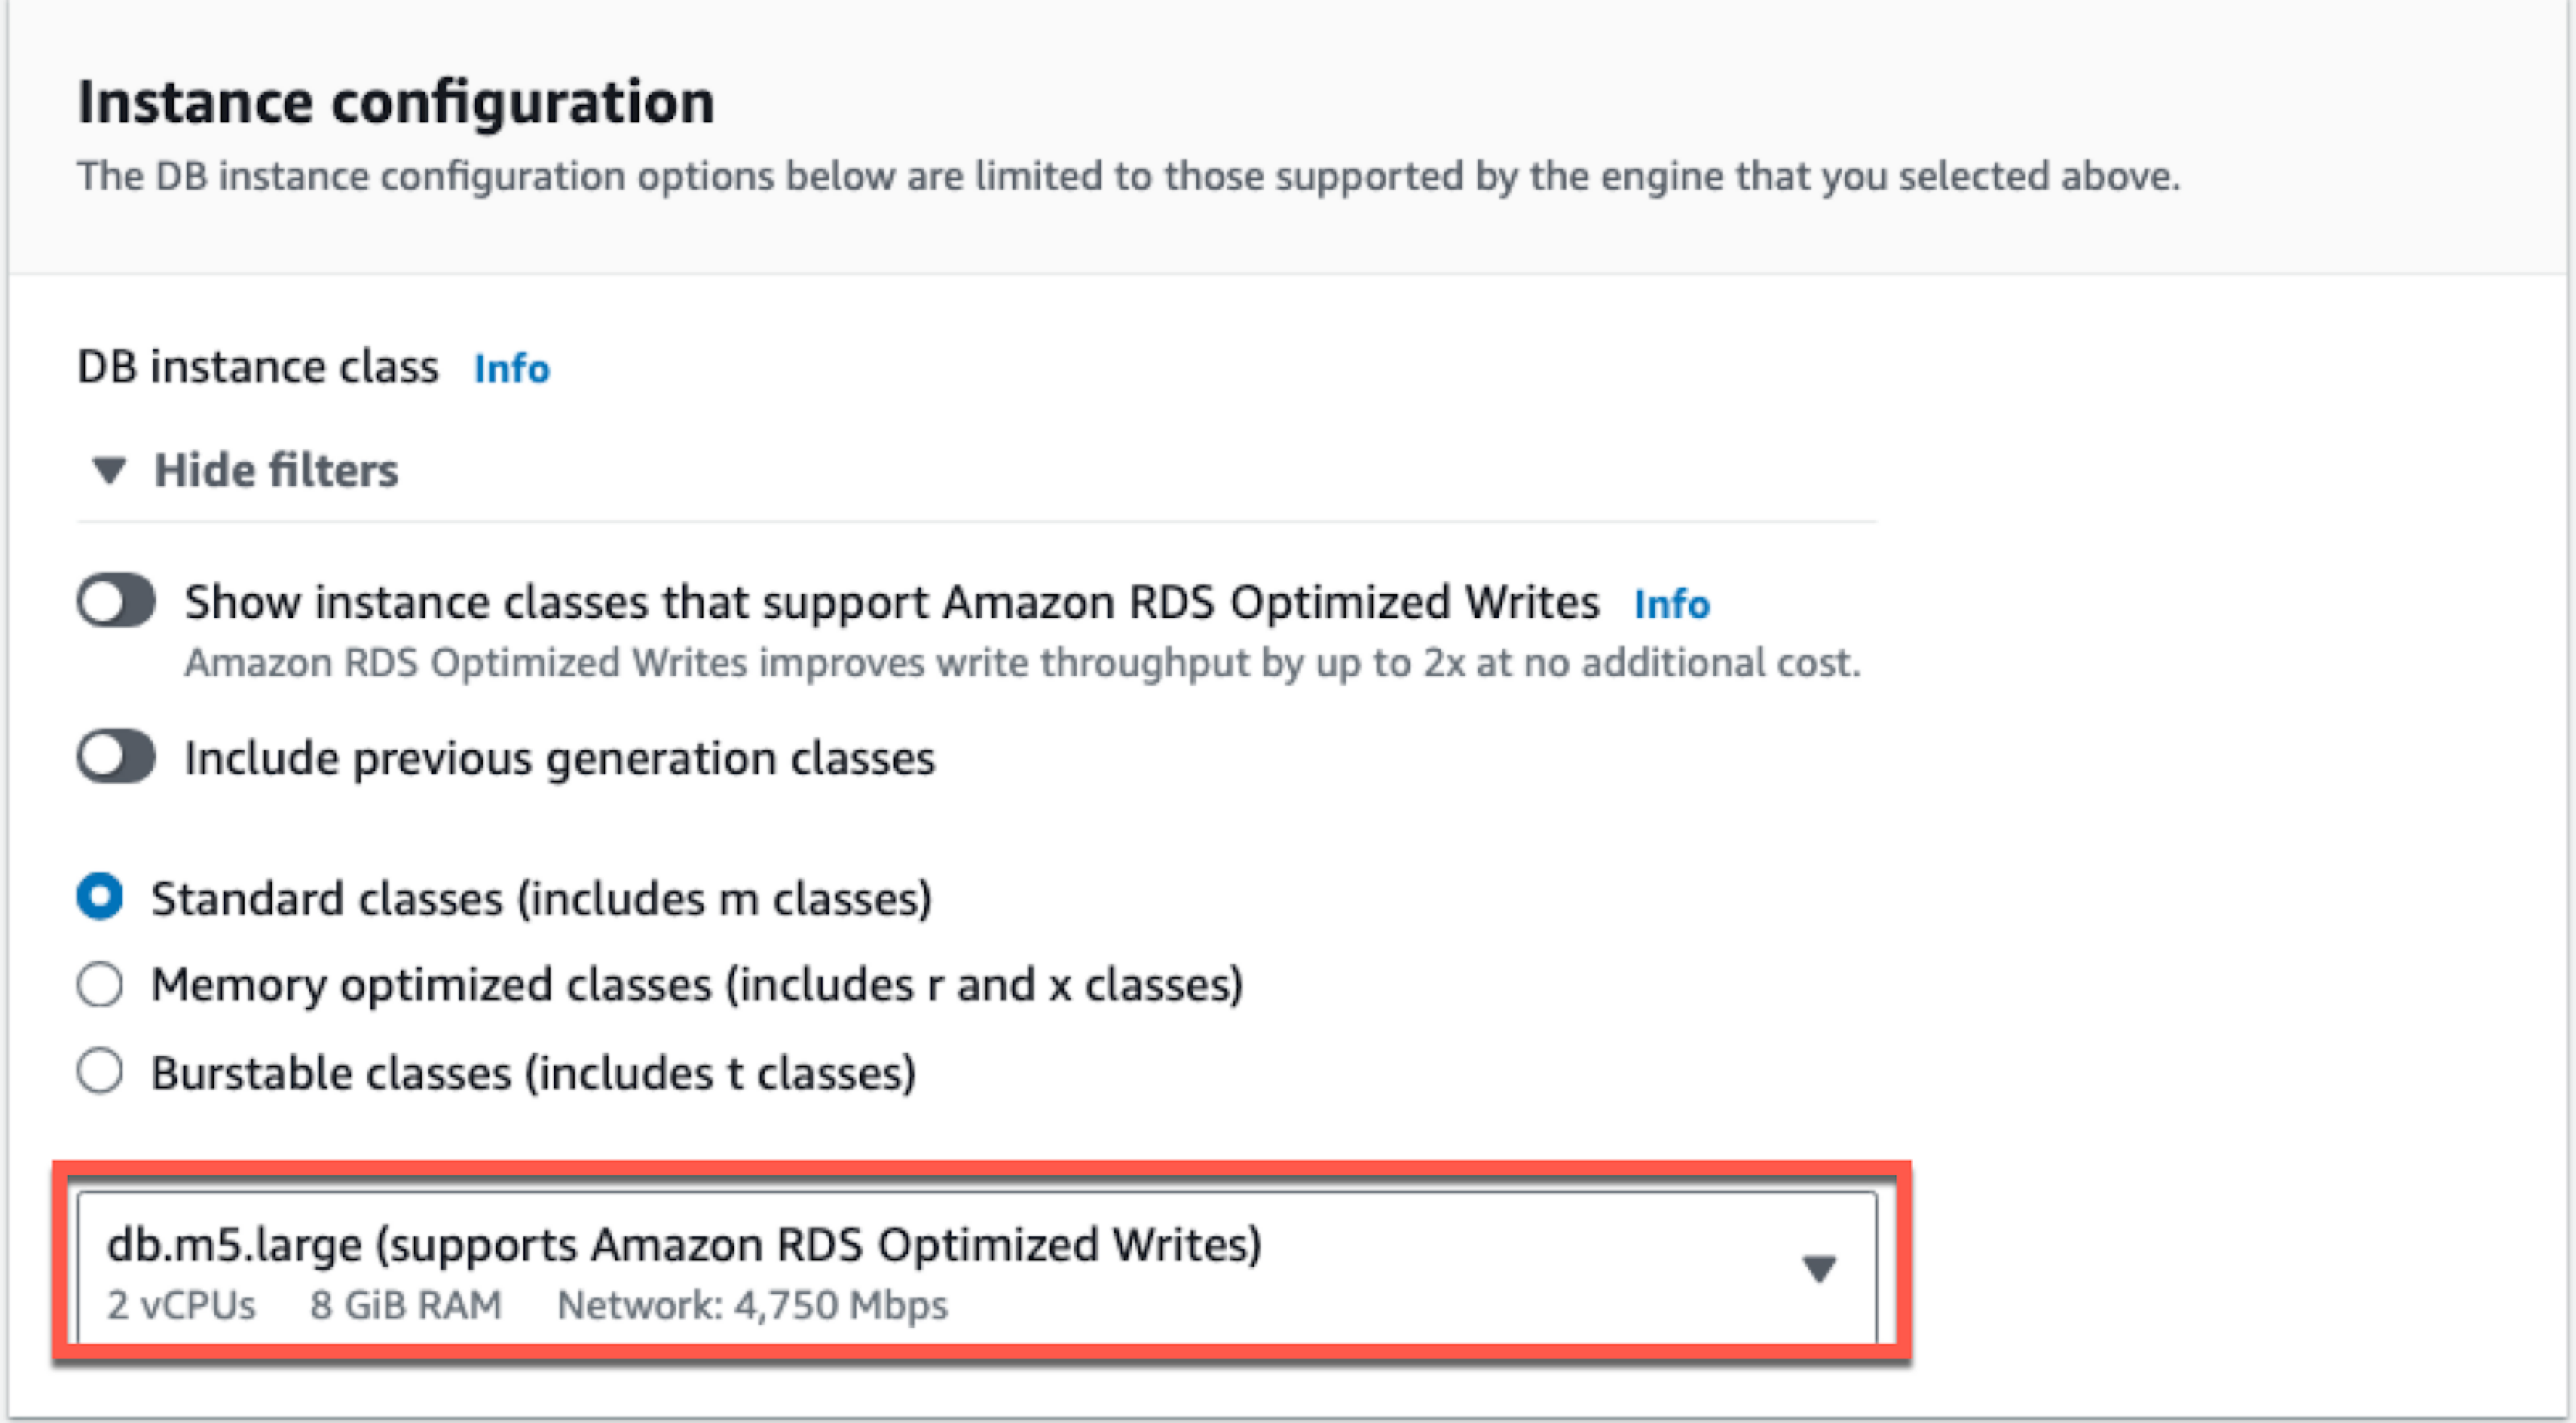
In the Instance configuration section select db.m5.large, the minimal instance size is sufficient
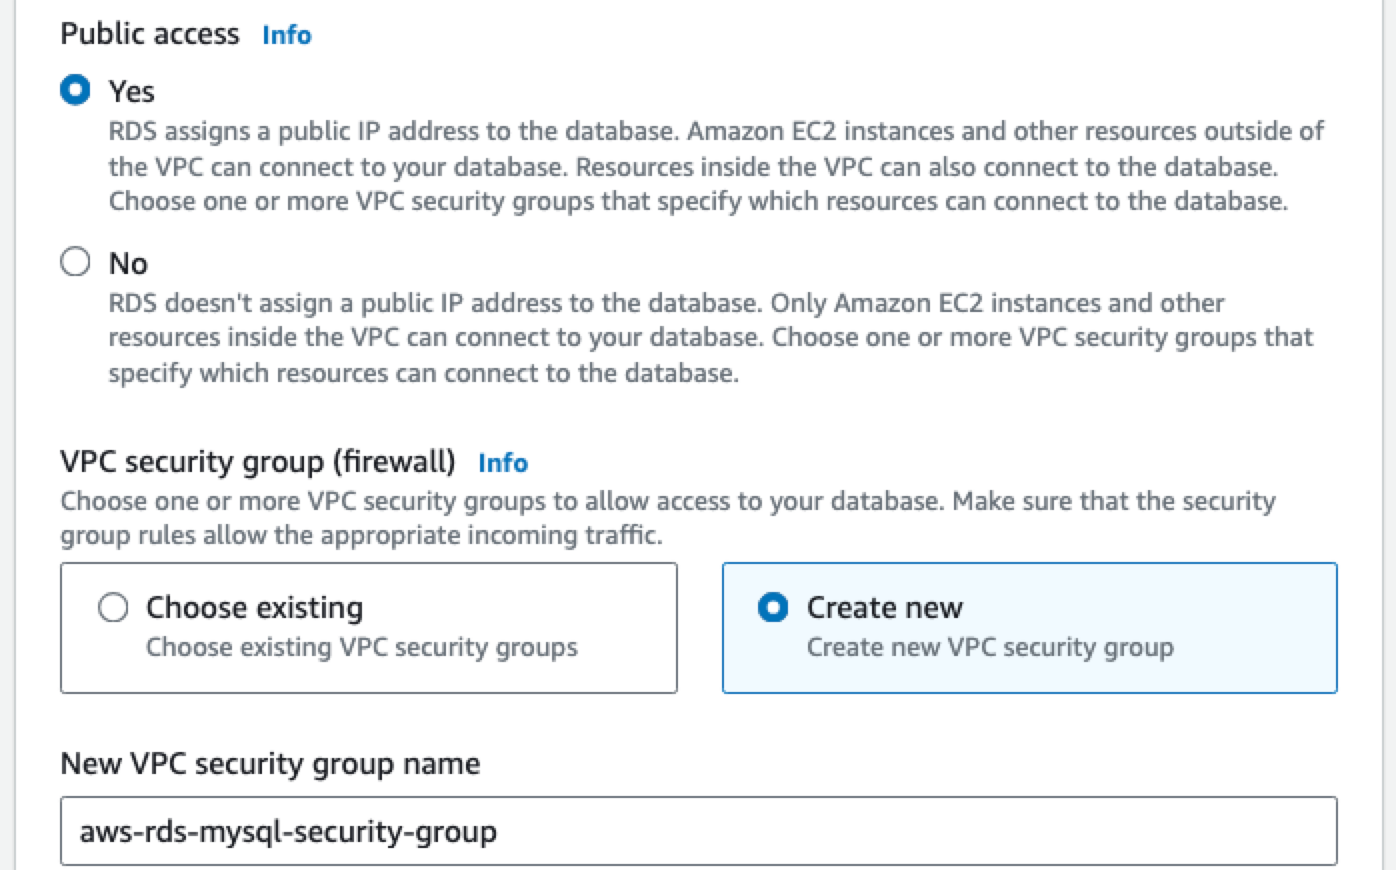
In the Connectivity section, enable Public access
Enabling Public Access can expose the database to the internet. It's suitable for demo purposes, but for production systems, consider enabling VPC access only from dedicated hosts.
In the VPC security group (firewall) section select Create new to create a new VPC security group and enter aws-rds-mysql-security-group as name
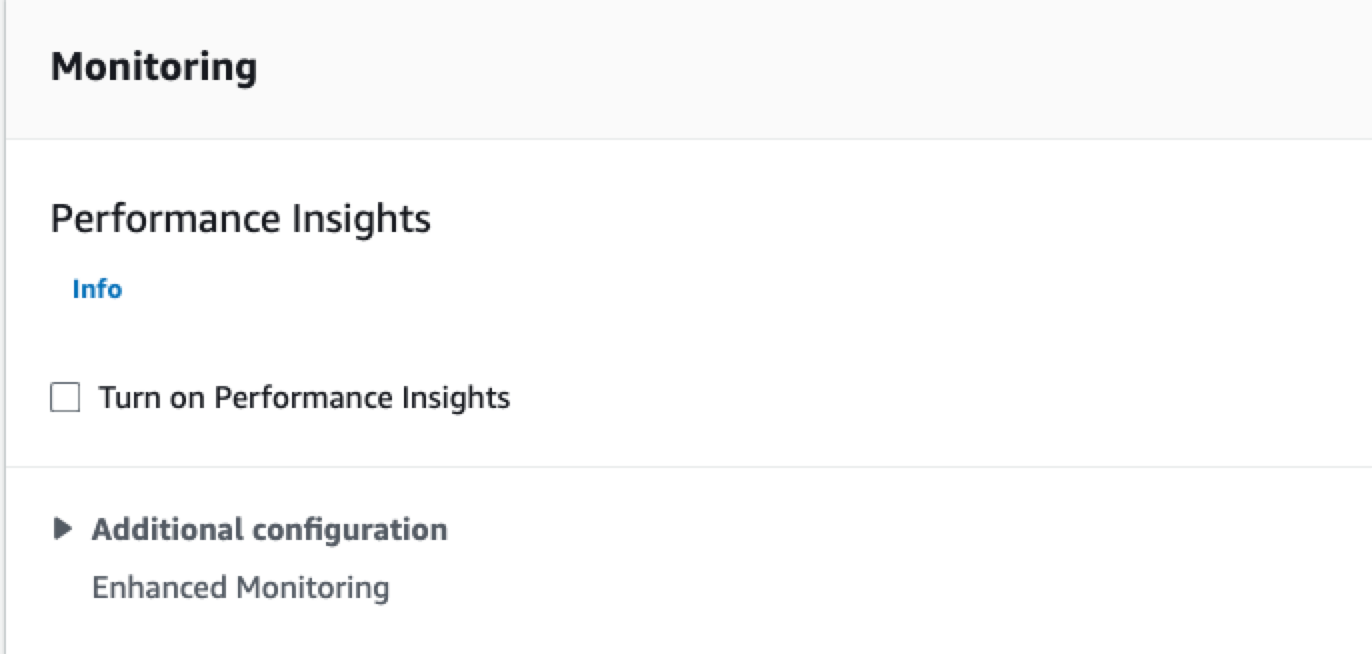
In the Monitoring section disable Performance Insights.
Amazon RDS Performance Insight allows you to monitor RDS databases, review changes in behaviour and pinpoint problematic queries. However, the optimisation of these queries is still up to us. The AI-driven solution by EverSQL shown in this blog provides not only visibility on performance alterations but also index and query rewrite suggestions.
Click Create database The above command starts the creation of the Amazon RDS for MySQL database.
Enable MySQL slow query log
In order to monitor the MySQL database, we need to enable the slow query log. The slow query log captures every statement taking more than the specified long_query_time seconds to execute. To enable the slow query log we need to:
Create a new parameter group
Customize the parameters to enable slow query log
Associate the parameter group with the Amazon RDS for MySQL database
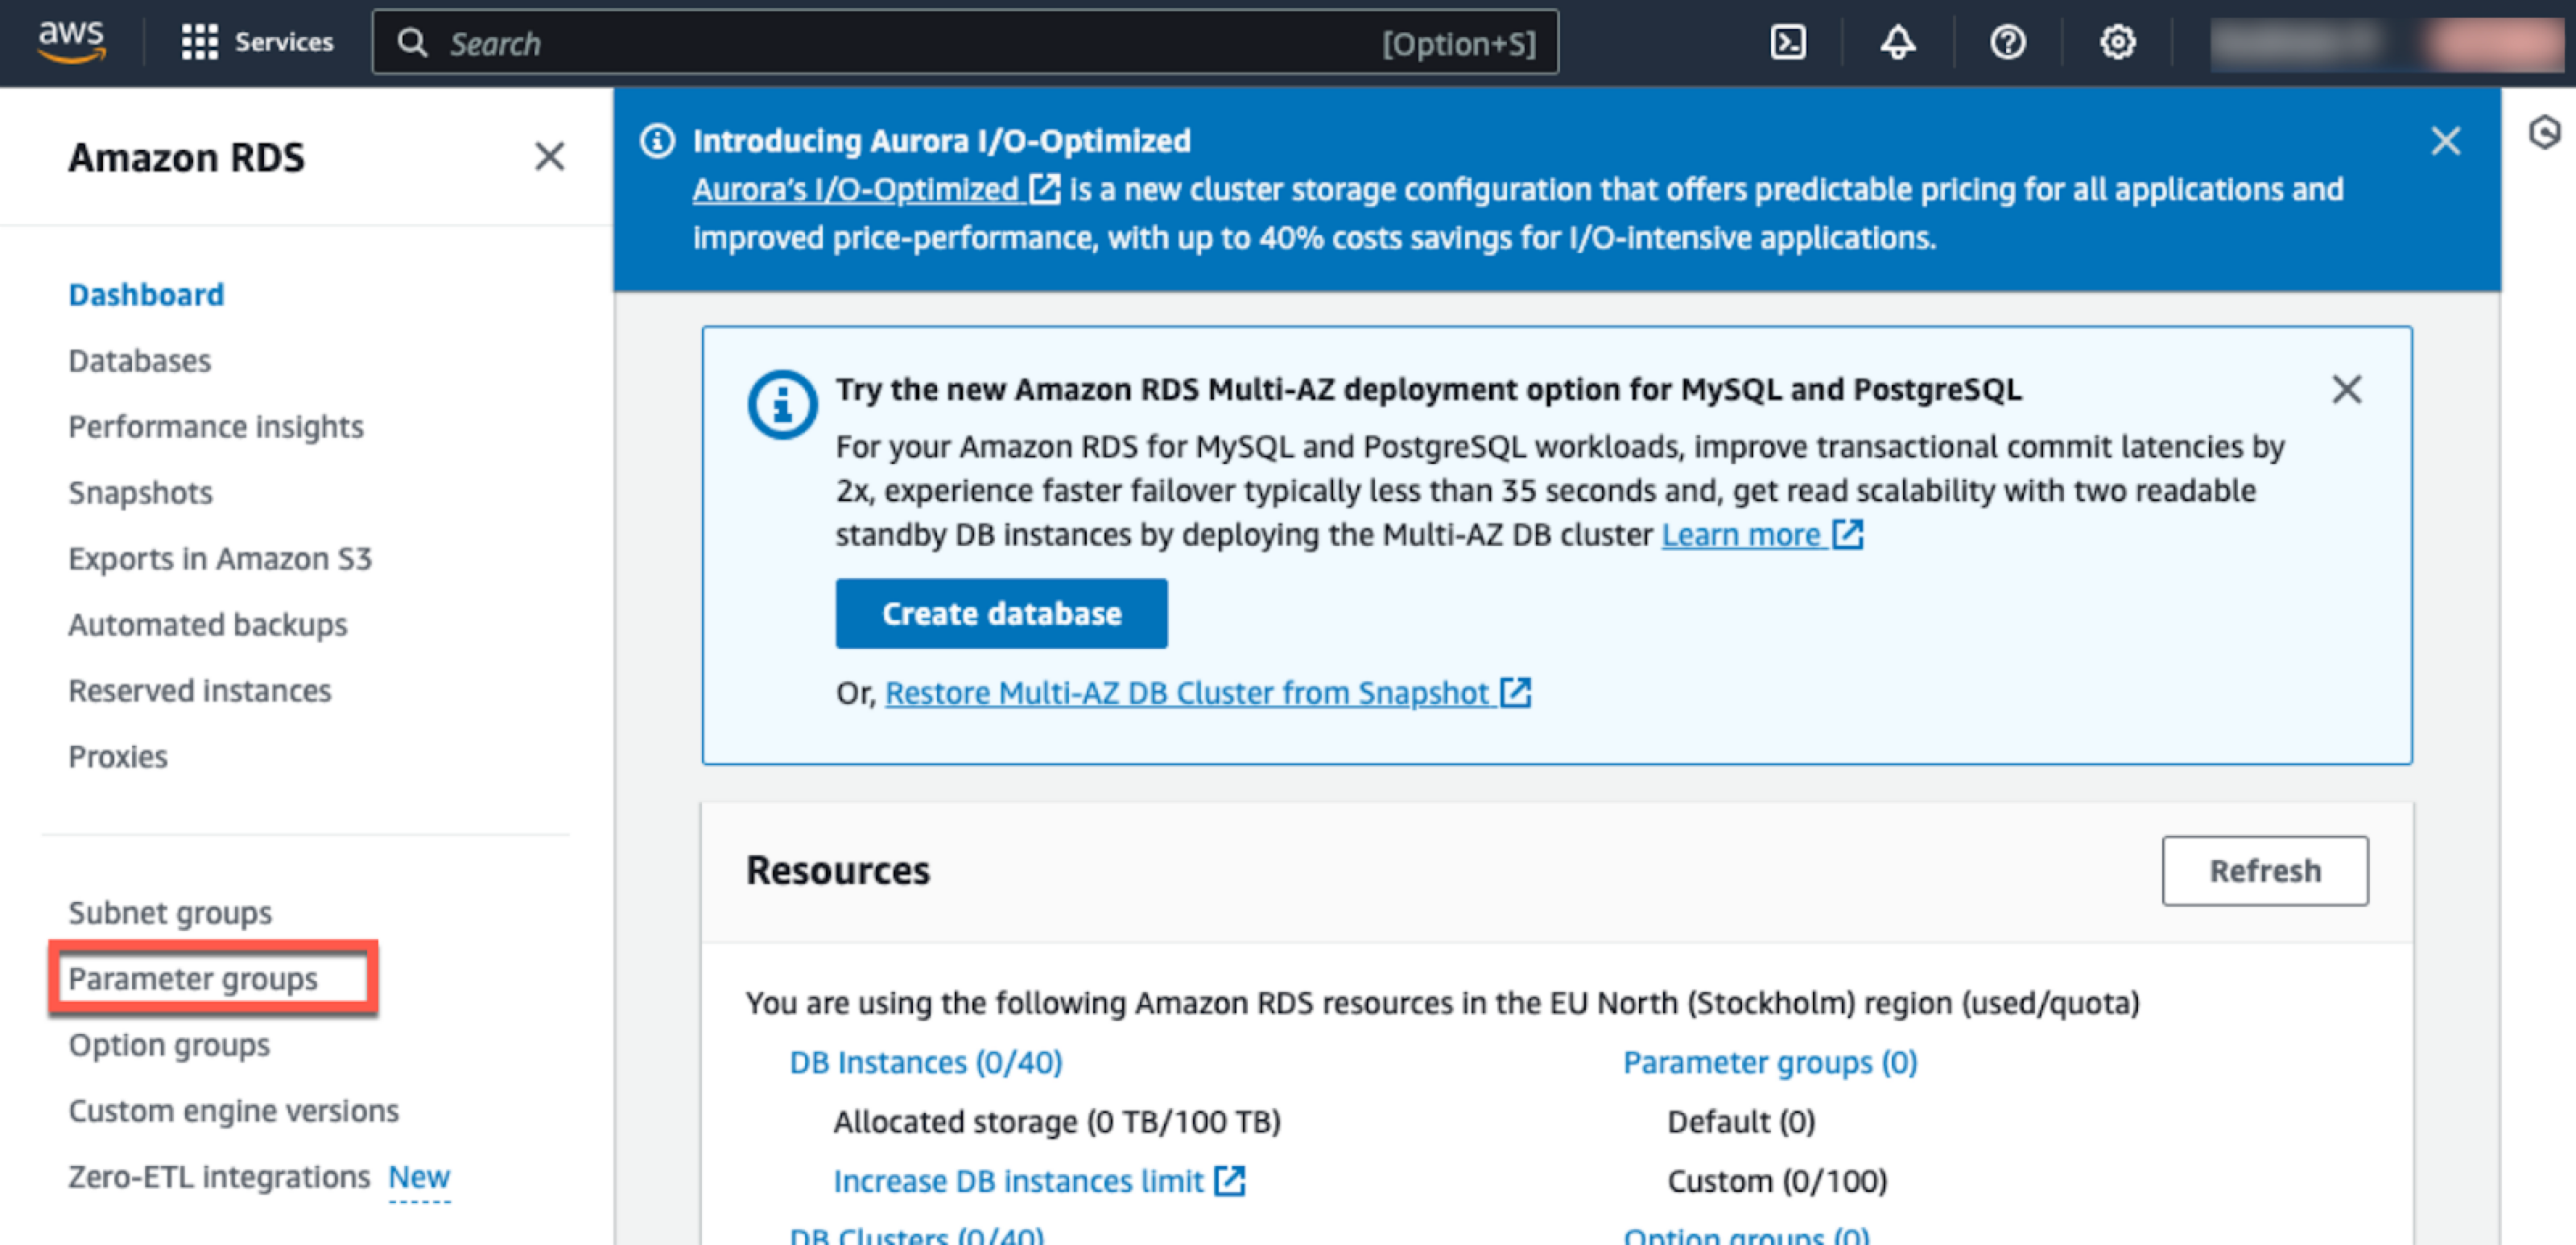
Create a new Parameter group
A Parameter group allows us to define a set of custom parameters to associate to one or more database instances. To create a new parameter group:
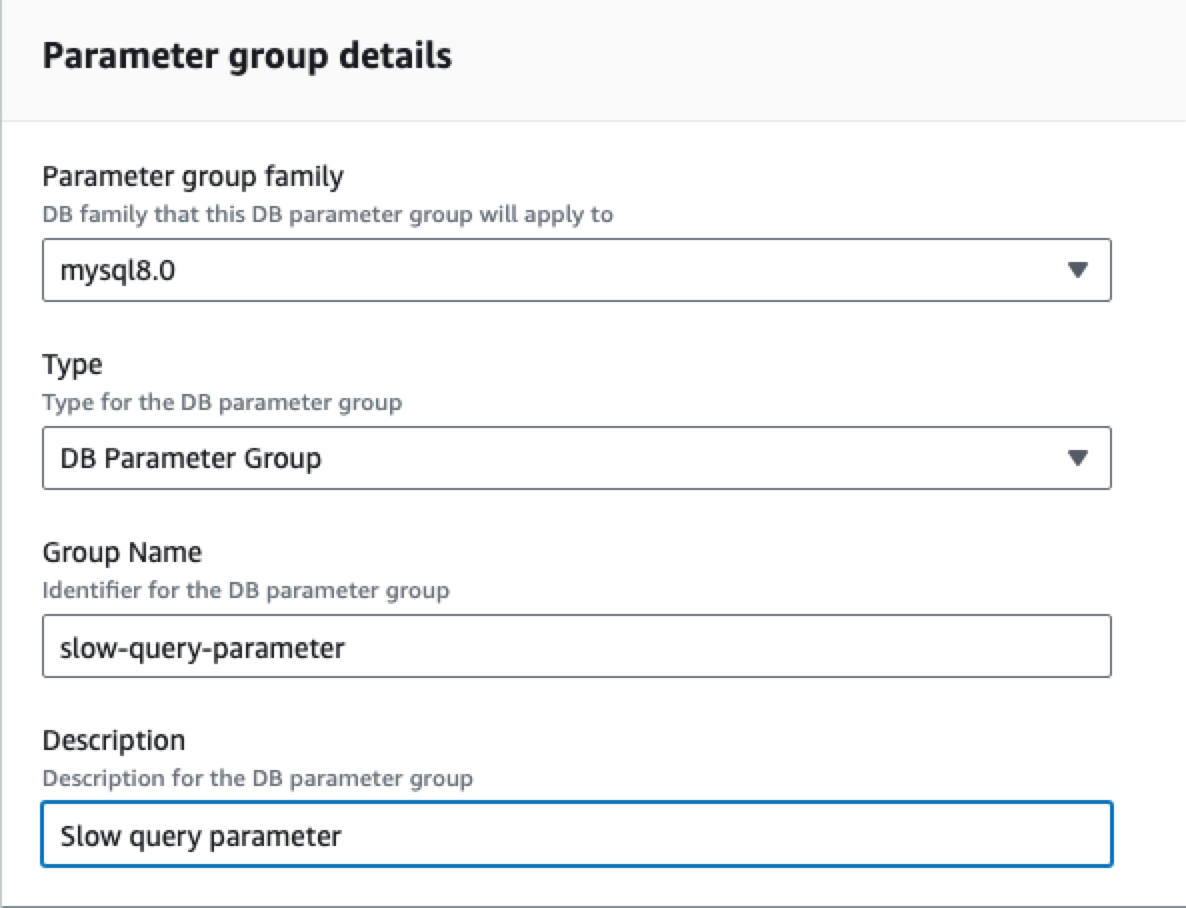
In the Parameter group family section select mysql8.0
In the Type section select DB Parameter Group
Write slow-query-parameter as Group Name
Write Slow query parameter as Description
Click on Create
Customize the parameters in the Parameter group
Once created the parameter group, we can customize the parameters within it. We should now see the newly created Parameter group called slow-query-parameter. Click on it to edit.
Click on Edit
Set the following parameters:
general_log = 1 to enable logging
slow_query_log = 1 to enable slow query logging
long_query_time = 1 to log every query taking more than 1 second (you can change the parameter as needed)
log_output =FILE to write the slow query log in a dedicated table queryable by SQL
Click on Save Changes
Associate the Parameter Group to Amazon RDS for MySQL
The last step in the setup is to associate the parameter group with the Amazon RDS for MySQL instance created. To do so:
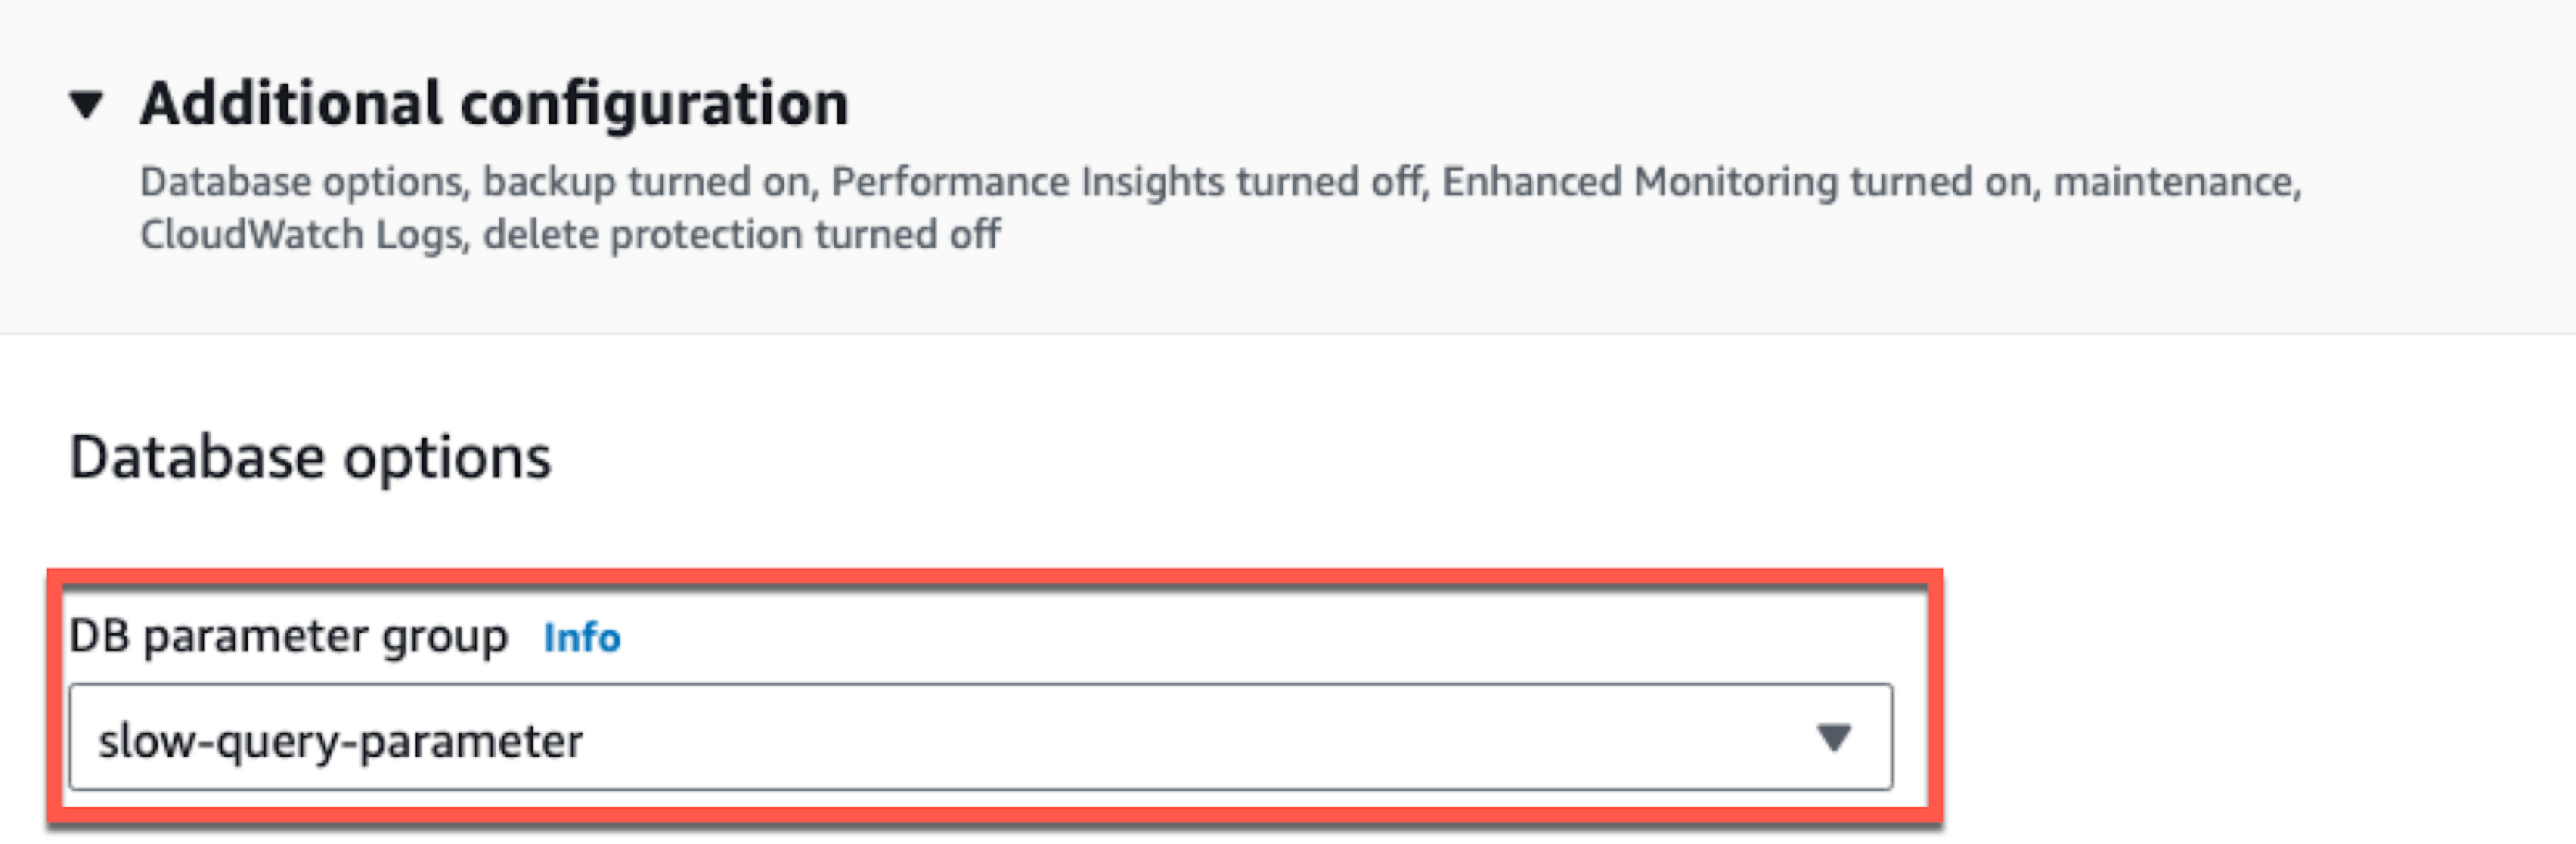
In the Additional configuration section, select slow-query-parameter as the DB parameter group
Click on Continue
The Summary of modifications showcases the change in the DB parameter group, select the Apply immediately to restart the database and apply the changes.
Click on Modify DB instance Alert: After clicking on Modify DB instance, the database reboots immediately to make the necessary modifications to the parameters. After a few minutes the database will be up and running again and we’ll be able to connect to it.
Create an EverSQL account
As mentioned at the beginning, we’ll use EverSQL for our optimization. EverSQL monitors the database, and gives us AI-driven performance insights and optimization suggestions. You can create a FREE EverSQL account by:
Select Native SQL. We are assuming we can directly change the SQL queries. If you are using an ORM to manage the database, please select the dedicated option
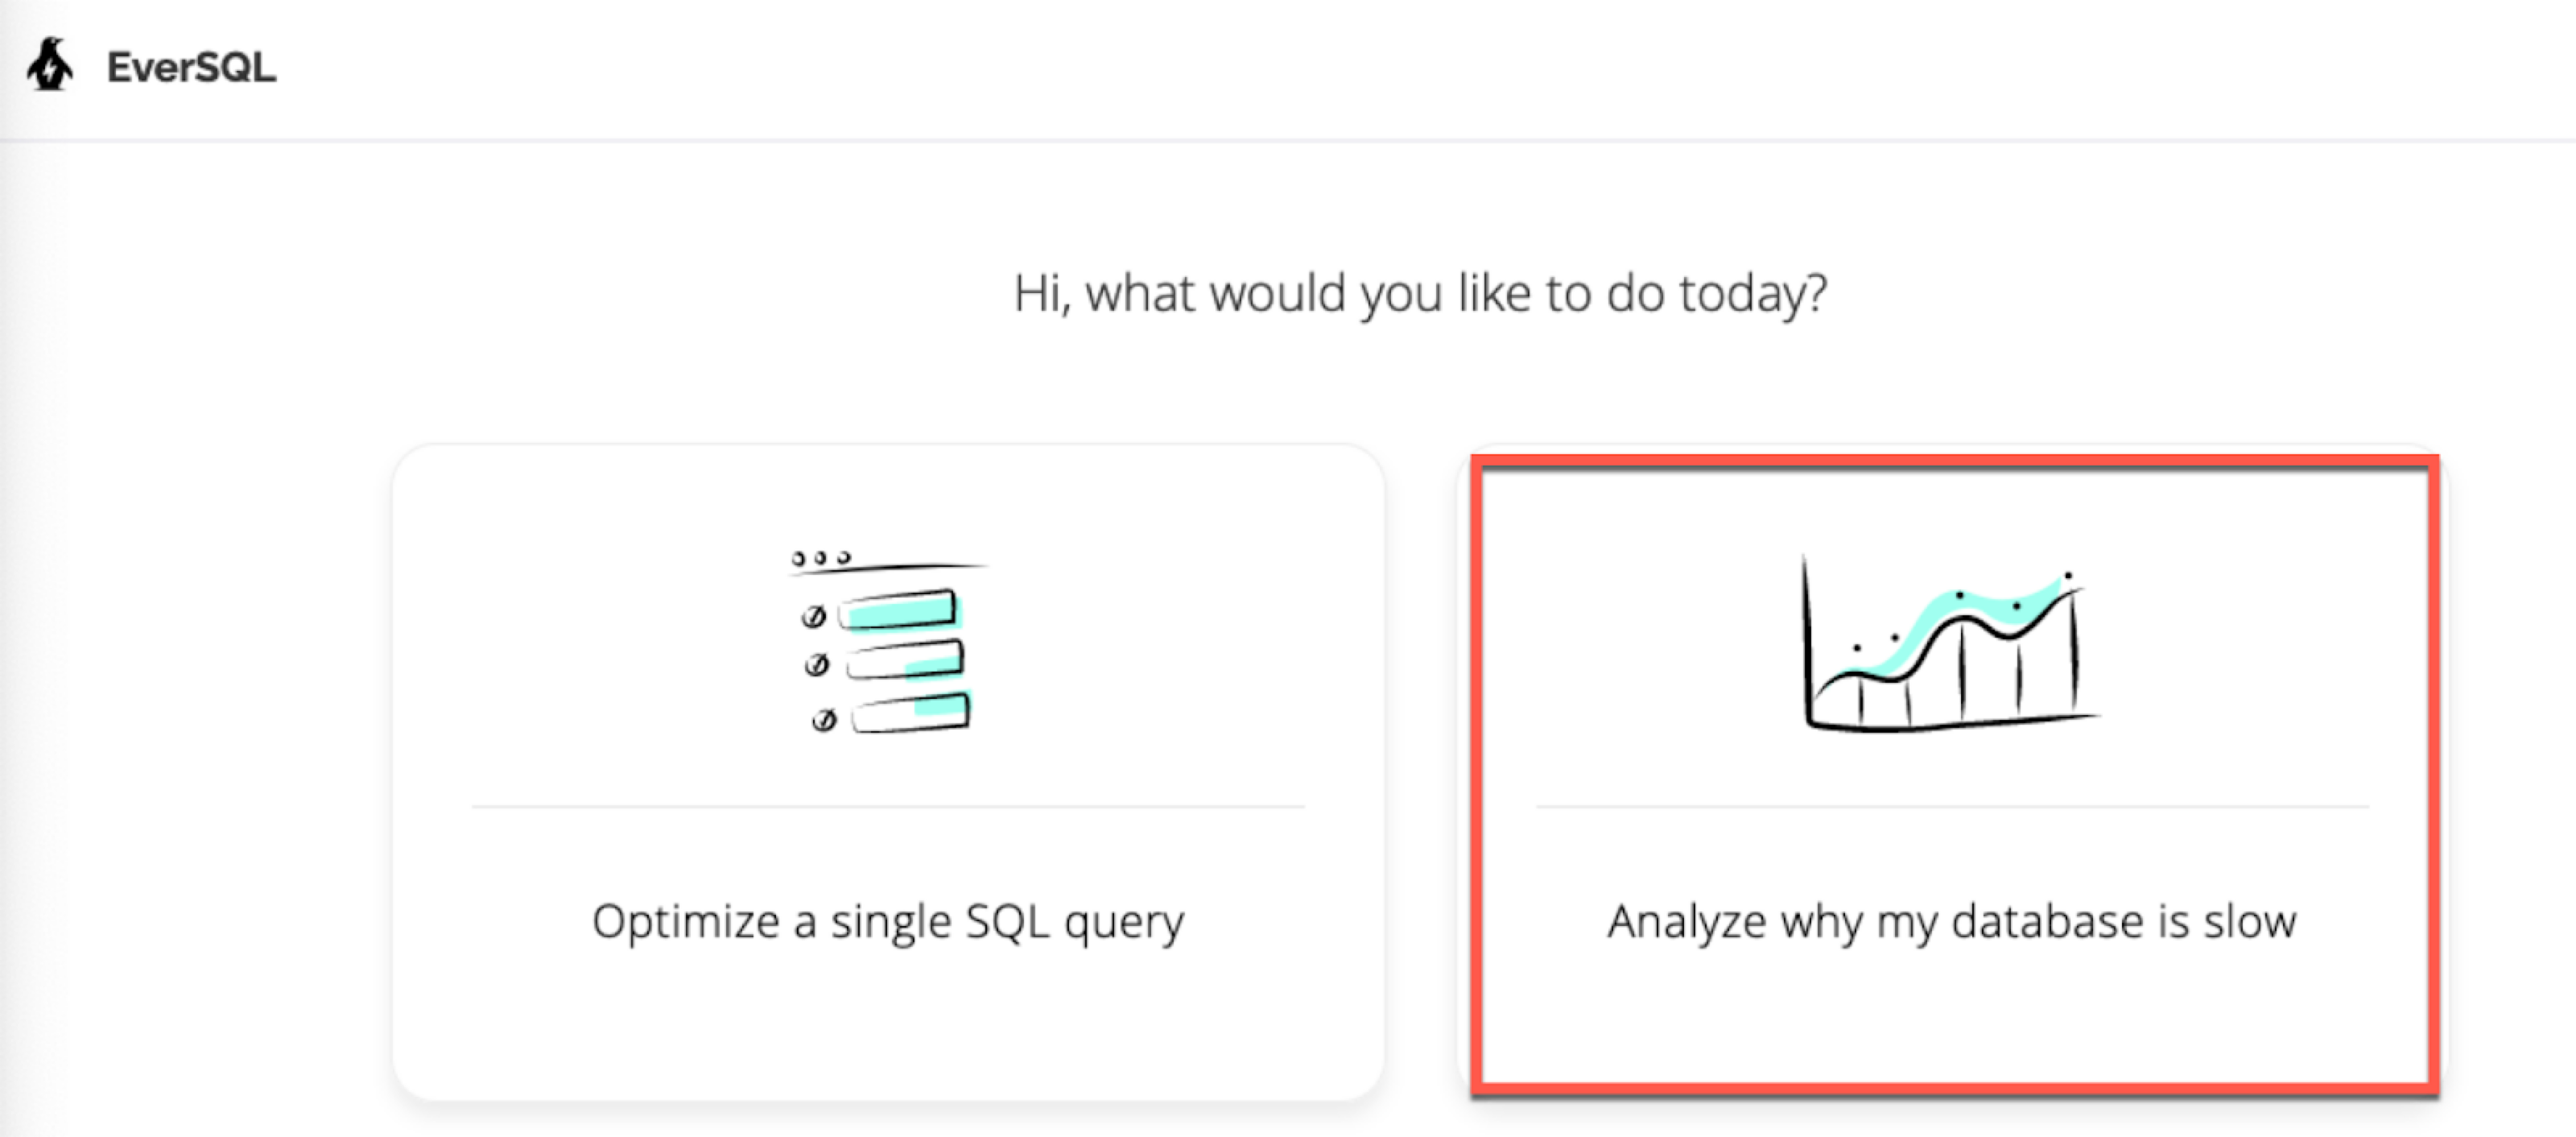
After creating the account, select Analyze why my database is slow
Click on install now, it takes 60 seconds
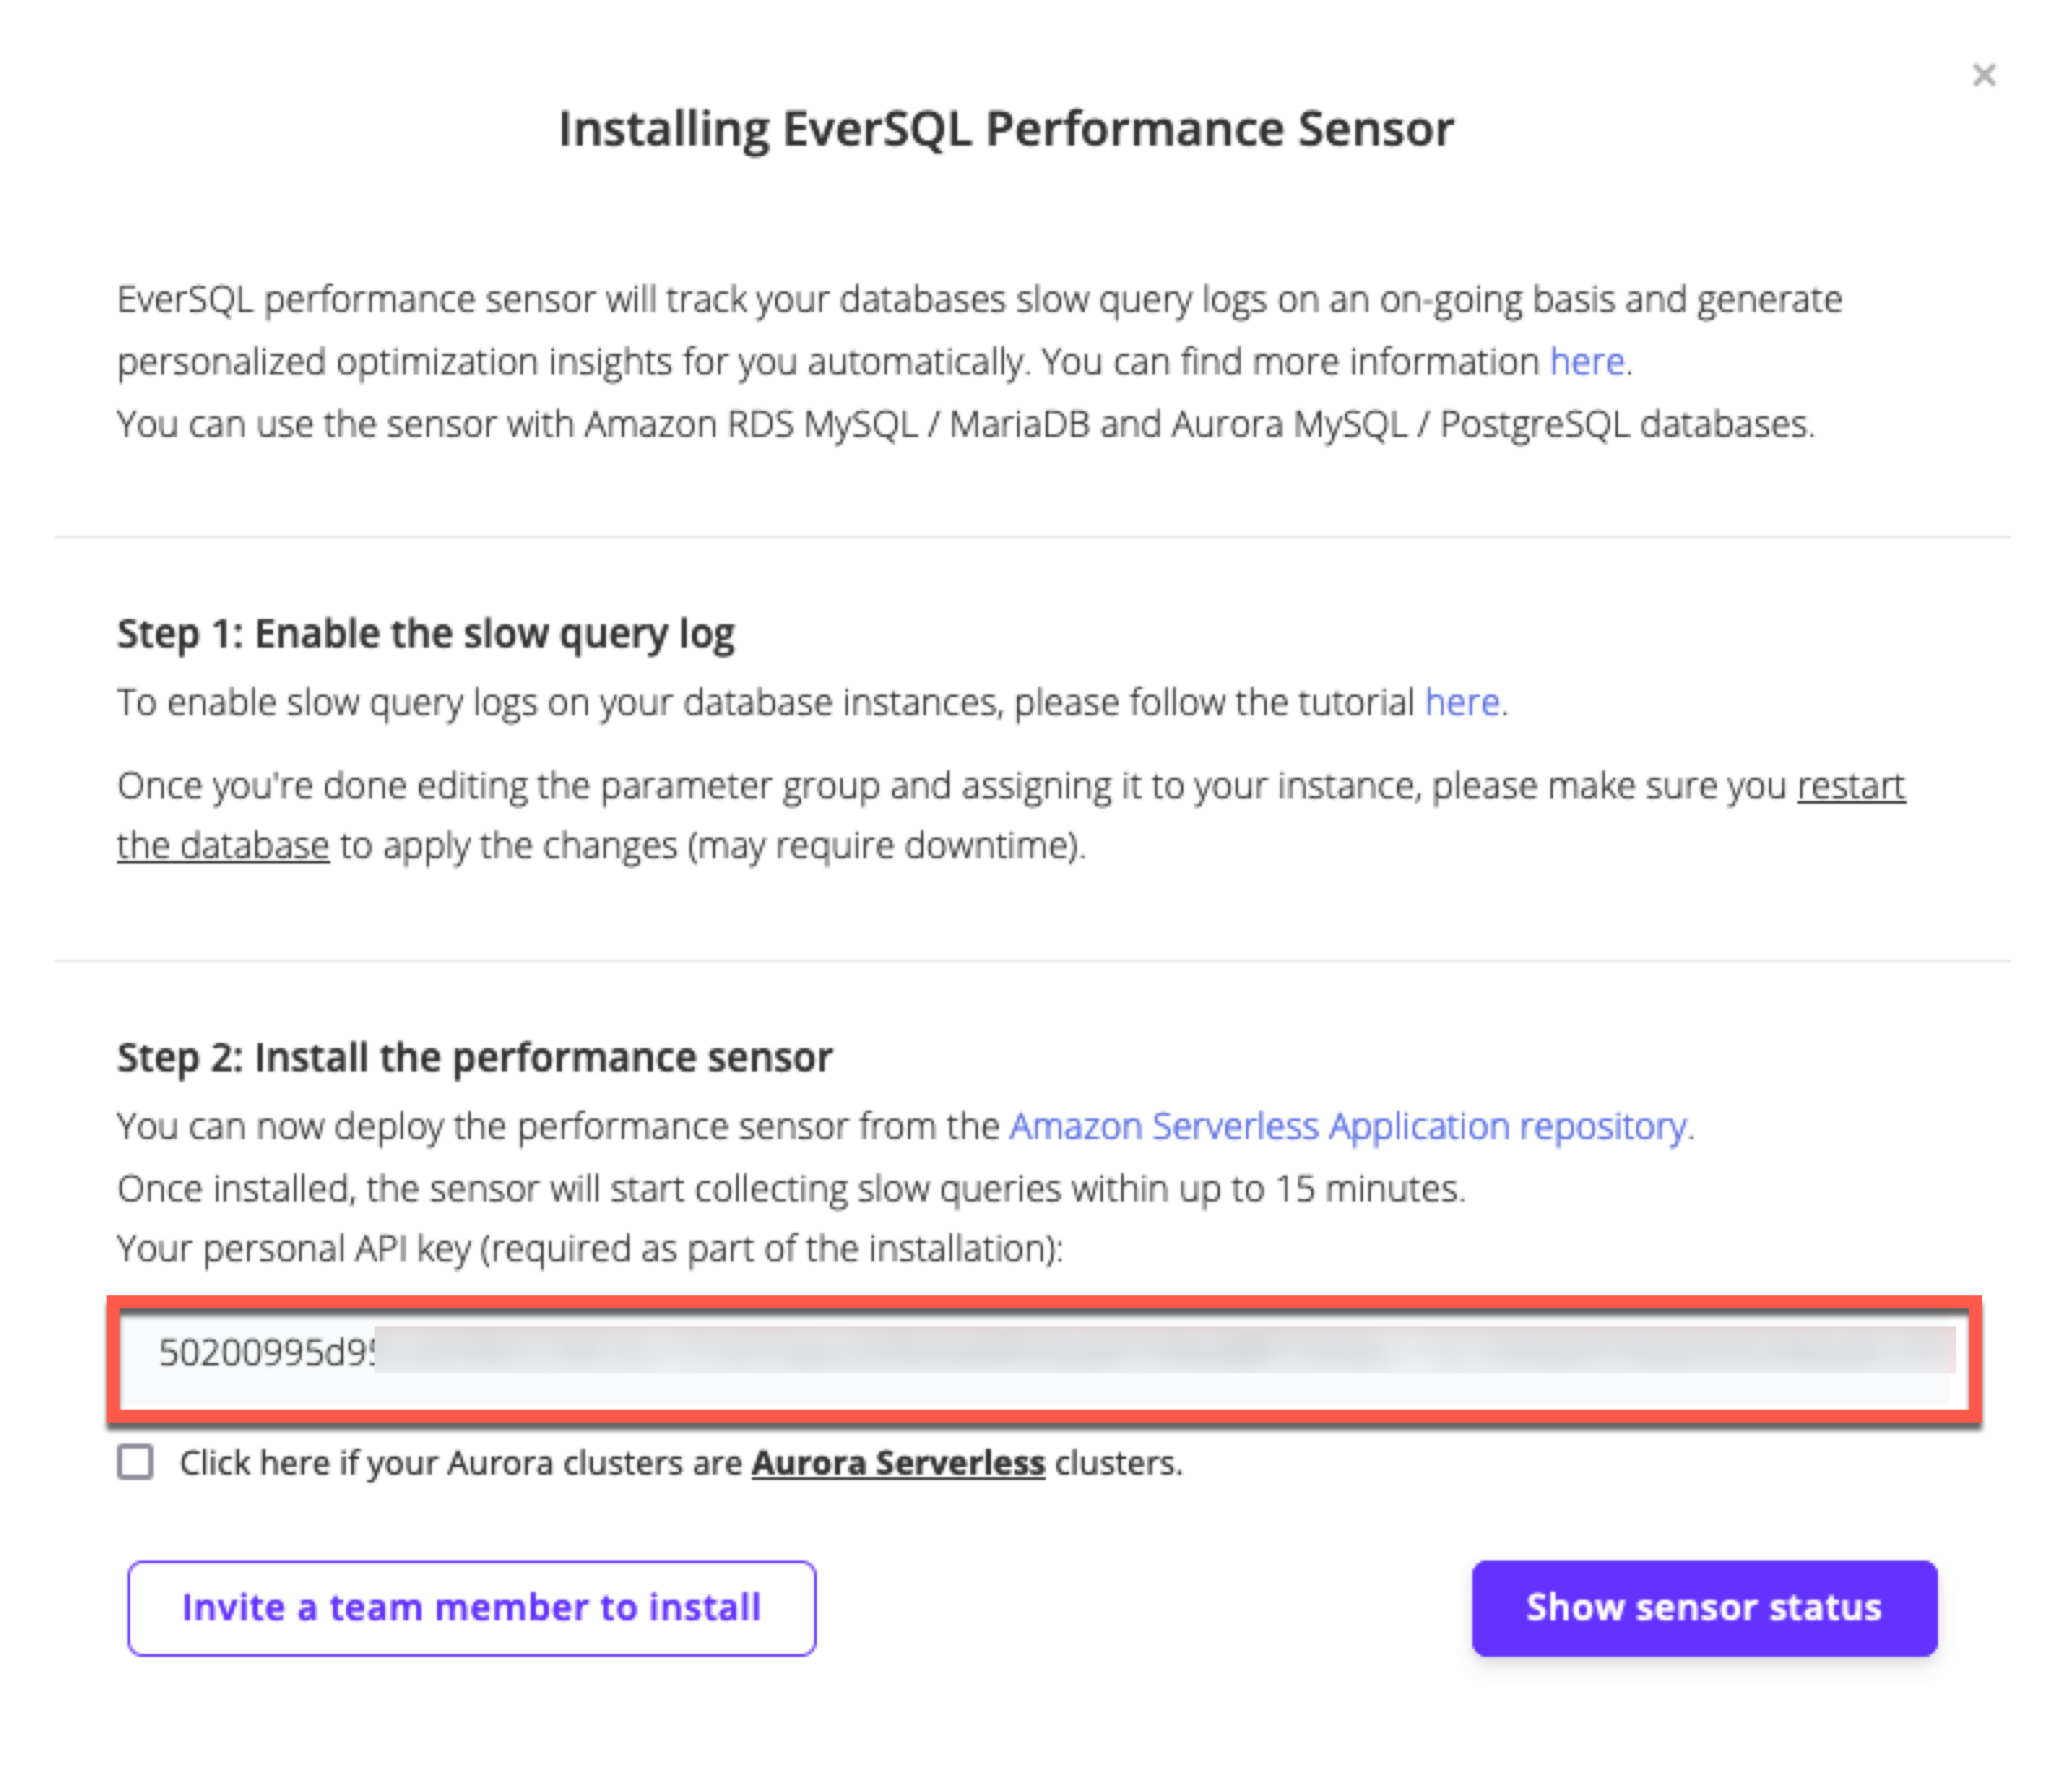
The screen in the below picture showcases the steps needed to install the EverSQL performance sensor and provide the personal API key
Install the EverSQL sensor from the Amazon Serverless Application repository
With both the Amazon RDS for MySQL instance and EverSQL account created, we can now install the sensor that monitors the database load with the following steps:
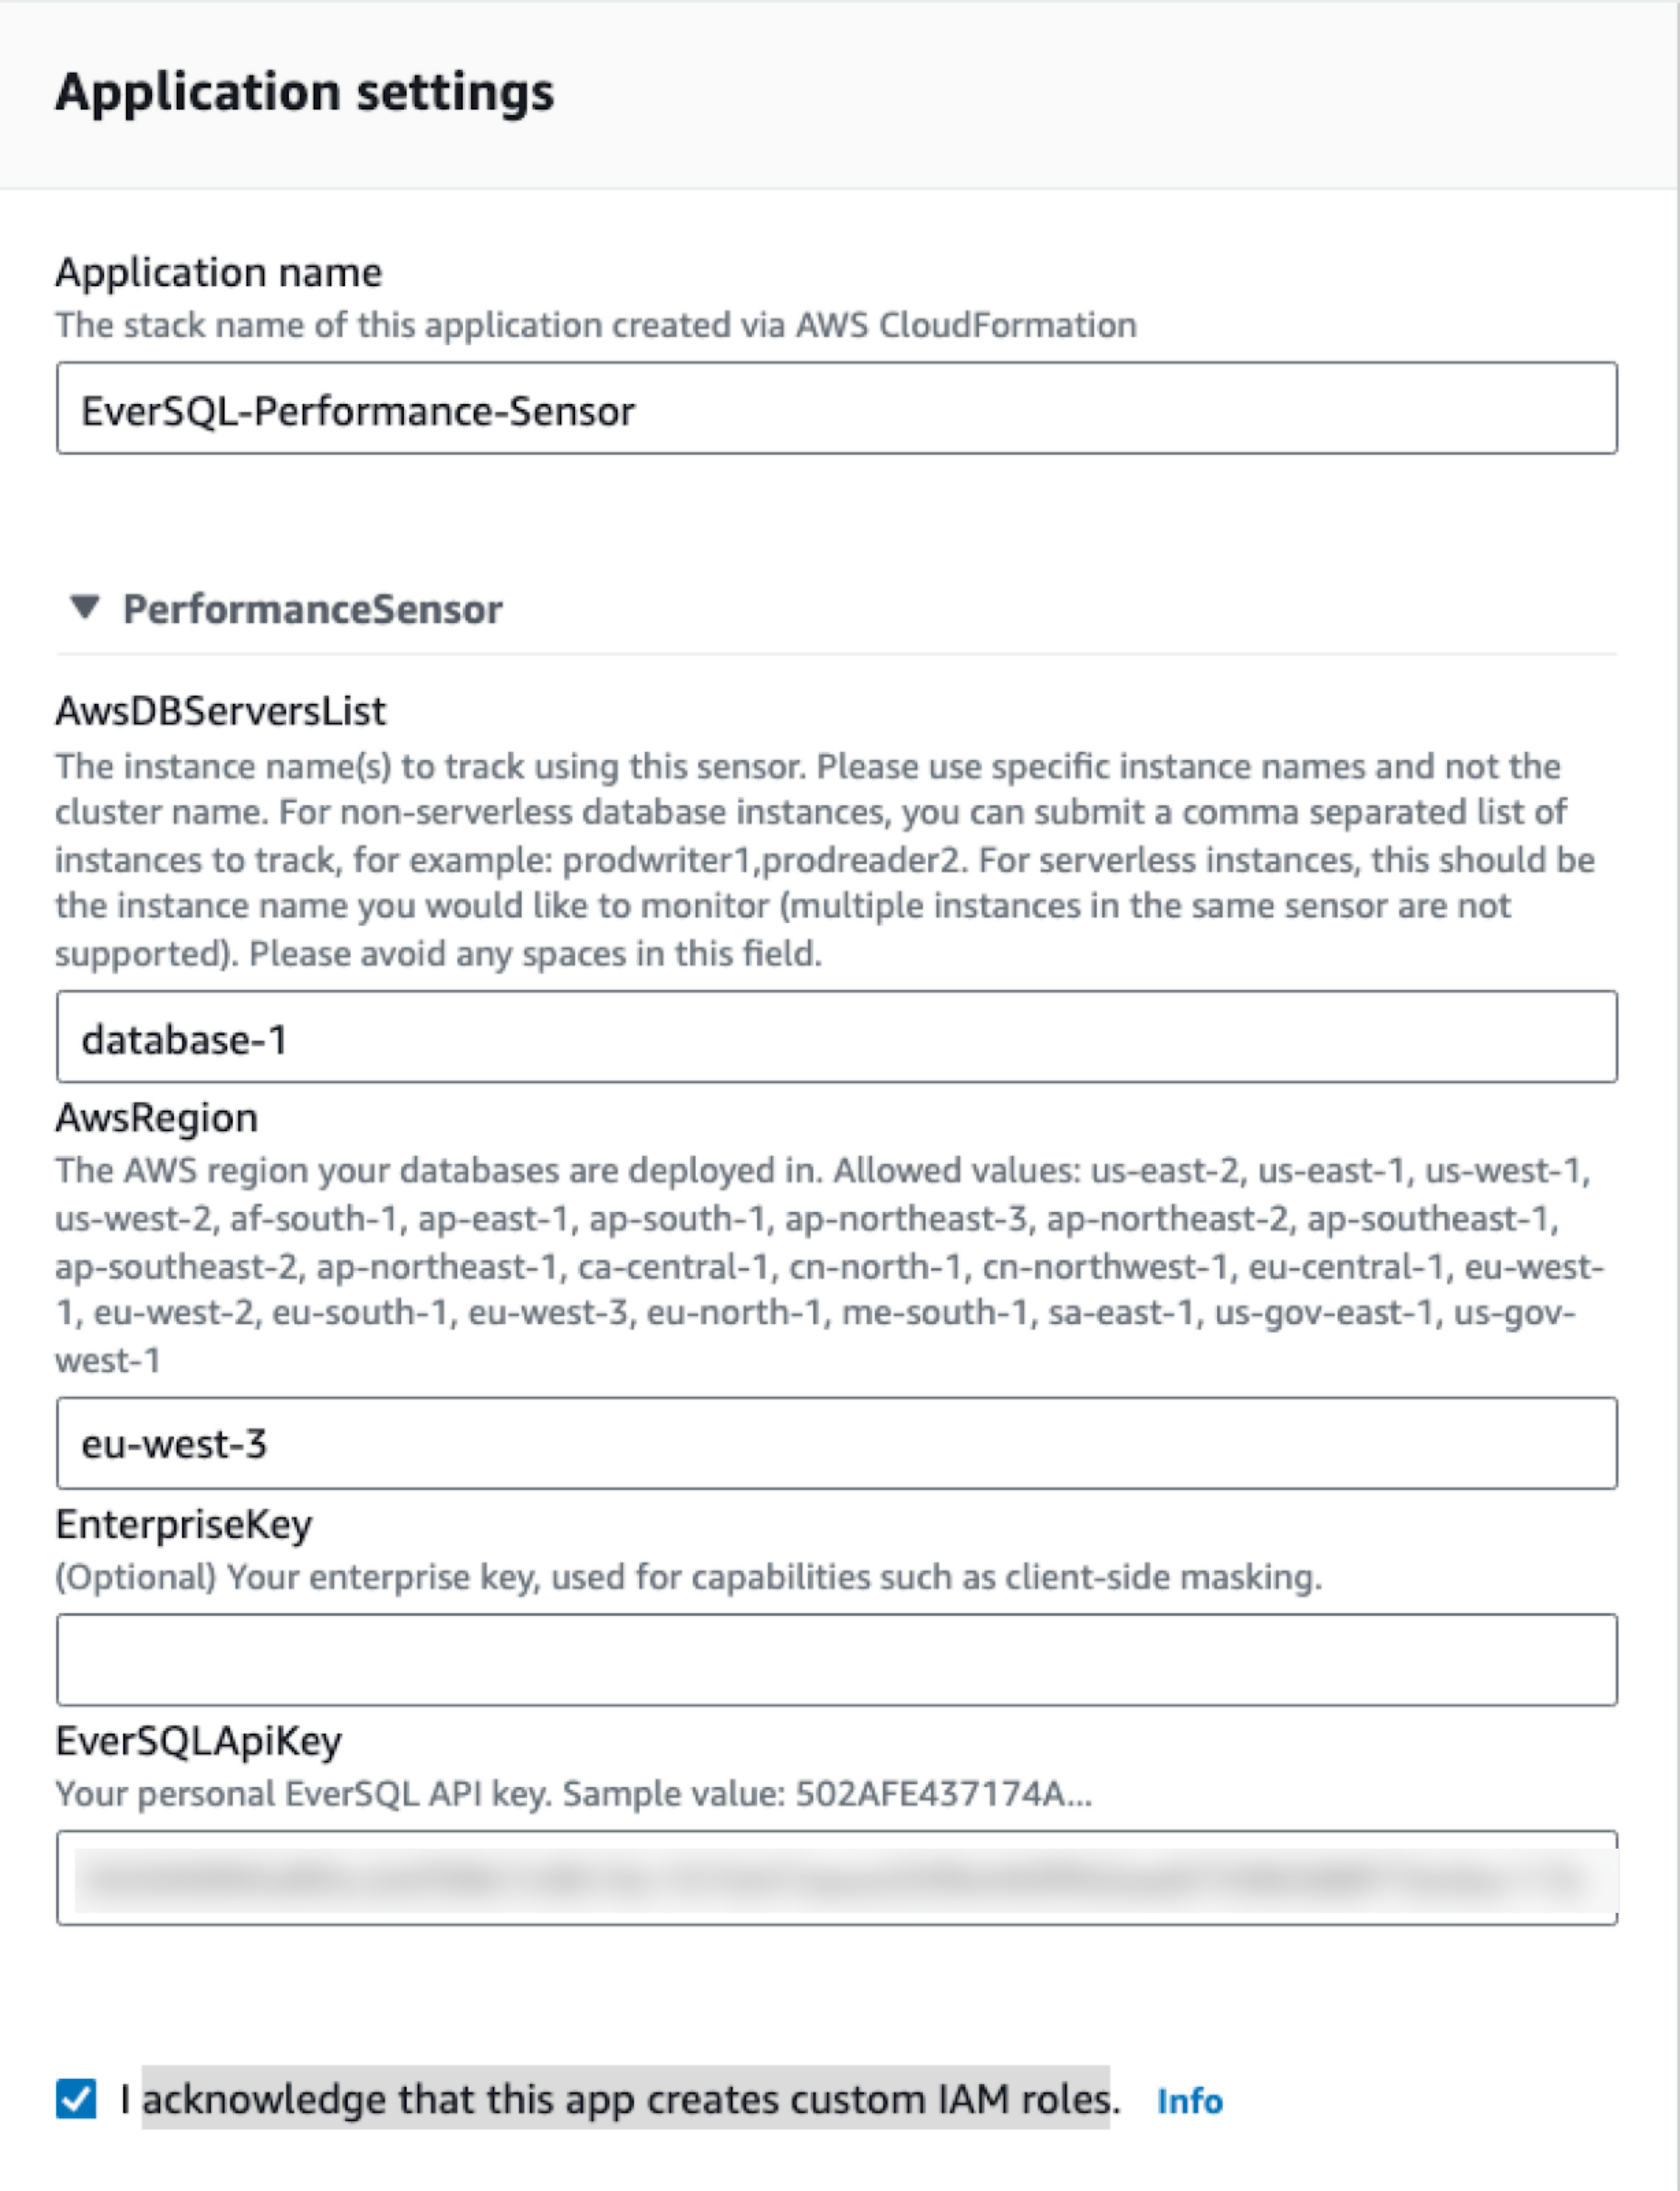
Leave EverSQL-Performance-Sensor as Application name
Write database-1 as AwsDBServersList, this name should match your database name
Write the AWS region where the Amazon RDS for MySQL instance is deployed (e.g. eu-west-3 for Paris)
Copy the EverSQL API Key in the EverSQLApiKey field
Check the I acknowledge that this app creates custom IAM roles checkbox
Click on Deploy Alert: if you don’t see the sensor as available in the EverSQL console, don’t worry! We’ll need to generate some slow traffic for it to show up.
Download the dataset
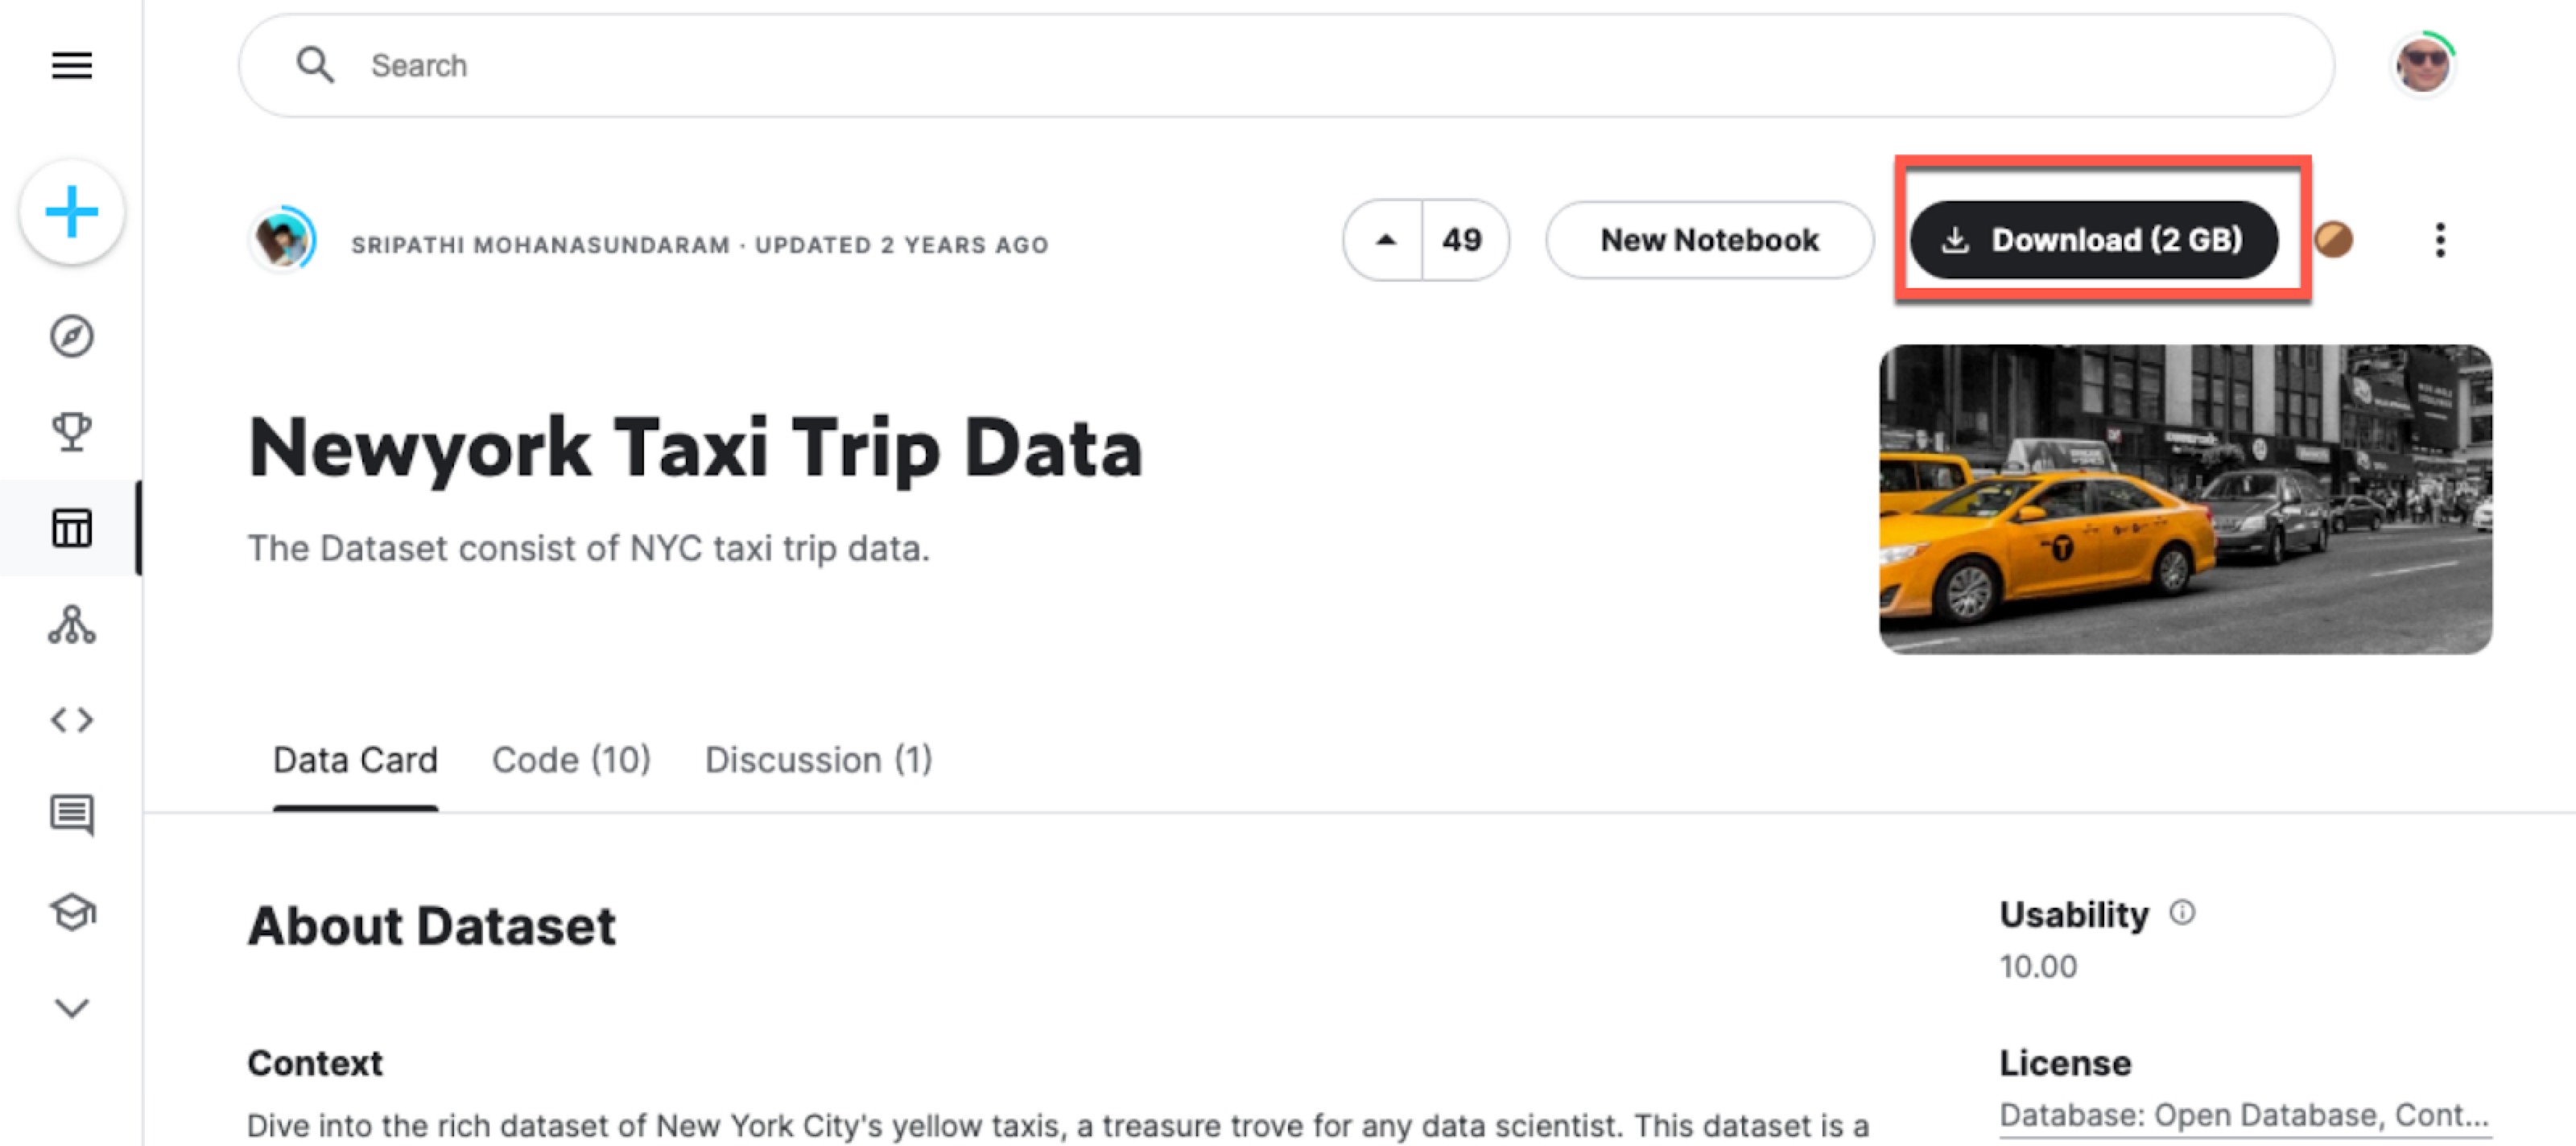
For the purpose of the blog, we’ll use the Newyork Taxi Trip Data from Kaggle. This dataset provides information about New York taxi trips and can be downloaded once created a free Kaggle account. After signing in, click on the Download button.
Once the zip file is downloaded, we can extract it and navigate with the terminal within the folder which contains a list of CSV files called yellow_trip_data together with the year and month.
Connect to the Amazon RDS for MySQL instance
The next step is to connect to the MySQL instance and generate some traffic
mysql -u [USERNAME] -h [HOST] -P [PORT] -p[PASSWORD]
Where:
[USERNAME] is the MySQL user, by default admin
[HOST] is the database hostname, that you can find in the Connectivity and security section
[PORT] is the database port, that you can find in the Connectivity and security section
[PASSWORD] is the MySQL password that we set during the database creation
Load the data
Once connected, we can start loading the taxi data, but, first of all we need to create a database and a table that will contain the dataset. We can do it with the following script.
Creates a table called taxi_zones Now let’s load the data.We can use the LOAD DATA MySQL command for this.
1
2
3
4
5
6
7
LOAD DATA LOCAL INFILE
'yellow_tripdata_2019-01.csv'
INTO TABLE taxi_trips
FIELDS TERMINATED BY ','
ENCLOSED BY '"'
LINES TERMINATED BY '\n'
(VendorID,tpep_pickup_datetime,tpep_dropoff_datetime,passenger_count,trip_distance,RatecodeID,store_and_fwd_flag,PULocationID,DOLocationID,payment_type,fare_amount,extra,mta_tax,tip_amount,tolls_amount,improvement_surcharge,total_amount,congestion_surcharge);
The above command loads 7667793 records in the taxi_trips table. By switching the file name in the 2nd row of the above SQL (now mentioning yellow_tripdata_2019-01.csv) we can also load the other 17 files loading data for 2019 and 2020. We can also load the taxi_zones table with 133 records with the following statement.
1
2
3
4
5
6
7
LOAD DATA LOCAL INFILE
'taxi+_zone_lookup.csv'
INTO TABLE taxi_zones
FIELDS TERMINATED BY ','
ENCLOSED BY '"'
LINES TERMINATED BY '\n'
(LocationID,Borough,Zone,service_zone);
To create a slow query we can run the following SQL statement to retrieve the average number of the trips starting from the Queens or Manhattan and are on date 1st Jan 2019.
1
2
3
4
5
6
7
8
9
10
11
12
13
14
select src_taxi_zone.zone src,
dest_taxi_zone.zone dest,
avg(total_amount)
from taxi_trips
join taxi_zones src_taxi_zone
on src_taxi_zone.LocationID = taxi_trips.PULocationID
join taxi_zones dest_taxi_zone
on dest_taxi_zone.LocationID = taxi_trips.DOLocationID
where
src_taxi_zone.Zone in
(select zone from taxi_zones where Borough in ('Queens','Manhattan'))
and payment_type=2
and DATE(tpep_pickup_datetime) = '2019-01-01'
group by src_taxi_zone.zone, dest_taxi_zone.zone;
This is a complex query, so the execution time should be greater than the 1 second we defined for slow queries. In my test, the query lasted 16.47 seconds on average.
Verify the presence of the slow query log
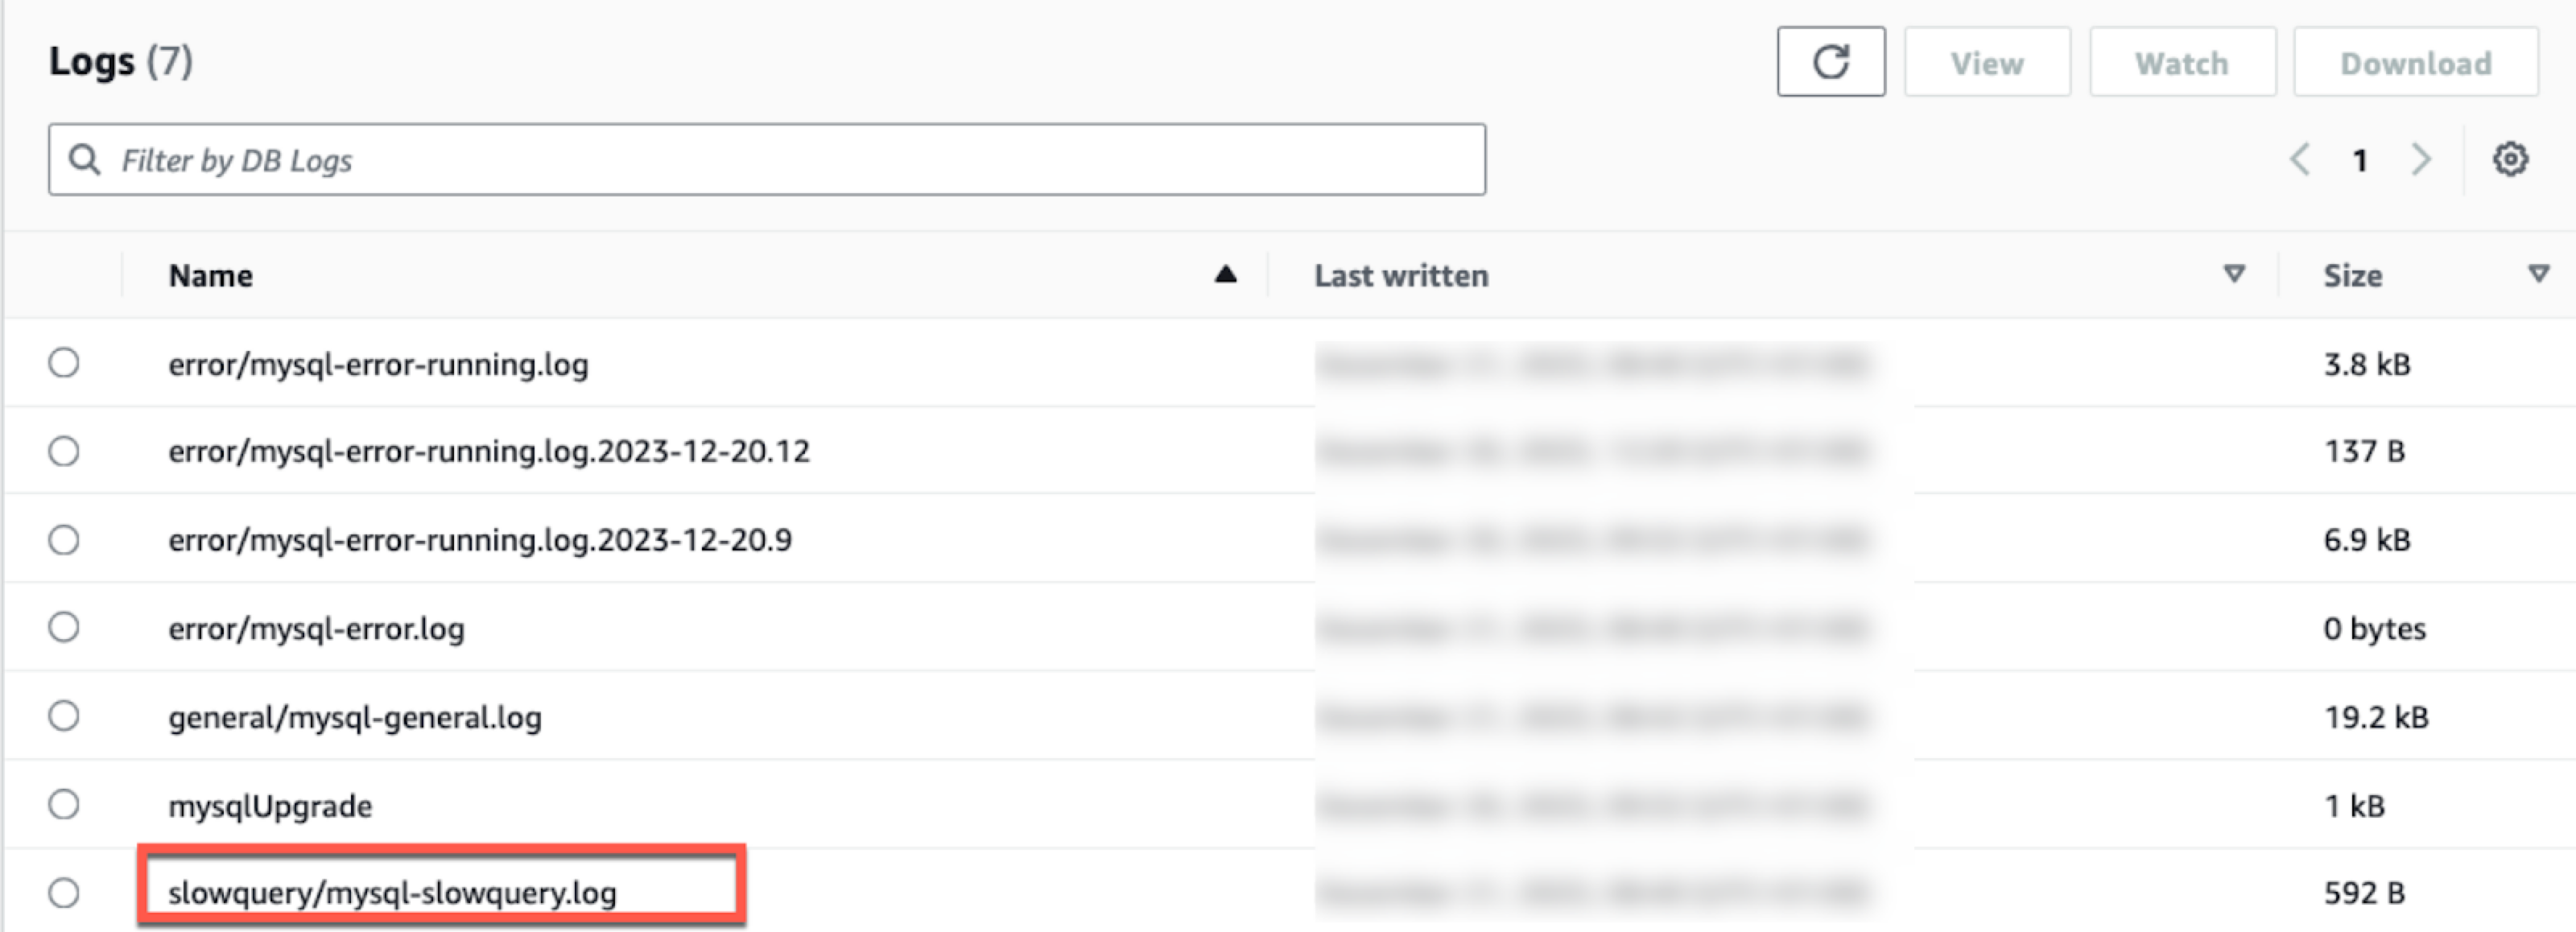
Before heading to the EverSQL console, we can verify that our query appears in the slow query log. The log entry is only created when a slow query is detected in our database and, until the log is created, the sensor will not appear in the EverSQL console. To check the presence of the slow query log:
Verify the presence of the slowquery/mysql-slowquery.log log
If the mysql-slowquery.log is not appearing, reboot the database and issue the query again.
Optimize the query with EverSQL
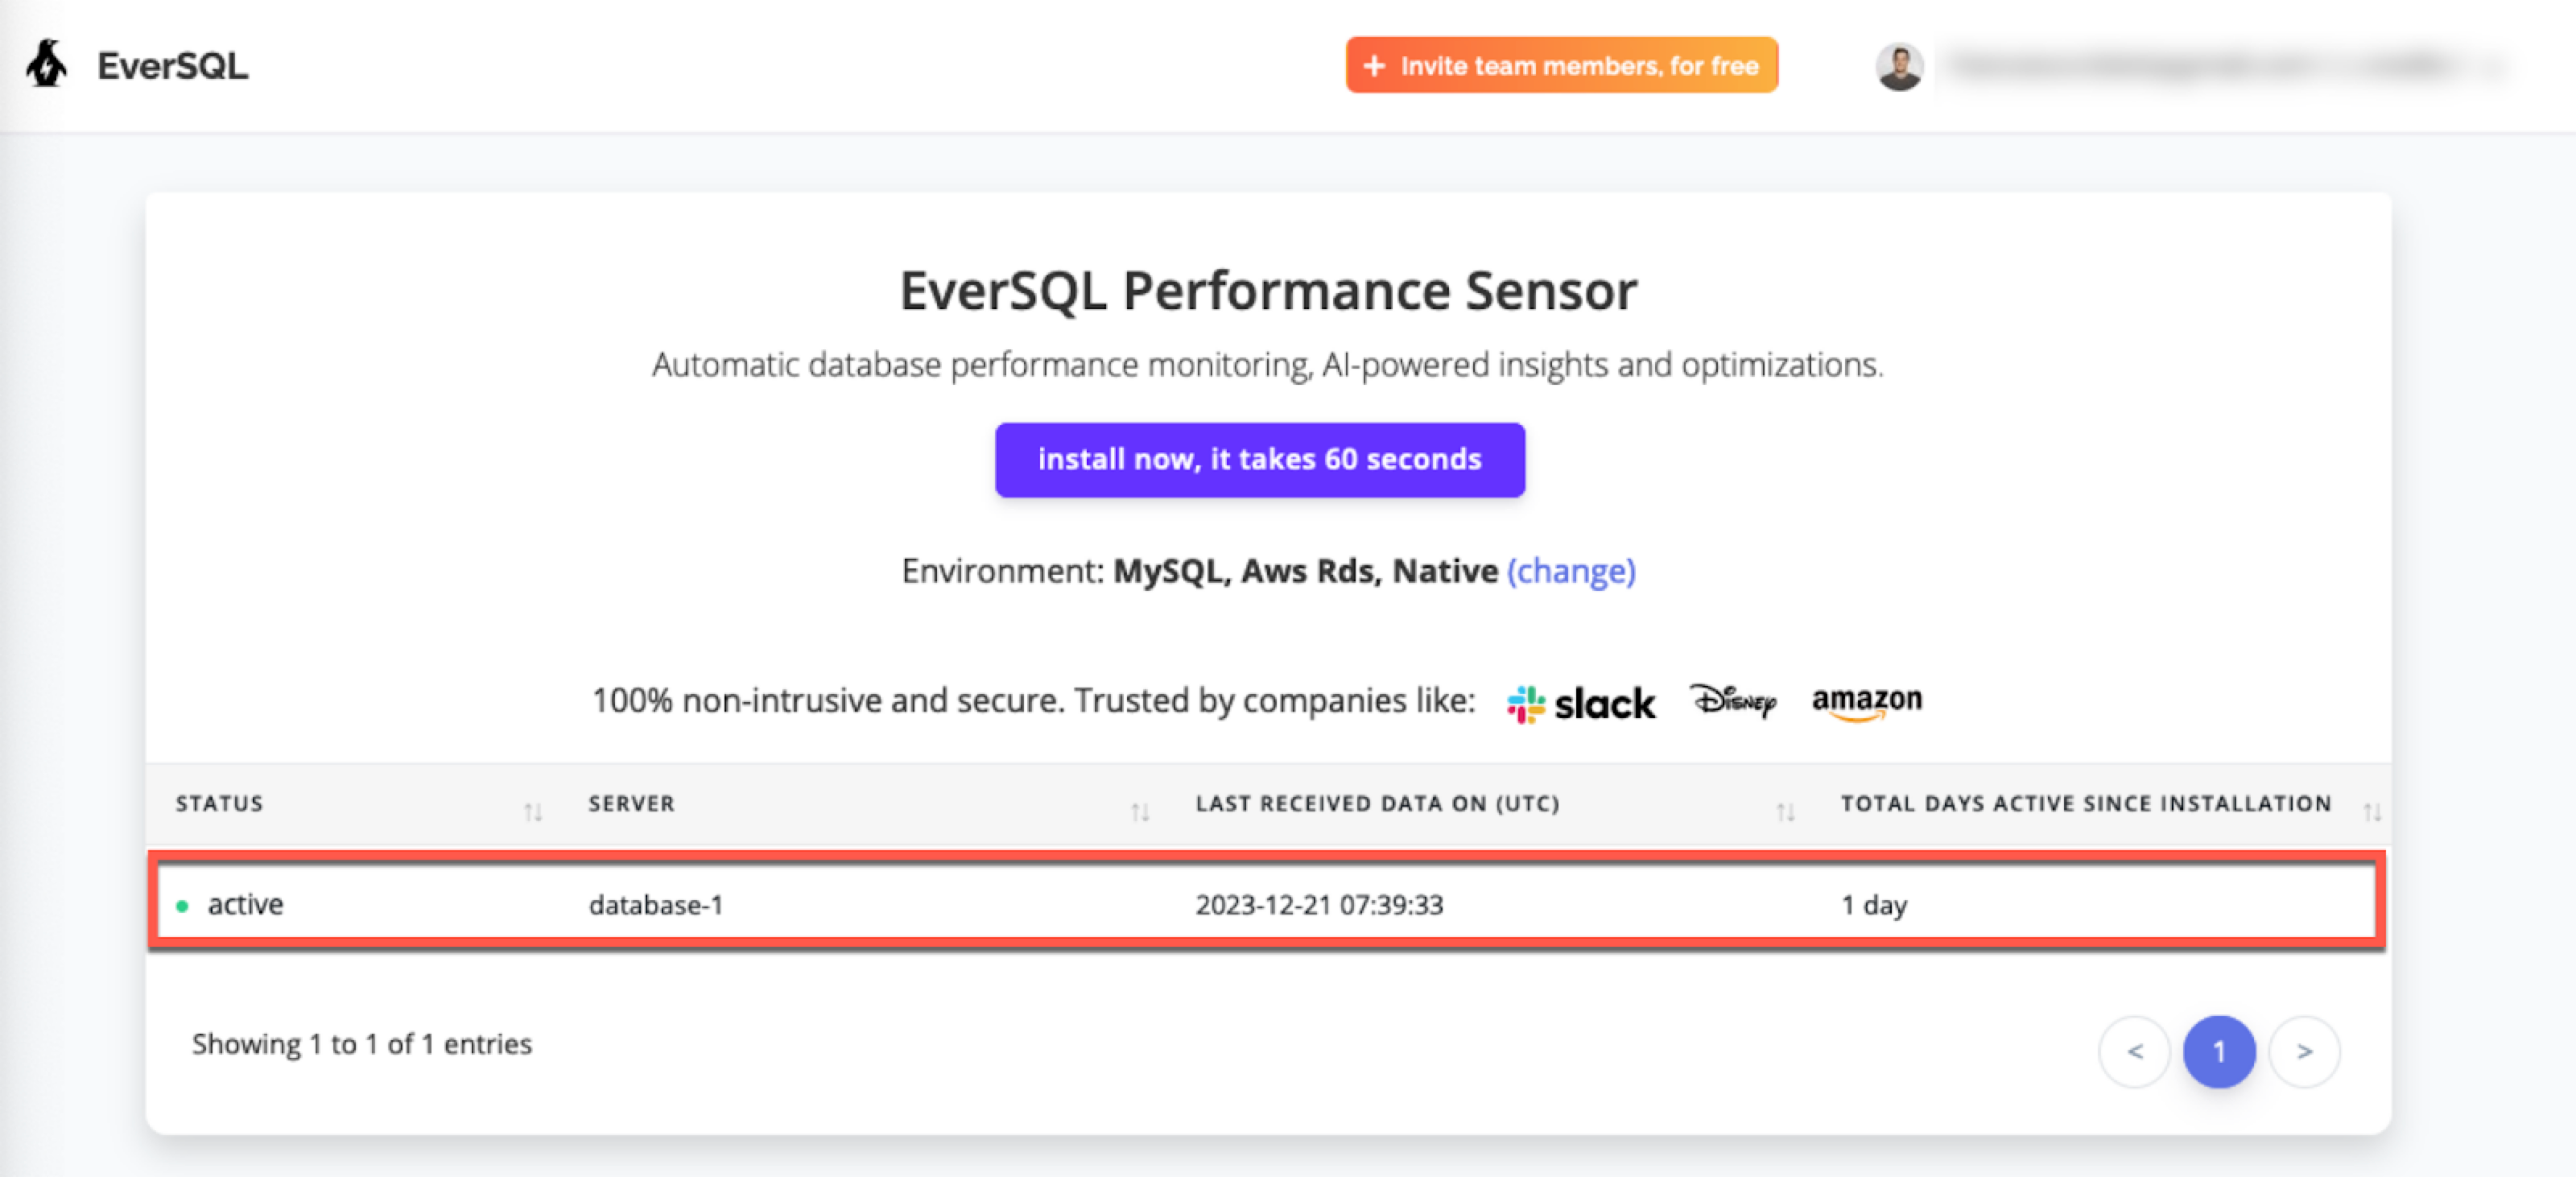
It’s finally time to optimize our query using EverSQL! We can head to the EverSQL sensor page and we should see the sensor being active on database-1.
So far so good! The next step is to head to the EverSQL dashboard console page. Scrolling down, we can see the Your SQL Queries Container section listing the query we executed previously. We can find an Optimize button that provides us insight on how to speed the query. Note: The EverSQL sensor runs every 3 minutes by default. You might need to wait a few minutes for your query to show up in the EverSQL console.
The EverSQL Optimization engine suggests the following:
Adding three indexes, one for the taxi_trips based on payment_type and tpep_pickup_datetime and two for taxi_zones on LocationID and Zone, more one dedicated to the Borough
1
2
3
ALTER TABLE `taxi_trips` ADD INDEX `taxi_trips_idx_payment_type_tpep_datetime` (`payment_type`,`tpep_pickup_datetime`);
ALTER TABLE `taxi_zones` ADD INDEX `taxi_zones_idx_locationid_zone` (`LocationID`,`Zone`);
ALTER TABLE `taxi_zones` ADD INDEX `taxi_zones_idx_borough` (`Borough`);
Rewriting the query to the following, avoiding using the DATE function in the filter condition and limiting the data from taxi_trips (filtering for the tpep_pickup_datetime and payment_type) before joining. All the explanations are available in the same window.
SELECT src_taxi_zone.zone src, dest_taxi_zone.zone dest, avg(taxi_trips_total_amount) FROM (SELECT taxi_trips.total_amount AS taxi_trips_total_amount, taxi_trips.PULocationID AS taxi_trips_PULocationID, taxi_trips.DOLocationID AS taxi_trips_DOLocationID FROM taxi_trips WHERE taxi_trips.payment_type = 2 AND taxi_trips.tpep_pickup_datetime BETWEEN '2019-01-01 00:00:00' AND '2019-01-01 23:59:59' ORDER BY NULL) AS taxi_trips JOIN taxi_zones src_taxi_zone ON src_taxi_zone.LocationID = taxi_trips.taxi_trips_PULocationID JOIN taxi_zones dest_taxi_zone ON dest_taxi_zone.LocationID = taxi_trips.taxi_trips_DOLocationID WHERE src_taxi_zone.Zone IN ( SELECT taxi_zones.zone FROM taxi_zones WHERE taxi_zones.Borough IN ( 'Queens', 'Manhattan' ) ) AND 1 = 1 AND 1 = 1 GROUP BY src_taxi_zone.zone, dest_taxi_zone.zone ORDER BY NULL
After creating the indexes, the updated query now executes in just 0.71 seconds. This is a more than 23x performance increase!
Conclusion
To get the most out of our Amazon RDS for MySQL we need to spend time understanding what SQL statements impact performance and how to optimize them. Small changes in the database structure and SQL statements can have an amazing impact on performance like an immediate 23x gain! EverSQL allows us to monitor the database, review insights about non performing queries or workload anomalies and automatically receive suggestions on indexes and sql rewrites, exactly what we need to optimize performance and spend on our MySQL instance.




Loading article